
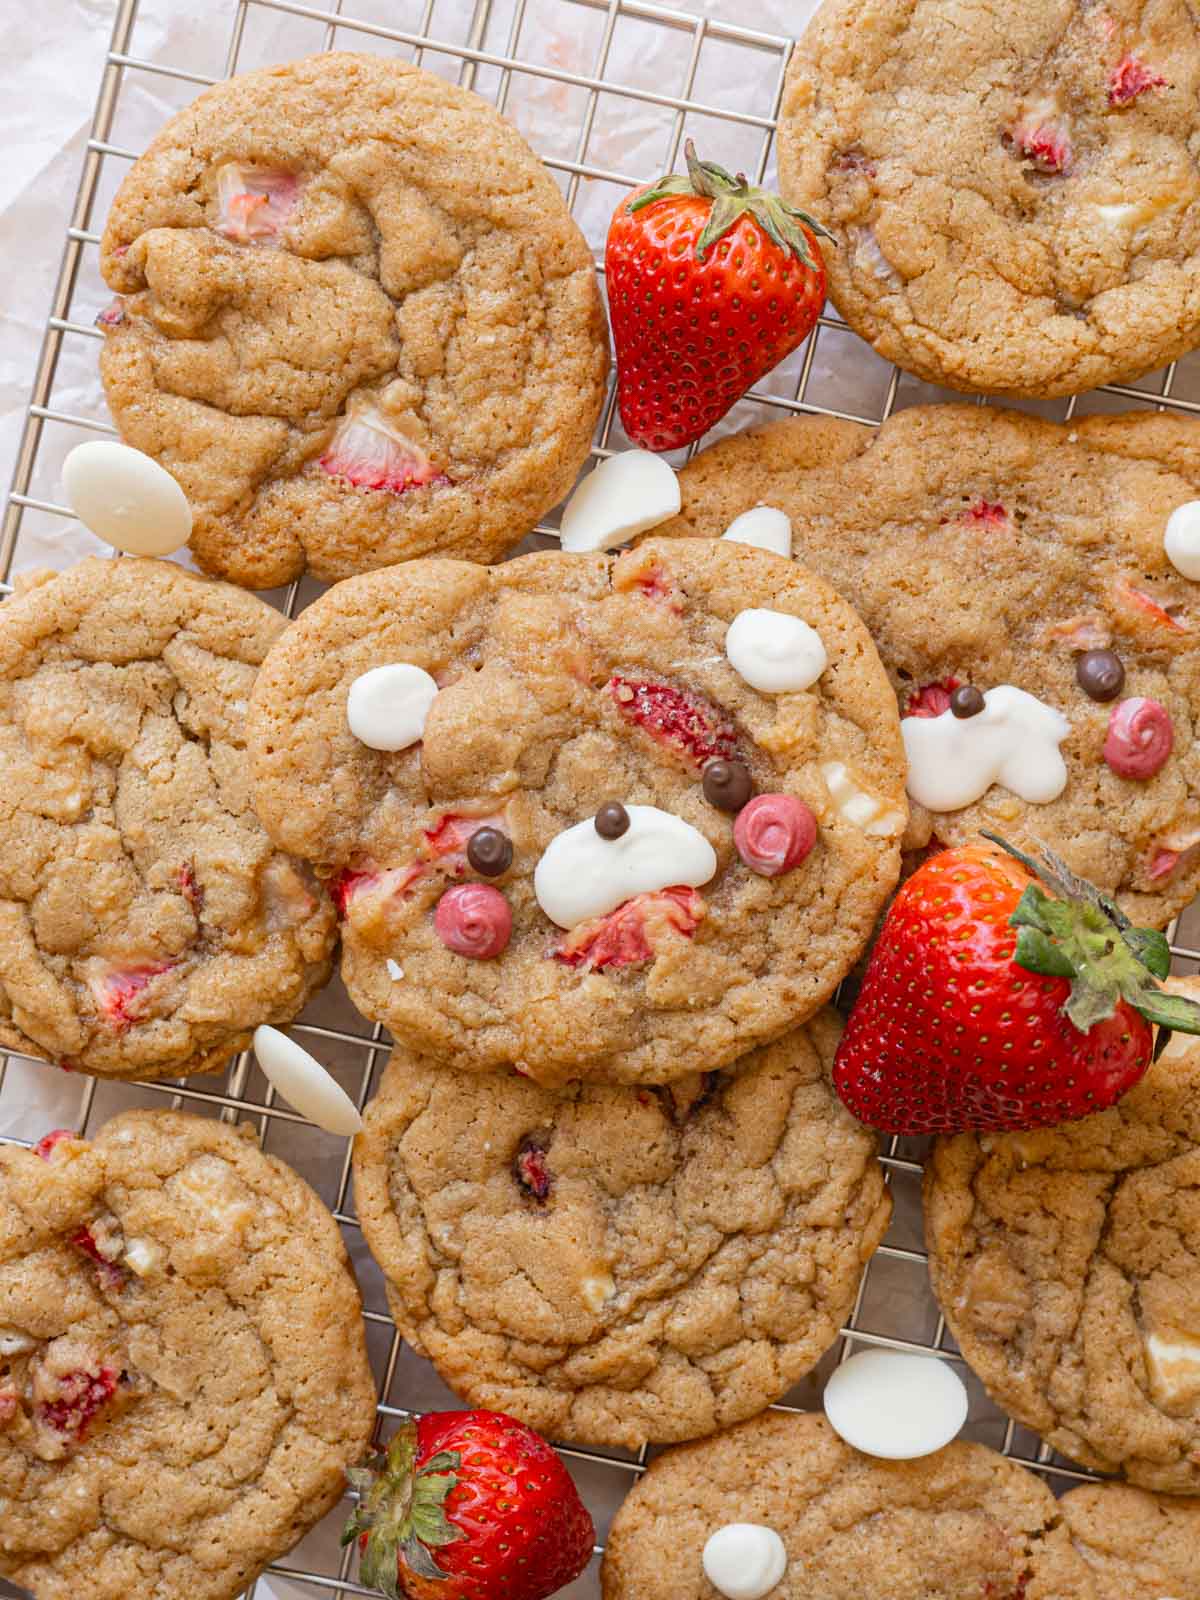
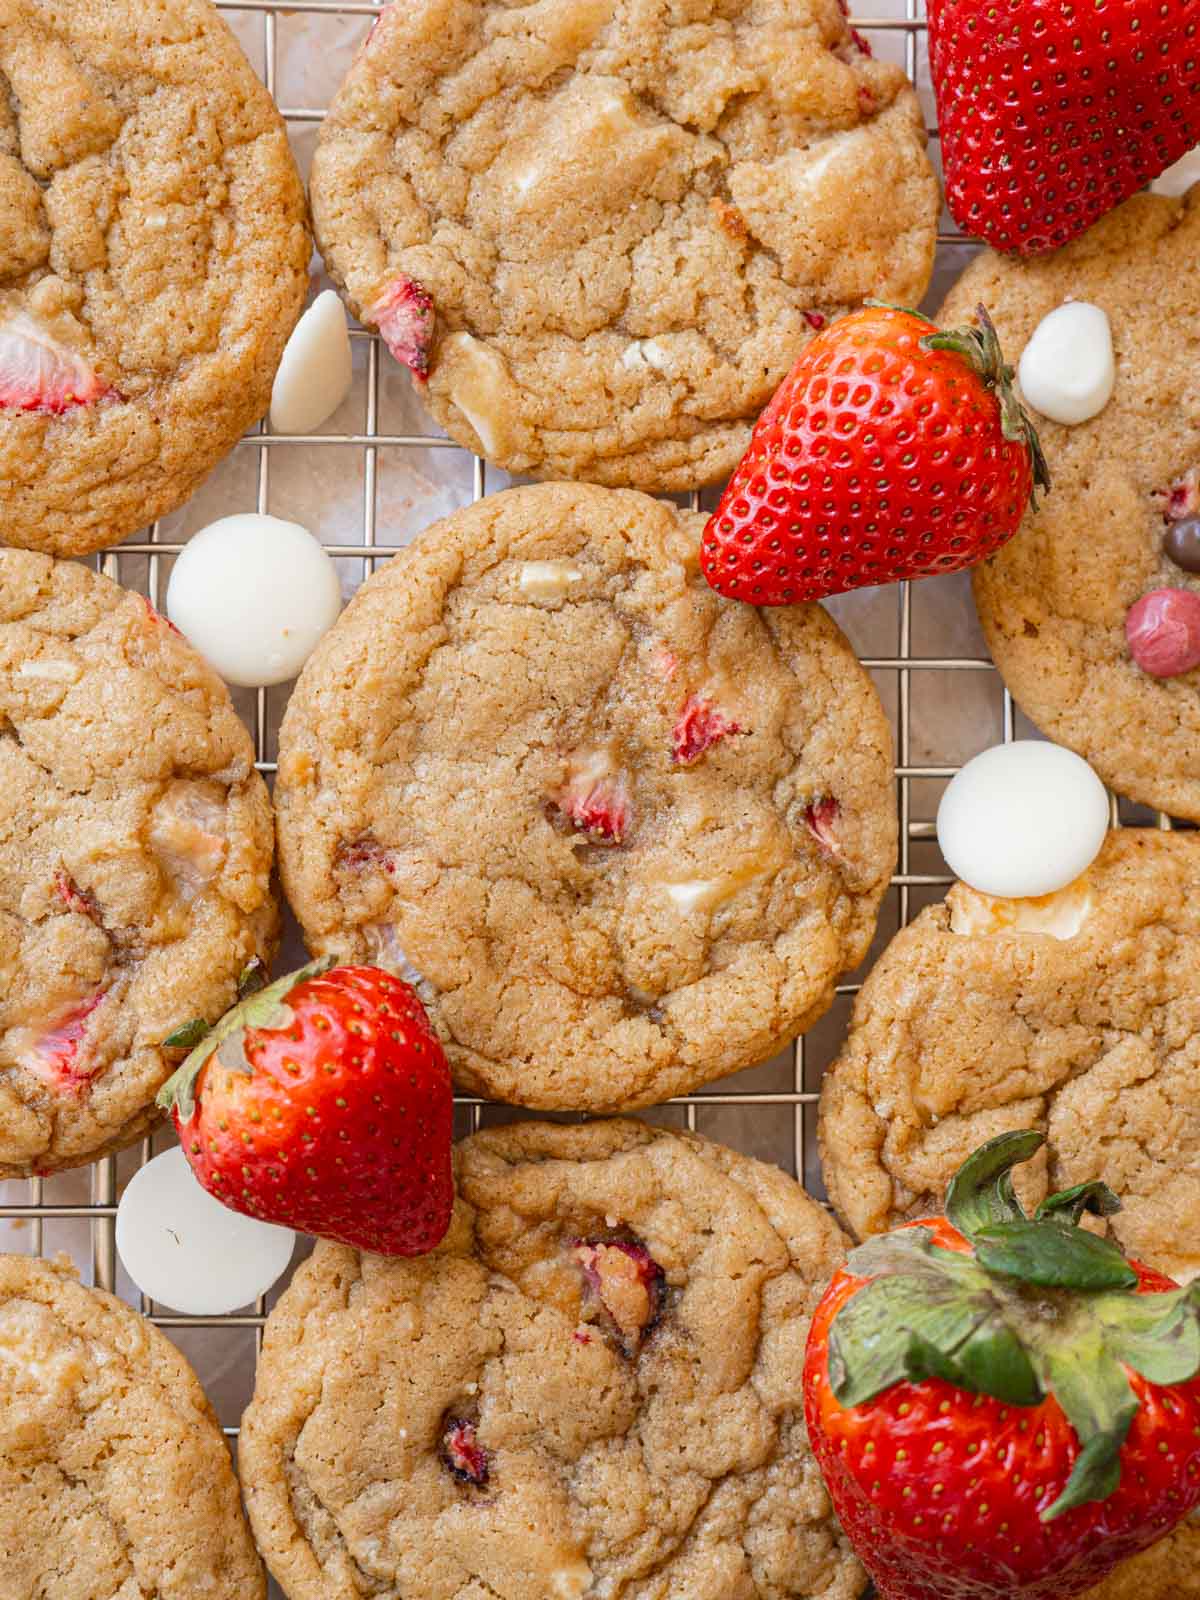
Easy & delicious white chocolate strawberry cookies made with fresh, ripe strawberries! They’re made in under one hour with one bowl and a silicone spatula—no electric mixer required! 🍓
✉️ want to save this?
Why You’ll Love This Recipe 🍓
- It uses almost an entire cup of fresh strawberries! The riper the strawberries, the better and more flavorful. Make sure to pick strawberries that are bright red with green tops, and have little to no spotting.
- This is a quick and easy no-chill recipe, meaning you don’t have to refrigerate the dough 30 minutes-1 hour before baking! AKA.. you can eat them within an hour.
- You won’t need any special equipment. Simply mix everything in one bowl, scoop, and bake. All decorations are done with chocolates that were melted right in the microwave!
Hard to find fresh strawberries near you? Check out my freeze-dried strawberry Kirby cookies or freeze-dried strawBEARy cookies.
Ingredients
To make these white chocolate strawberry cookies, you’ll need the following ingredients:
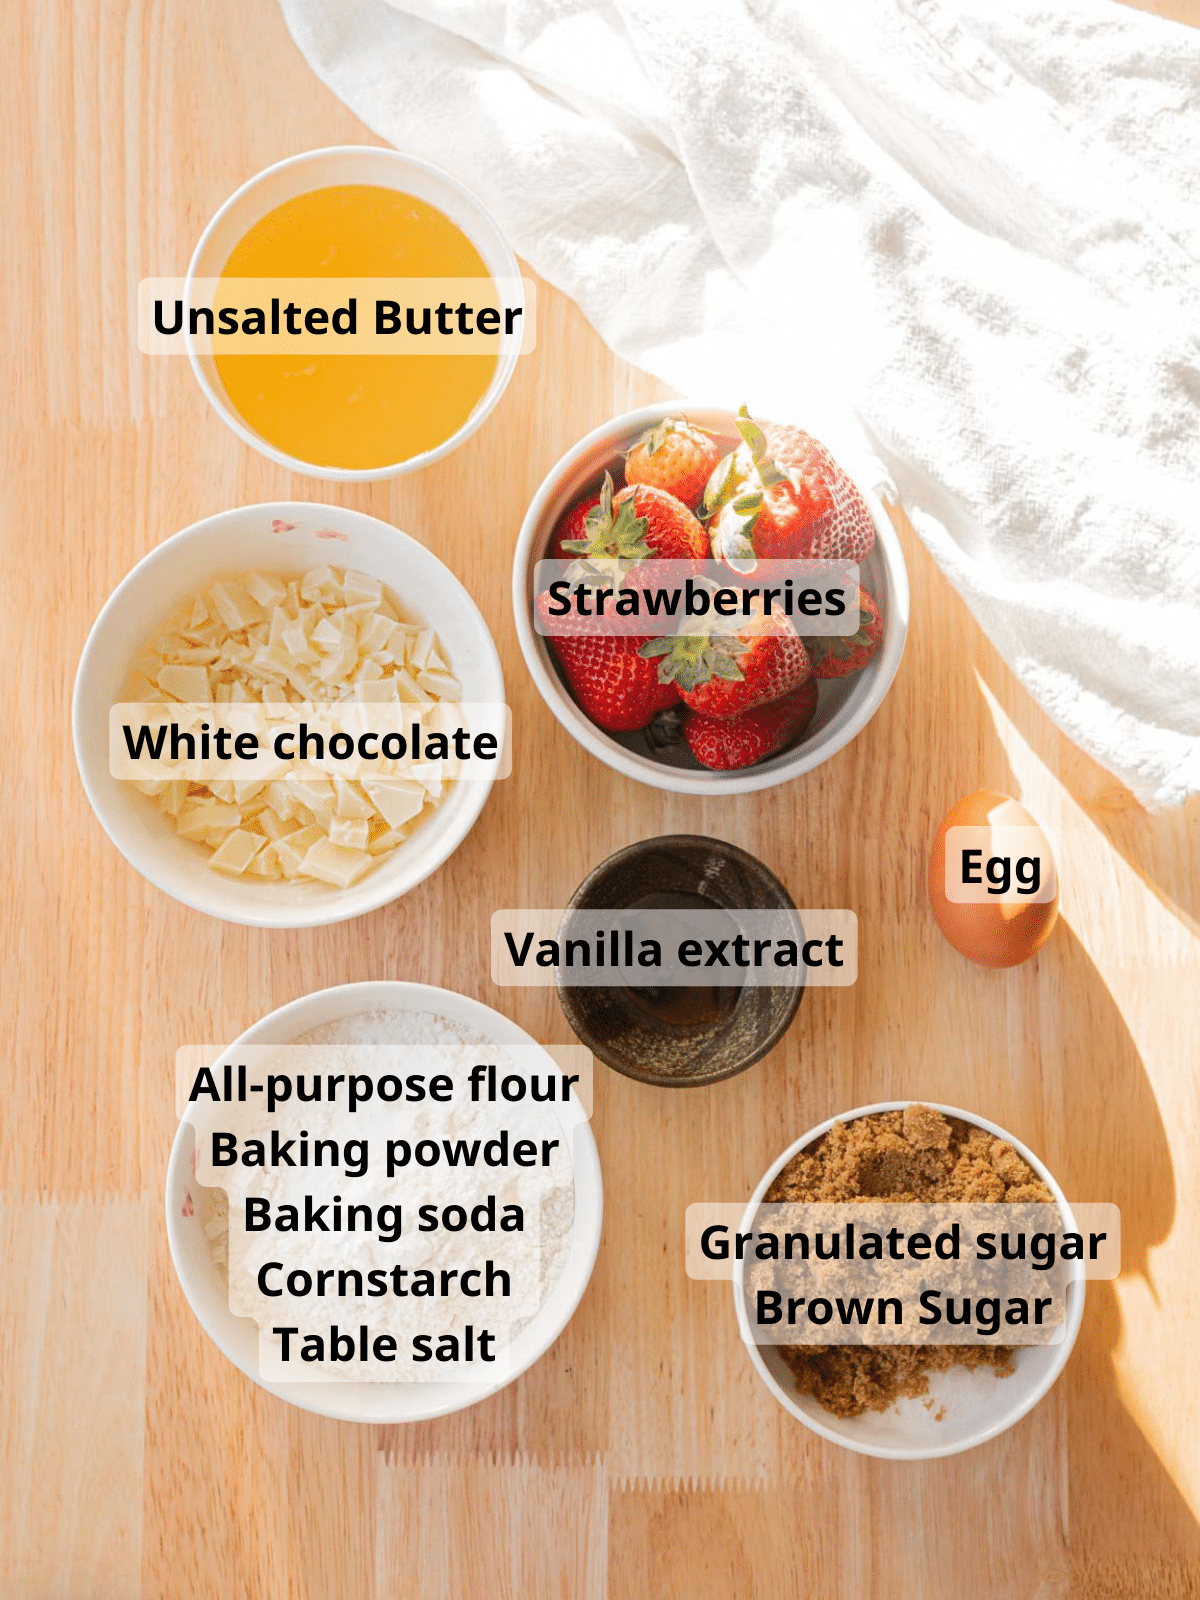
- This recipe calls for melted unsalted butter, which makes mixing easy! This means you don’t need electric beaters or even a hand whisk—a simple silicone spatula will do.
- Cornstarch helps keep the cookies soft and minimizes the dough from spreading in the oven.
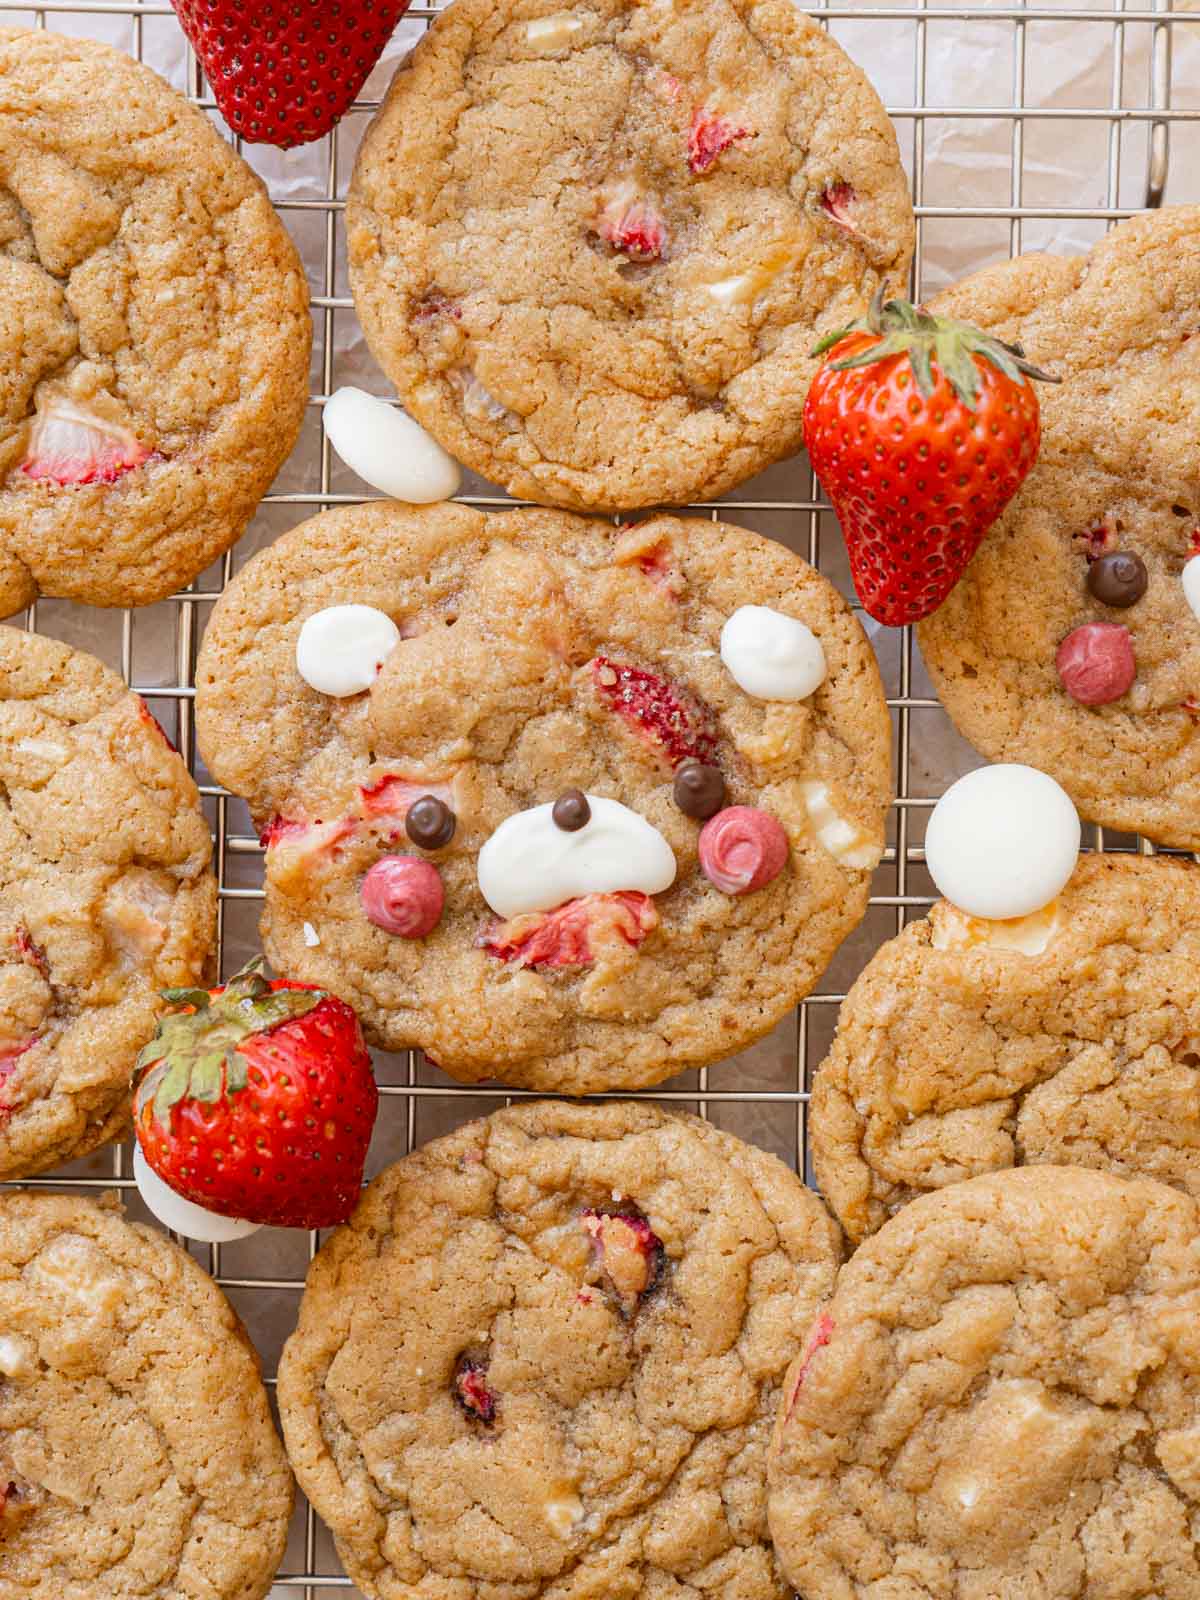
- I used fresh strawberries and a chopped white chocolate bar as mix-ins.
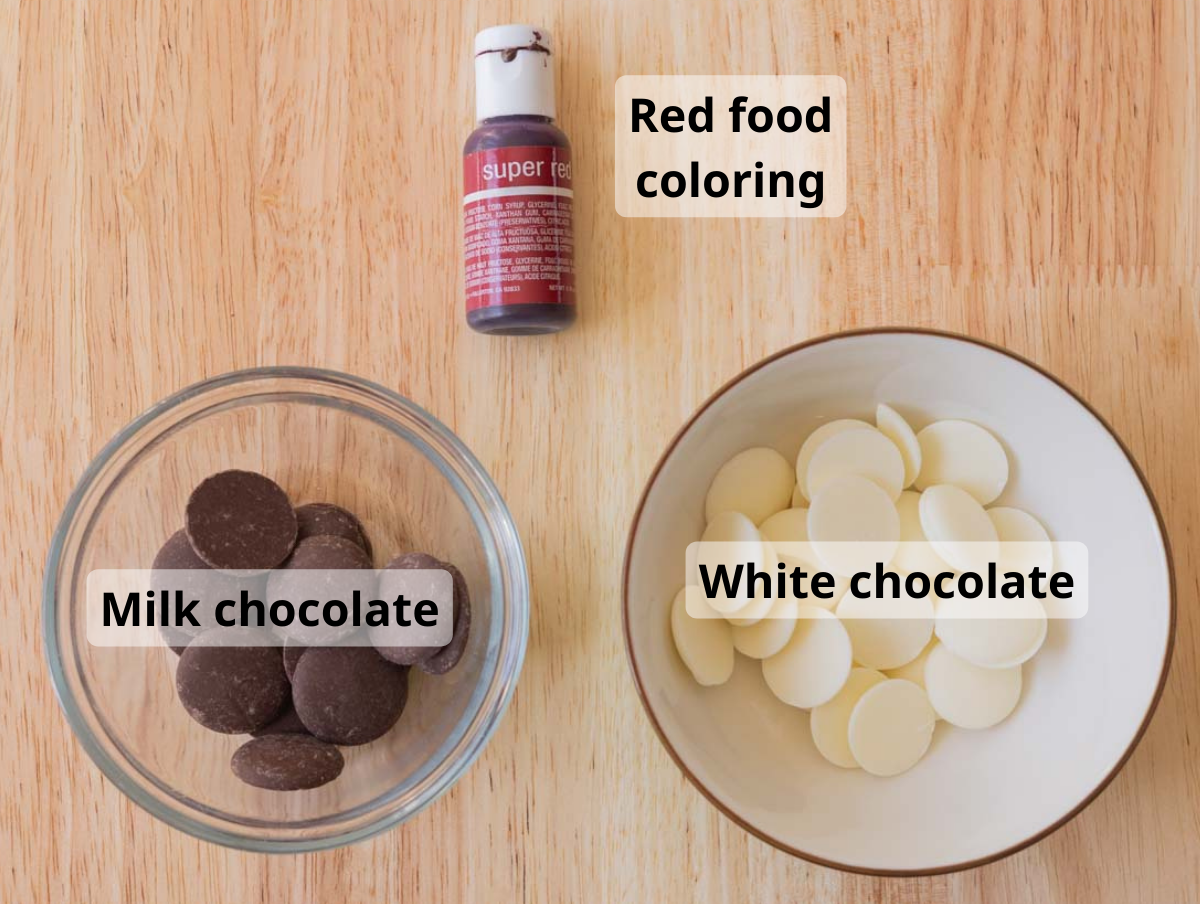
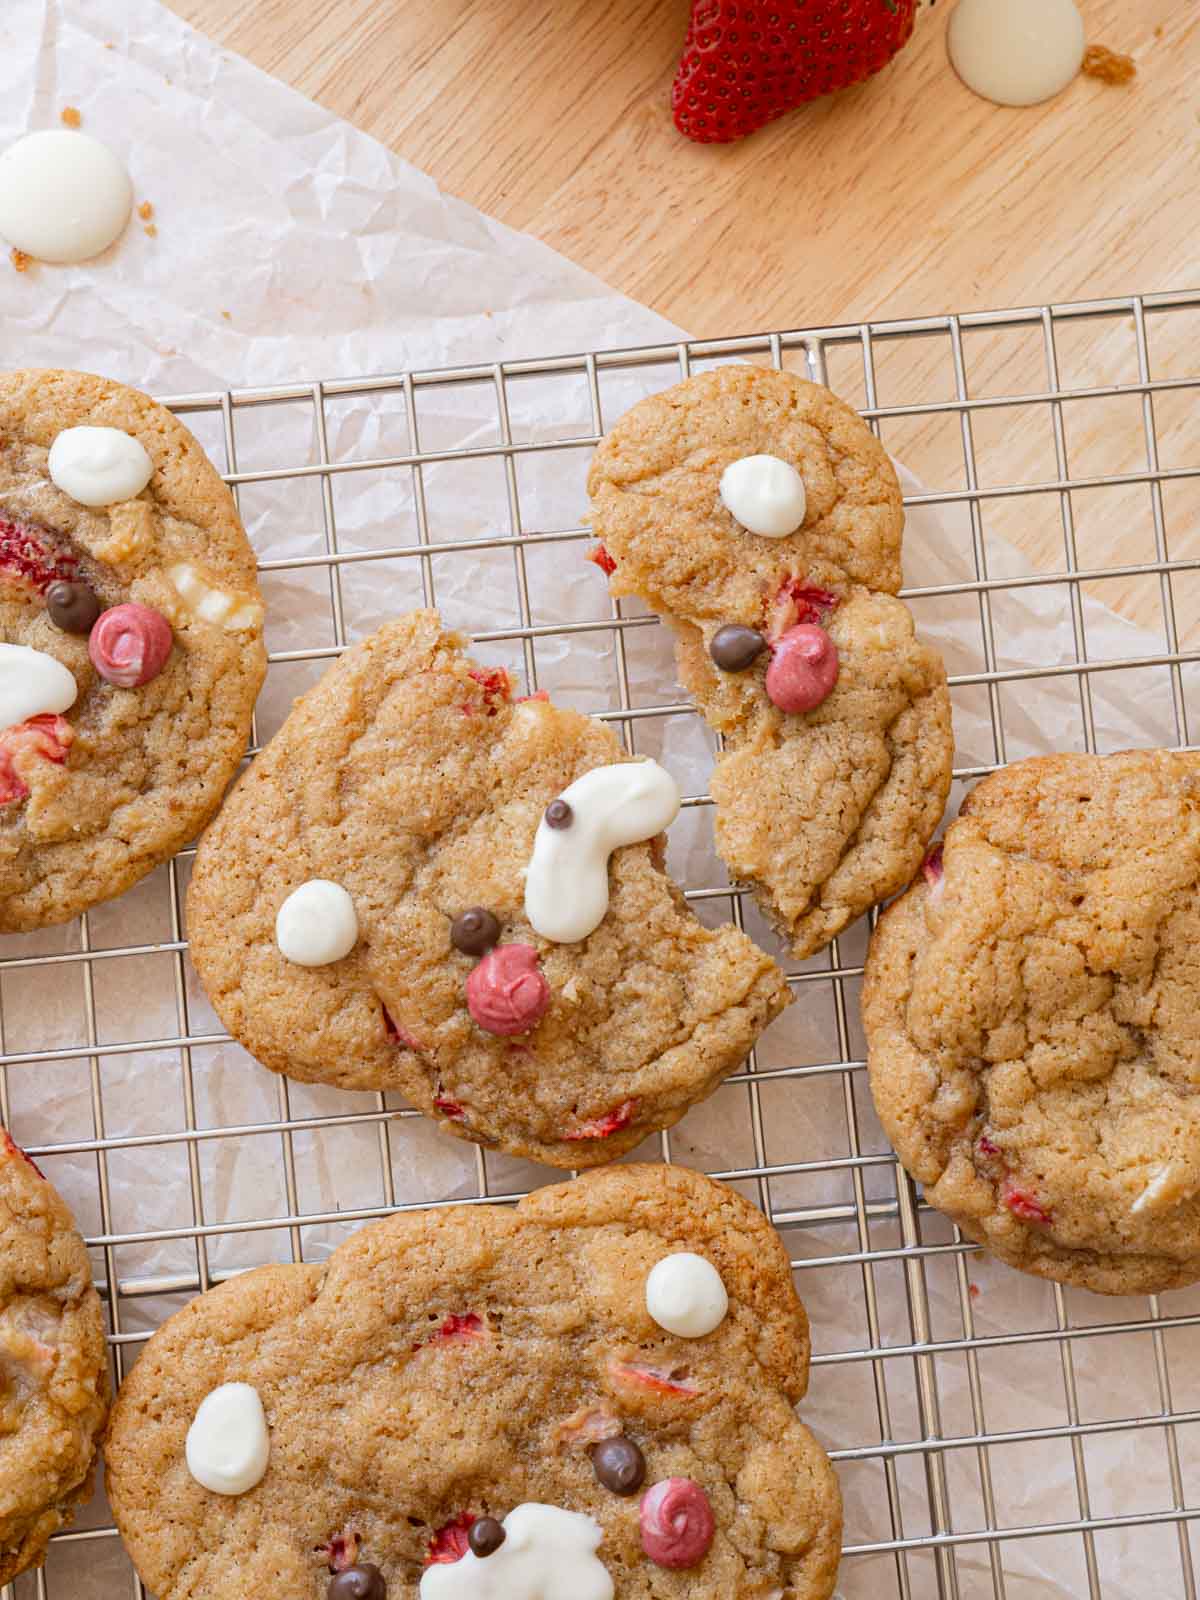
- To decorate the cookies into bears, I used white and milk/dark chocolate melting wafers. Alternatively, you can use chocolate chips or candy melts.
- The white chocolate wafers are for the snouts and ears. It was also dyed with red food coloring for the blush. The milk/dark chocolate wafers are for the noses and eyes.
- It’s best to use oil-based food coloring so the chocolate doesn’t seize. However, if you don’t have it on hand (like me), you can always stir in 1-2 tsp neutral oil (canola, vegetable) to the melted chocolate so it comes back together.
For the full list of ingredients and measurements, see the recipe card below.
How to Make White Chocolate Strawberry Cookies
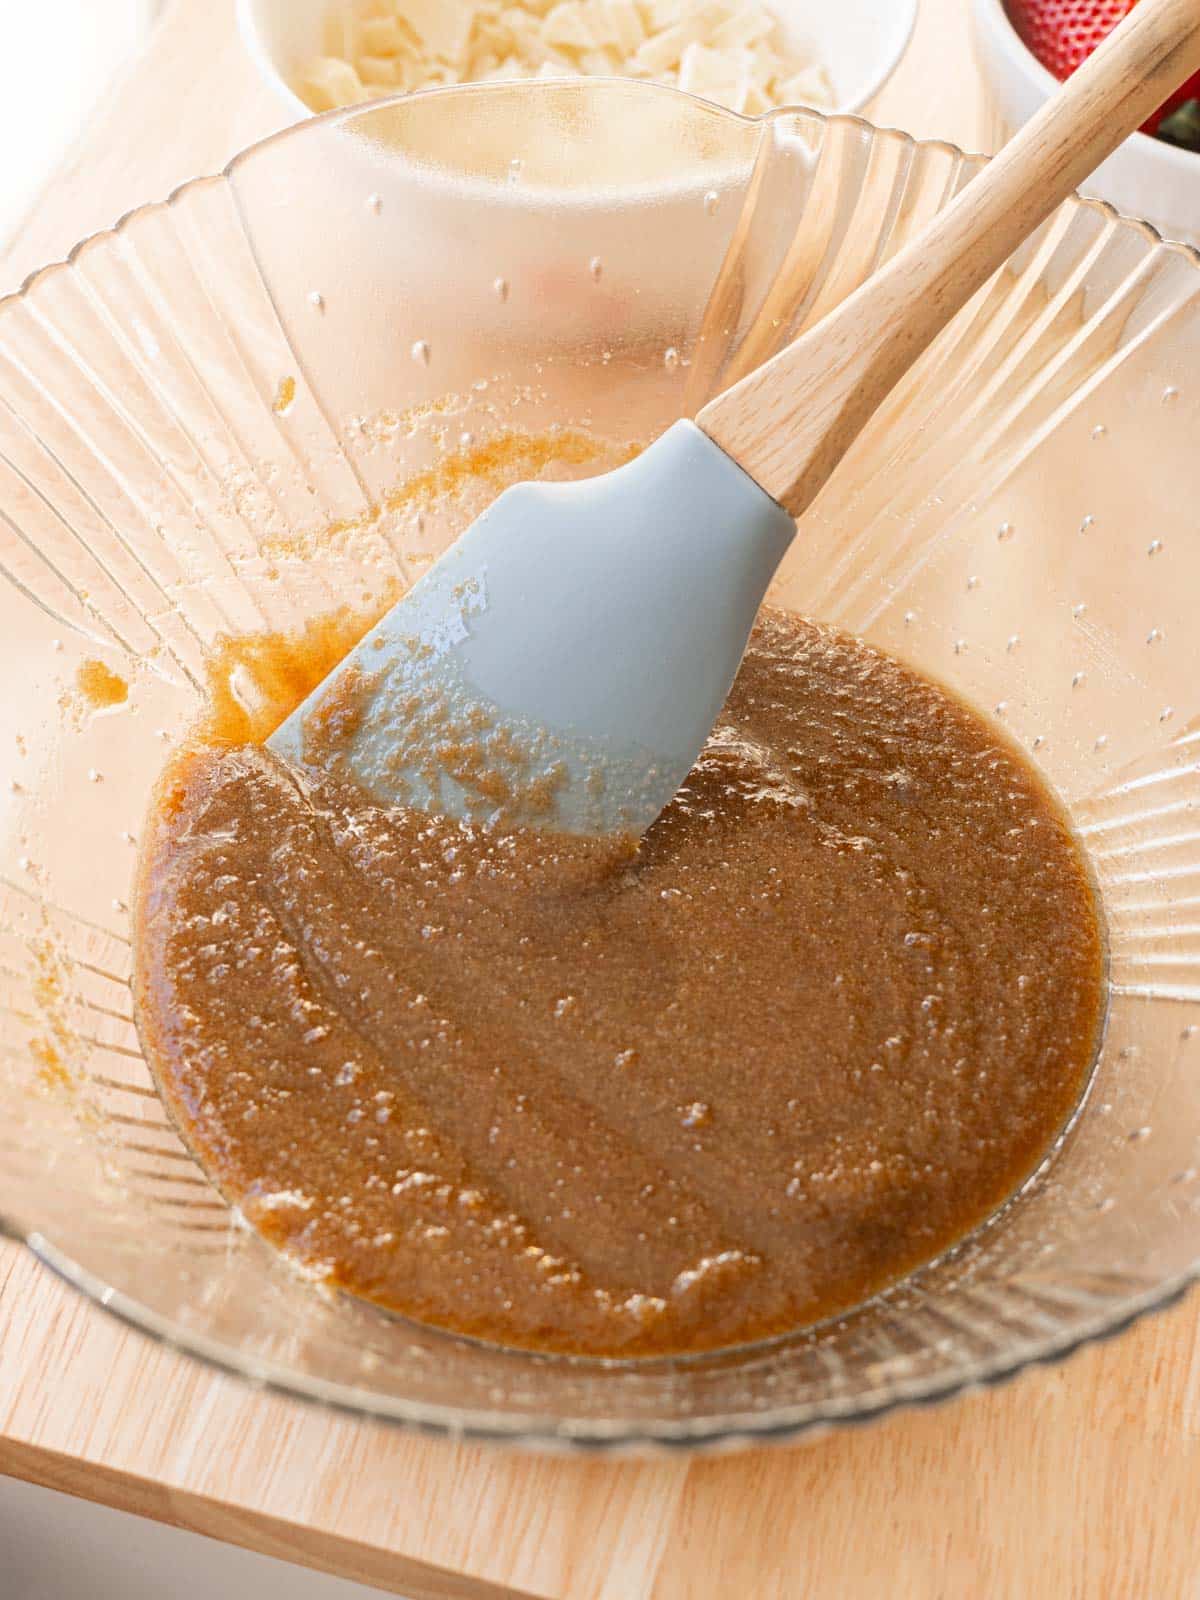
Step 1: Mix together melted butter and sugars until combined.
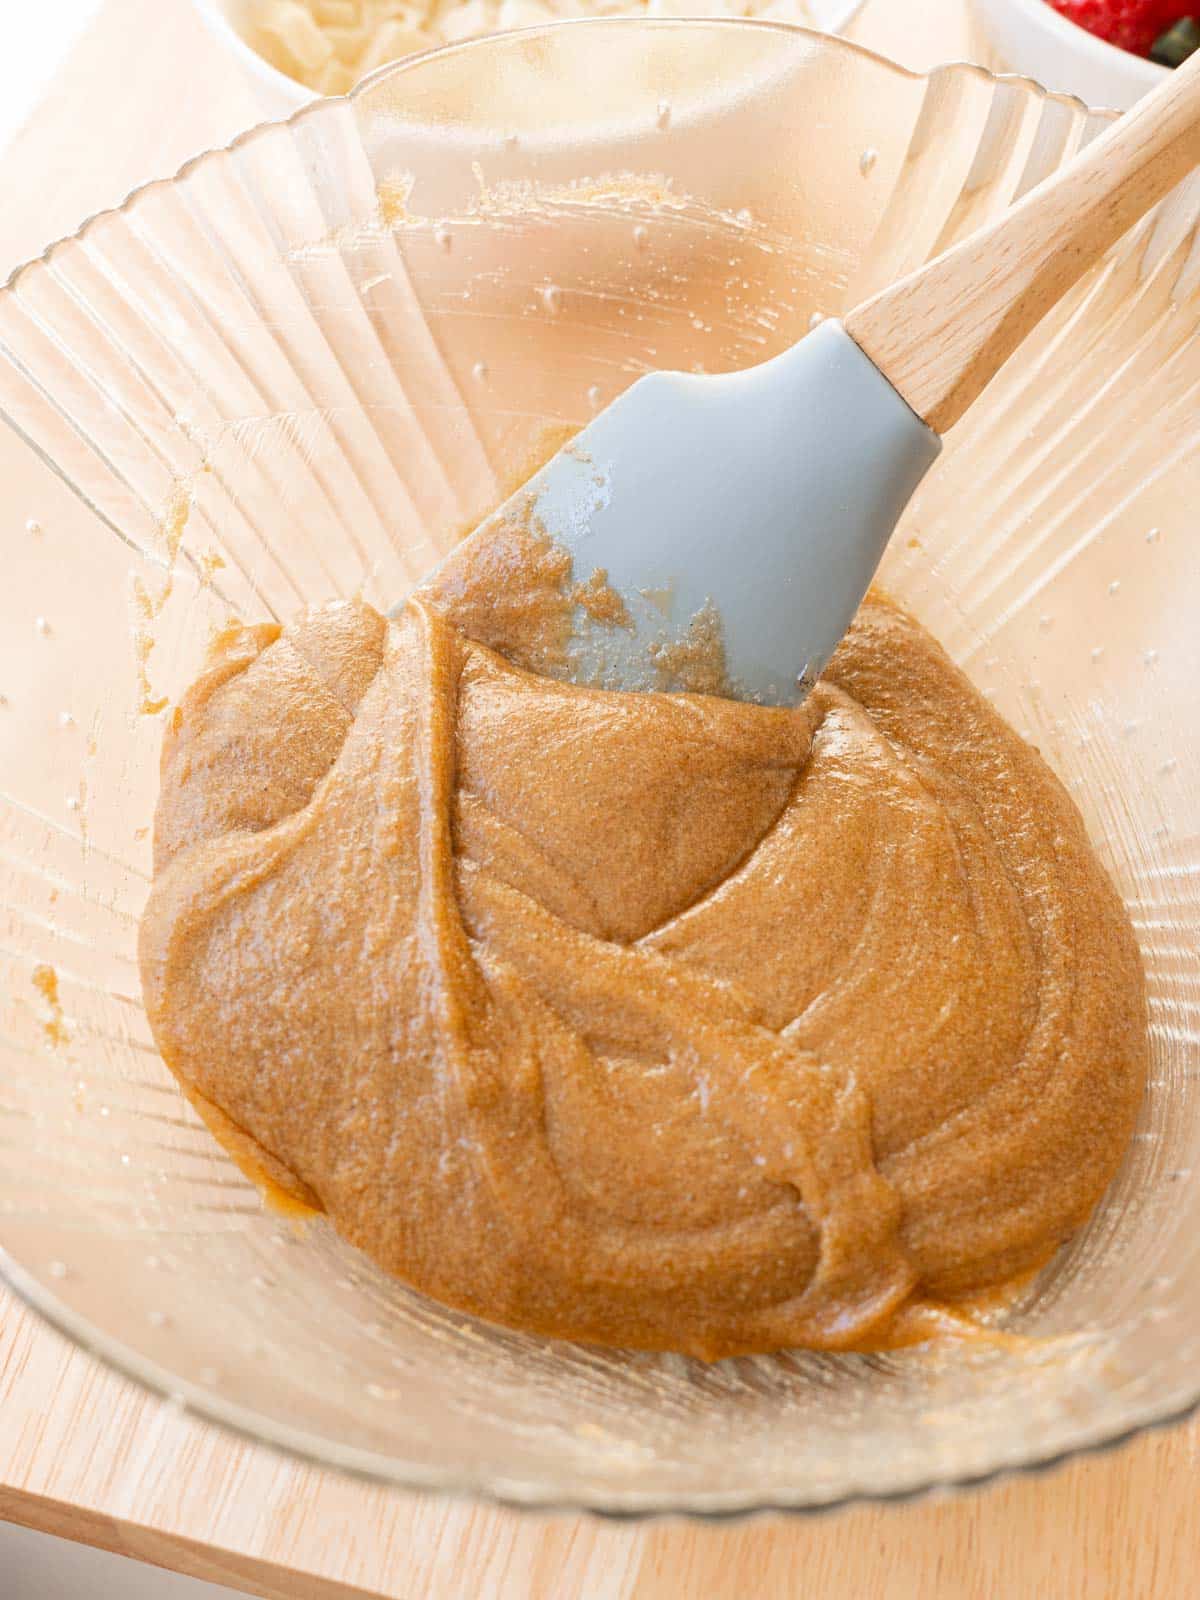
Step 2: Add egg and vanilla, stirring until completely smooth.
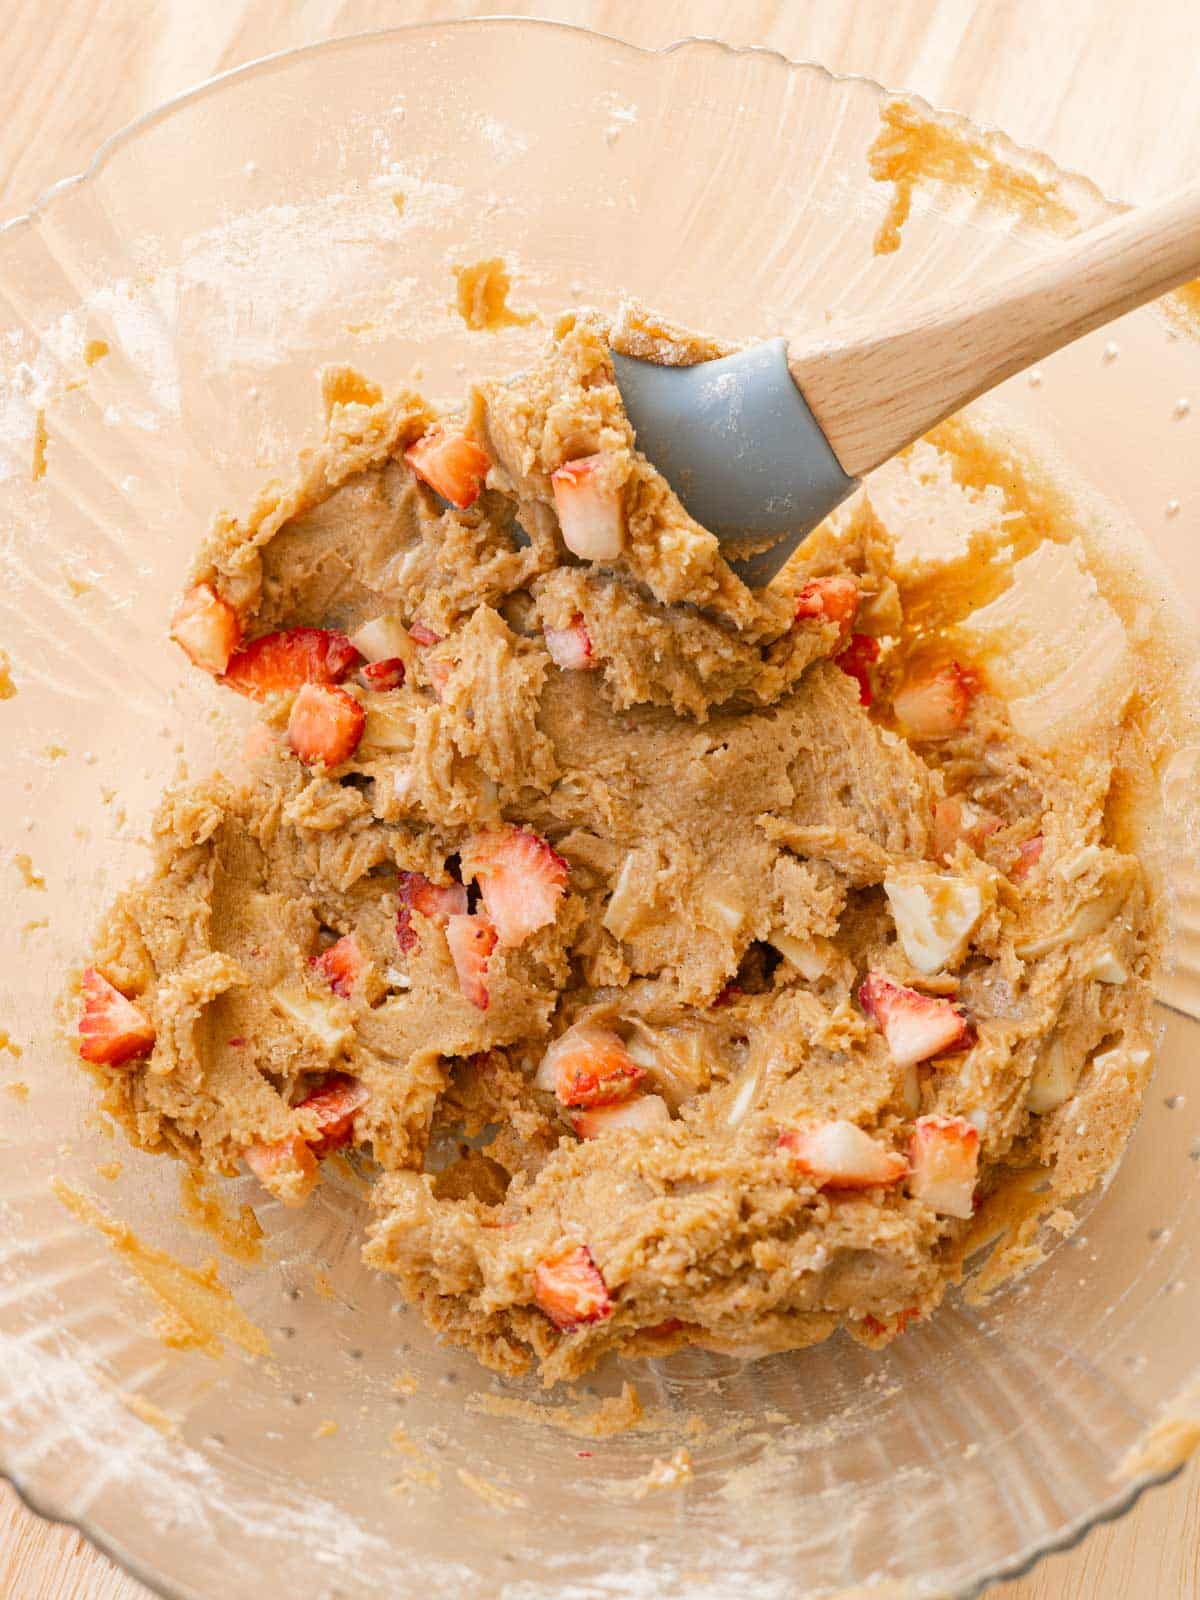
Step 3: Mix in dry ingredients, chopped white chocolate, and freshly diced strawberries. Stir until no dry spots remain.
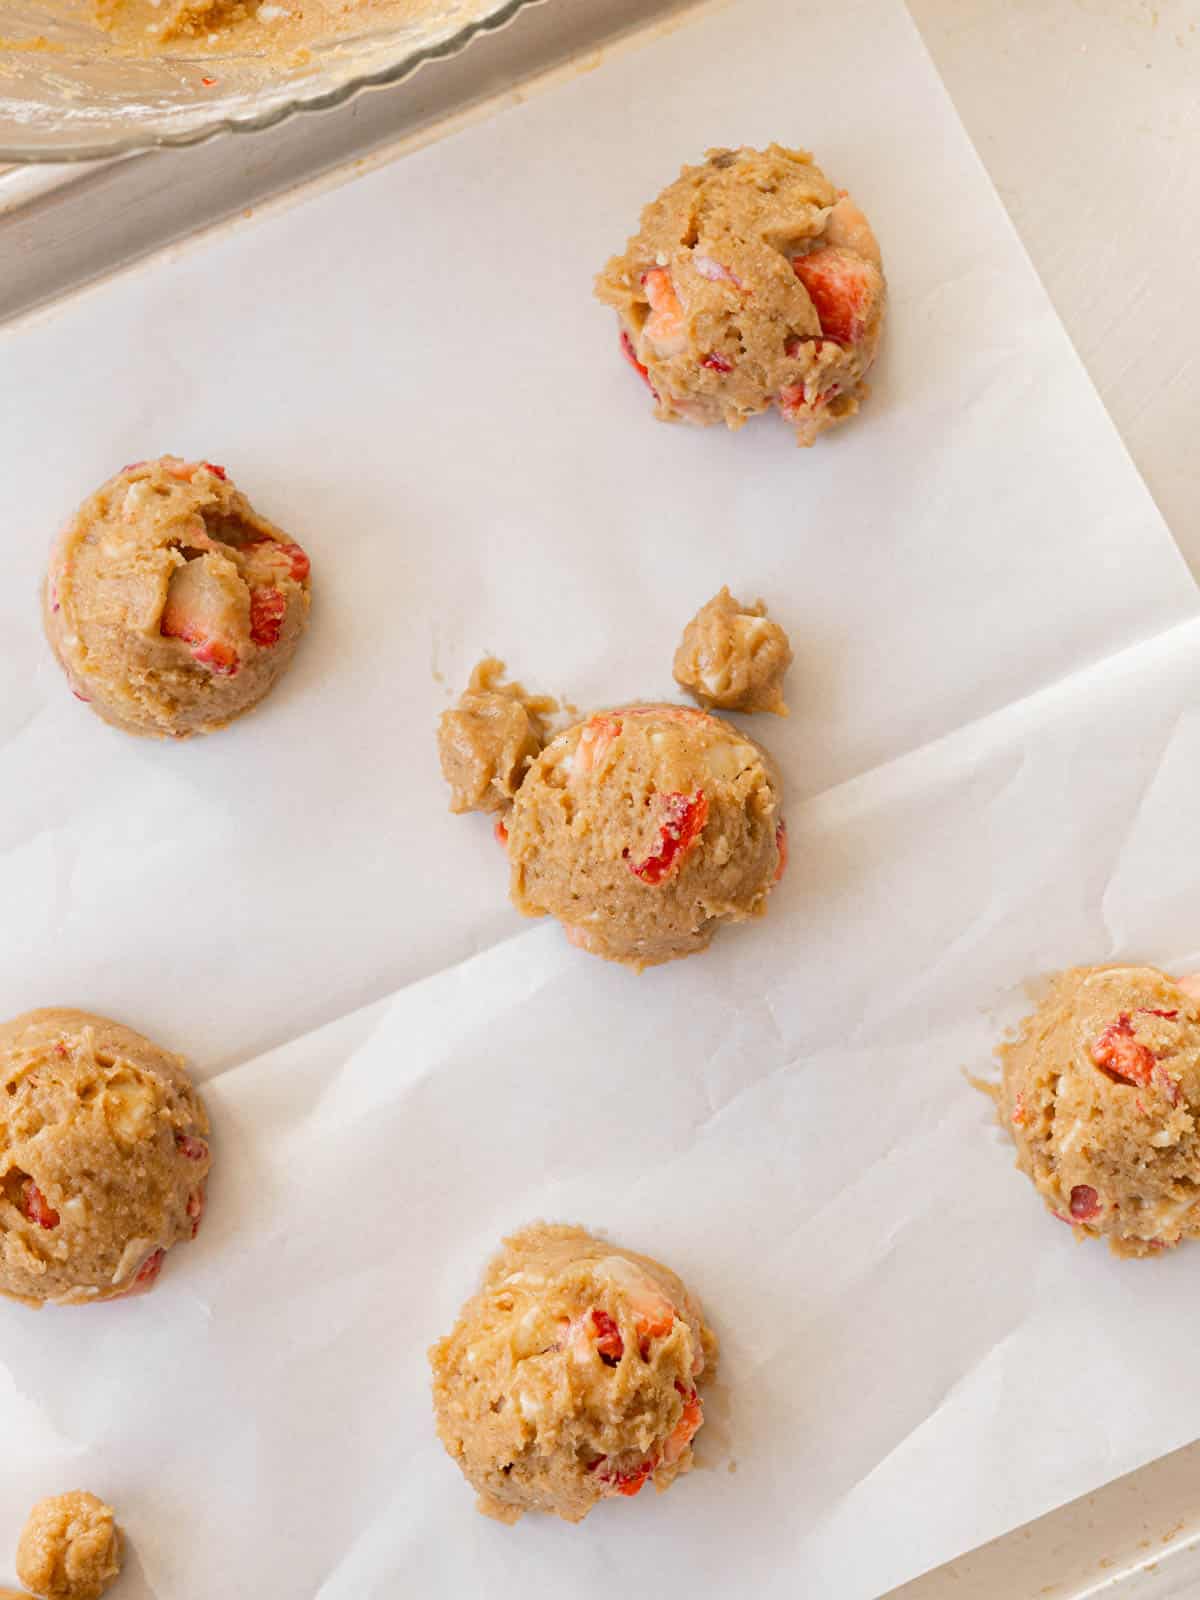
Step 4: Place 2-3 tablespoon cookie dough balls on a lined cookie sheet, 3-4 inches apart. If making a bear, add ½ tsp ball for each ear as pictured. Bake at 350°F/177°C for 10-13 minutes, or until edges are set. Let cool on pan for about 5 minutes before transferring to wire rack.
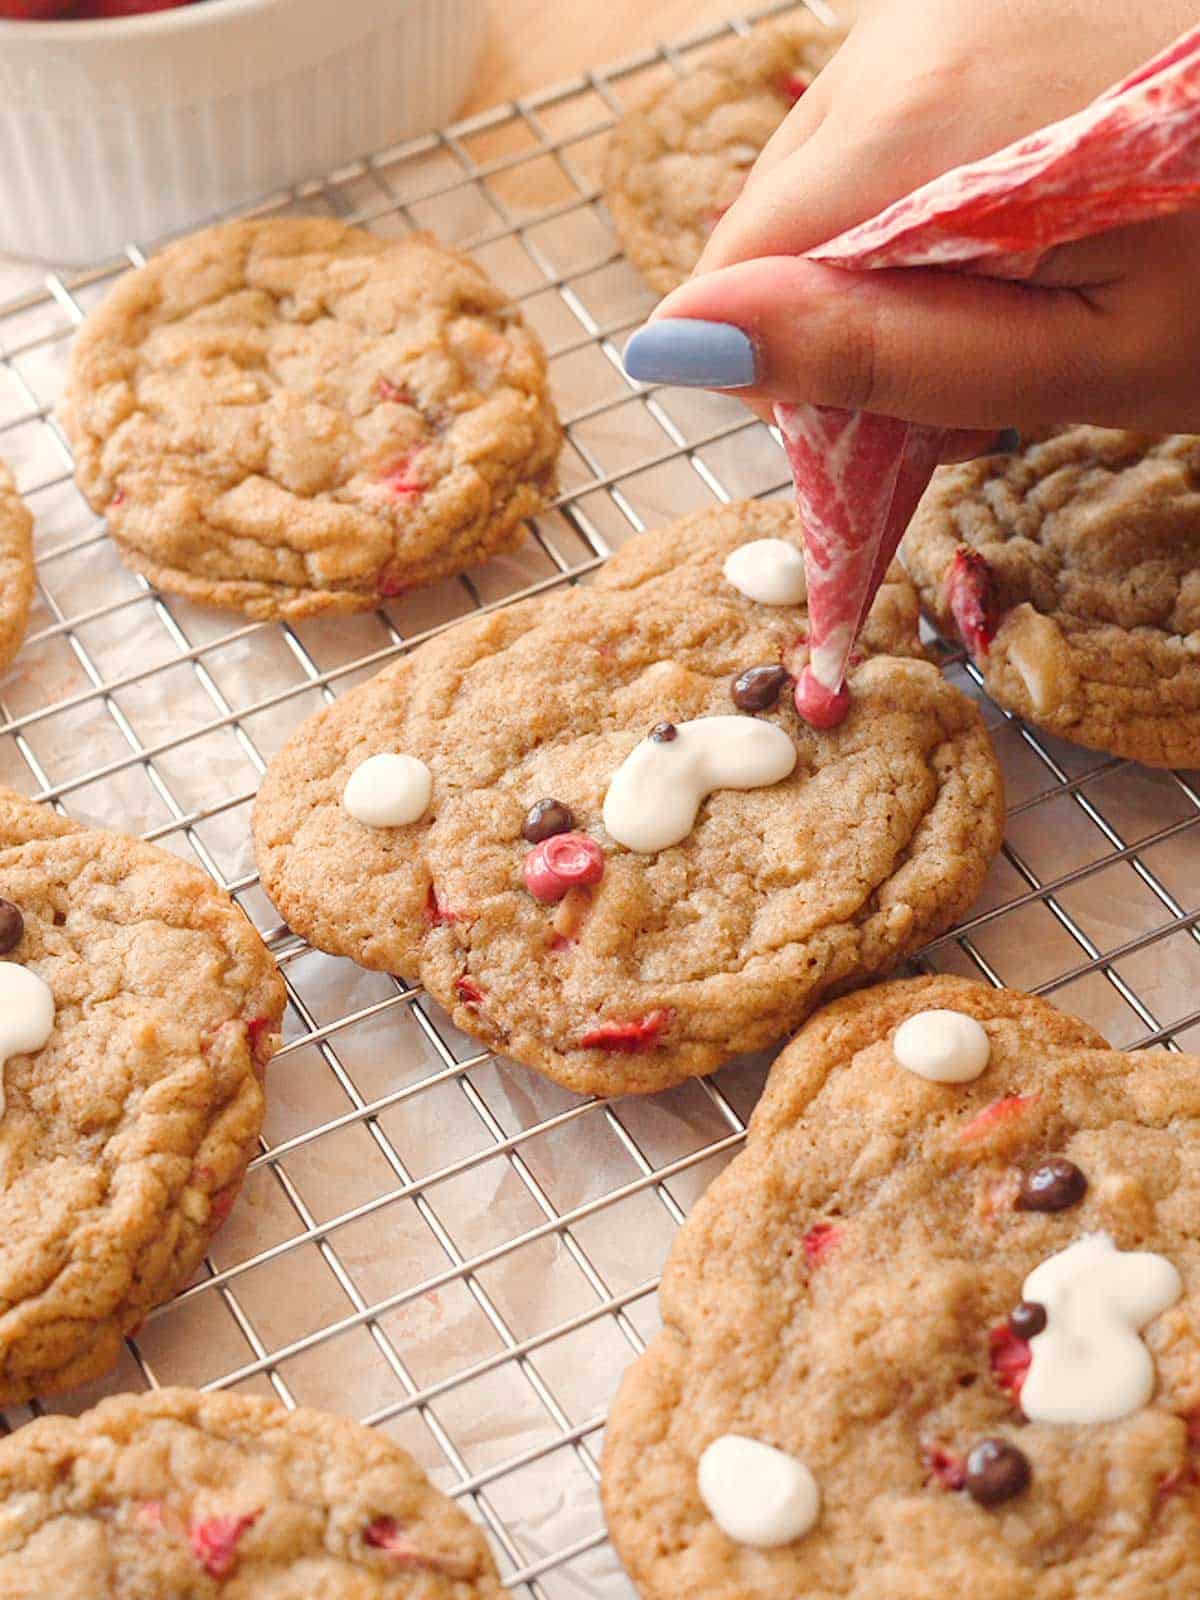
Step 5: Decorate cooled bear cookies using melted chocolates.

Step 6: Enjoy! Store cookies in an airtight container for up to 3 days.
For full instructions, see the recipe card below.
Recipe Tips
- Weigh your ingredients! One of my favorite kitchen tools is a kitchen scale because it’s more accurate than measuring by volume. If you use cups, spoon the flour in gently, then level it with a knife or spatula.
- For rounder cookies, immediately place a circle cookie cutter or mug (that is larger in diameter than your cookie) on top of a warm, oddly-shaped cookie. Move it around in a circular motion. This “cookie scoot” step turns them into the more aesthetic, perfectly round cookies you see online! However, it’s not necessary and purely for pretty plating purposes. 🙂
Storage
You can store the baked strawberry cookies in an airtight container for up to 3 days. They will get soggy over time due to how moist they are, so I recommend eating them as close to the day they’re baked as possible.
If you’d like to store the raw cookie dough, line a tray or plate with parchment or wax paper. Arrange the cookie balls in a single layer, then freeze for about 1 hour. Once the cookie dough balls are frozen, transfer them to an airtight container and freeze for up to 3 months. Bake as usual, but add 2-3 extra minutes.
🍓 Other Strawberry Recipes

Did you try this recipe?
Please leave a review & share it with me on Instagram, Facebook, Tiktok, or Pinterest!
Thank you so much! -Bianca ❤️
📖 Recipe
White Chocolate Strawberry Cookies
✉️ want to save this?
Equipment
- medium mixing bowl for dry ingredients
- large mixing bowl for cookie dough
- microwave-safe bowls, for melting white chocolate
- Piping bags for decorating
Ingredients
Dry Ingredients:
- 1 ¾ cup (218.75 g) all-purpose flour
- 1 tbsp (8 g) cornstarch
- 1 tsp (4 g) baking powder
- ½ tsp (2 g) baking soda
- ¾ tsp (4.5 g) table salt
Wet Ingredients:
- ½ cup (113.5 g) unsalted butter melted and cooled
- ¾ cup (165 g) light or dark brown sugar packed
- ¼ cup (50 g) granulated sugar
- 1 (1) egg room temperature
- 1 tbsp (13 g) vanilla extract
Mix-ins:
- 1 (1) white chocolate bar roughly chopped
- ¾ cup (130 g) strawberries diced, about 5-6 large strawberries
Decorating:
- 1 tbsp (14.79 g) milk/dark chocolate melting wafers can sub 1:1 milk/dark chocolate chips
- 3 tbsp (44.36 g) white chocolate melting wafers can sub 1:1 white chocolate chips
- red or pink oil-based food coloring
Instructions
For the cookie dough:
- In a medium bowl, stir together all of the dry ingredients: 1 ¾ cup all-purpose flour, 1 tbsp cornstarch, 1 tsp baking powder, ½ tsp baking soda, and ¾ tsp table salt.
- In a large mixing bowl, stir melted ½ cup unsalted butter, ¾ cup light or dark brown sugar, and ¼ cup granulated sugar with silicone spatula until fully combined.
- Mix in 1 egg and 1 tbsp vanilla extract until smooth.
- Add in all of the dry ingredients, chopped 1 white chocolate bar, and diced ¾ cup strawberries. Fold until no dry spots remain.
Scoop & bake cookies:
- Preheat the oven to 350°F/177°C. Line two baking sheets with parchment paper.
- Use a medium cookie dough scoop to gather dough (about 2-3 tablespoons each) and plop onto lined baking tray, about 3-4 inches apart.
- To make bears (optional): For the ears, take about 1 tsp of dough and split it in 2. Place them on top left and right sides of a cookie dough ball on the baking sheet.
- Bake for 11-13 minutes, or until edges are set and golden brown. Let cool on pan for about 5 minutes, then transfer to wire rack.Optional: For rounder, more aesthetic cookies, take a something circular and larger than your cookies (cookie cutter, mug, cup), and place it on top of a warm, freshly baked cookie. Move the circular object around to shape the edges of the cookie until it becomes rounder.
Decorate:
- Note: You can a piping bag, toothpick, or cookie scribe to add on the details. I used piping bags.
- Melt 3 tbsp white chocolate melting wafers in a small microwave-safe bowl. Add about 2 tbsp to piping bag and use this for the snouts and ears.
- Mix in red or pink oil-based food coloring to the remaining melted white chocolate. Use this for the blush.If you don't have oil-based food coloring, then the chocolate will seize/become lumpy. To counter this, stir in a tsp of neutral oil (canola, vegetable) at a time, until it becomes smooth again.
- Add 1 tbsp milk/dark chocolate melting wafers to another small microwave-safe bowl and microwave in 30-second intervals, stirring in between, until fully melted. Use this this to draw on eyes and noses.
- Enjoy!
Notes
- Storage: Store cooled, freshly baked cookies in airtight container at room temperature for up to 3 days. They will get soggy over time due to the strawberries, so I recommend eating them as close to the day they’re baked as possible!
- Tip for measuring ingredients: I weigh my ingredients with a kitchen scale, rather than using measuring cups because it is more accurate. If using measuring cups, I recommend spooning flour into the cup and overfilling it, then leveling it off with a knife.

I panicked a bit before the strawberries were added because the batter kinda felt drier than I was used too, but the moisture from the strawberries will balance it out as soon as you add them! They turned out so gooood! I only had a bigger scoop, so my bears were pretty big 😆 I only needed to adjust cook time by a minute!
🙂 Hi Josyne, thank you for your comment!! 💕 I’m glad the cookies came out yummy, I hope you had fun baking them. And bigger cookies are always better, hehe!