
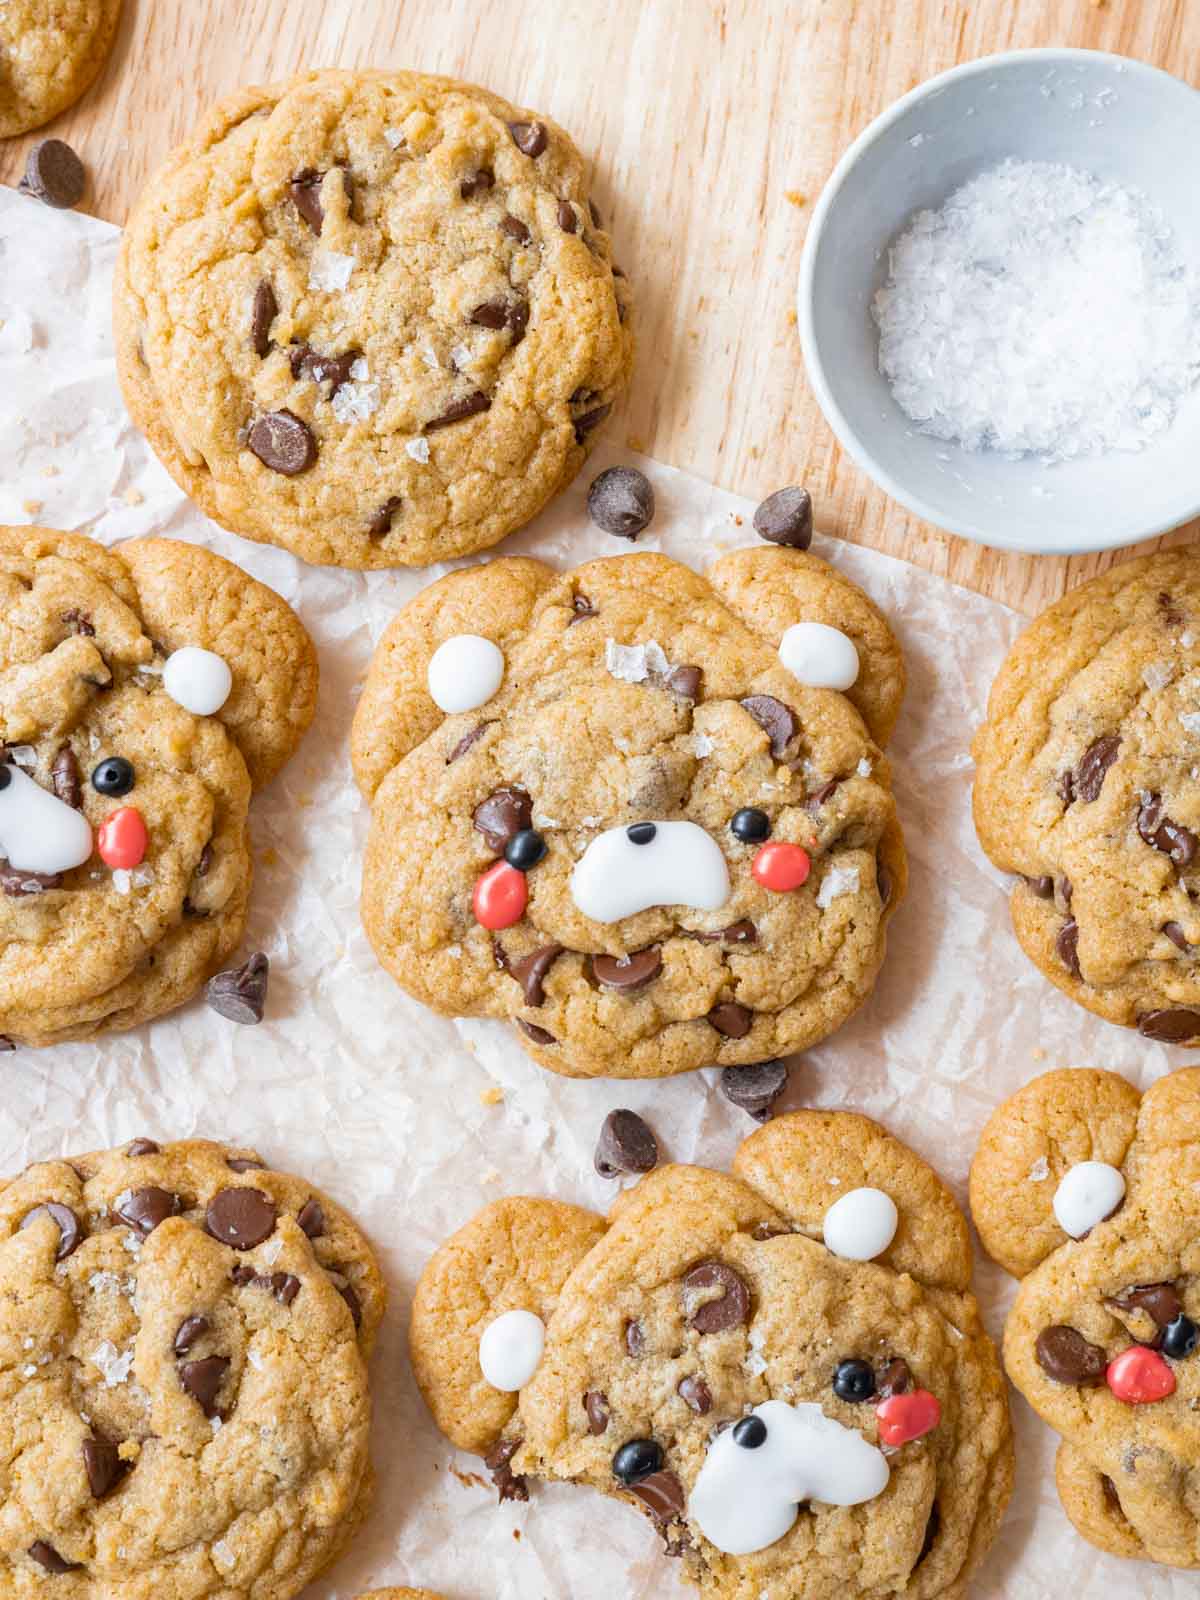
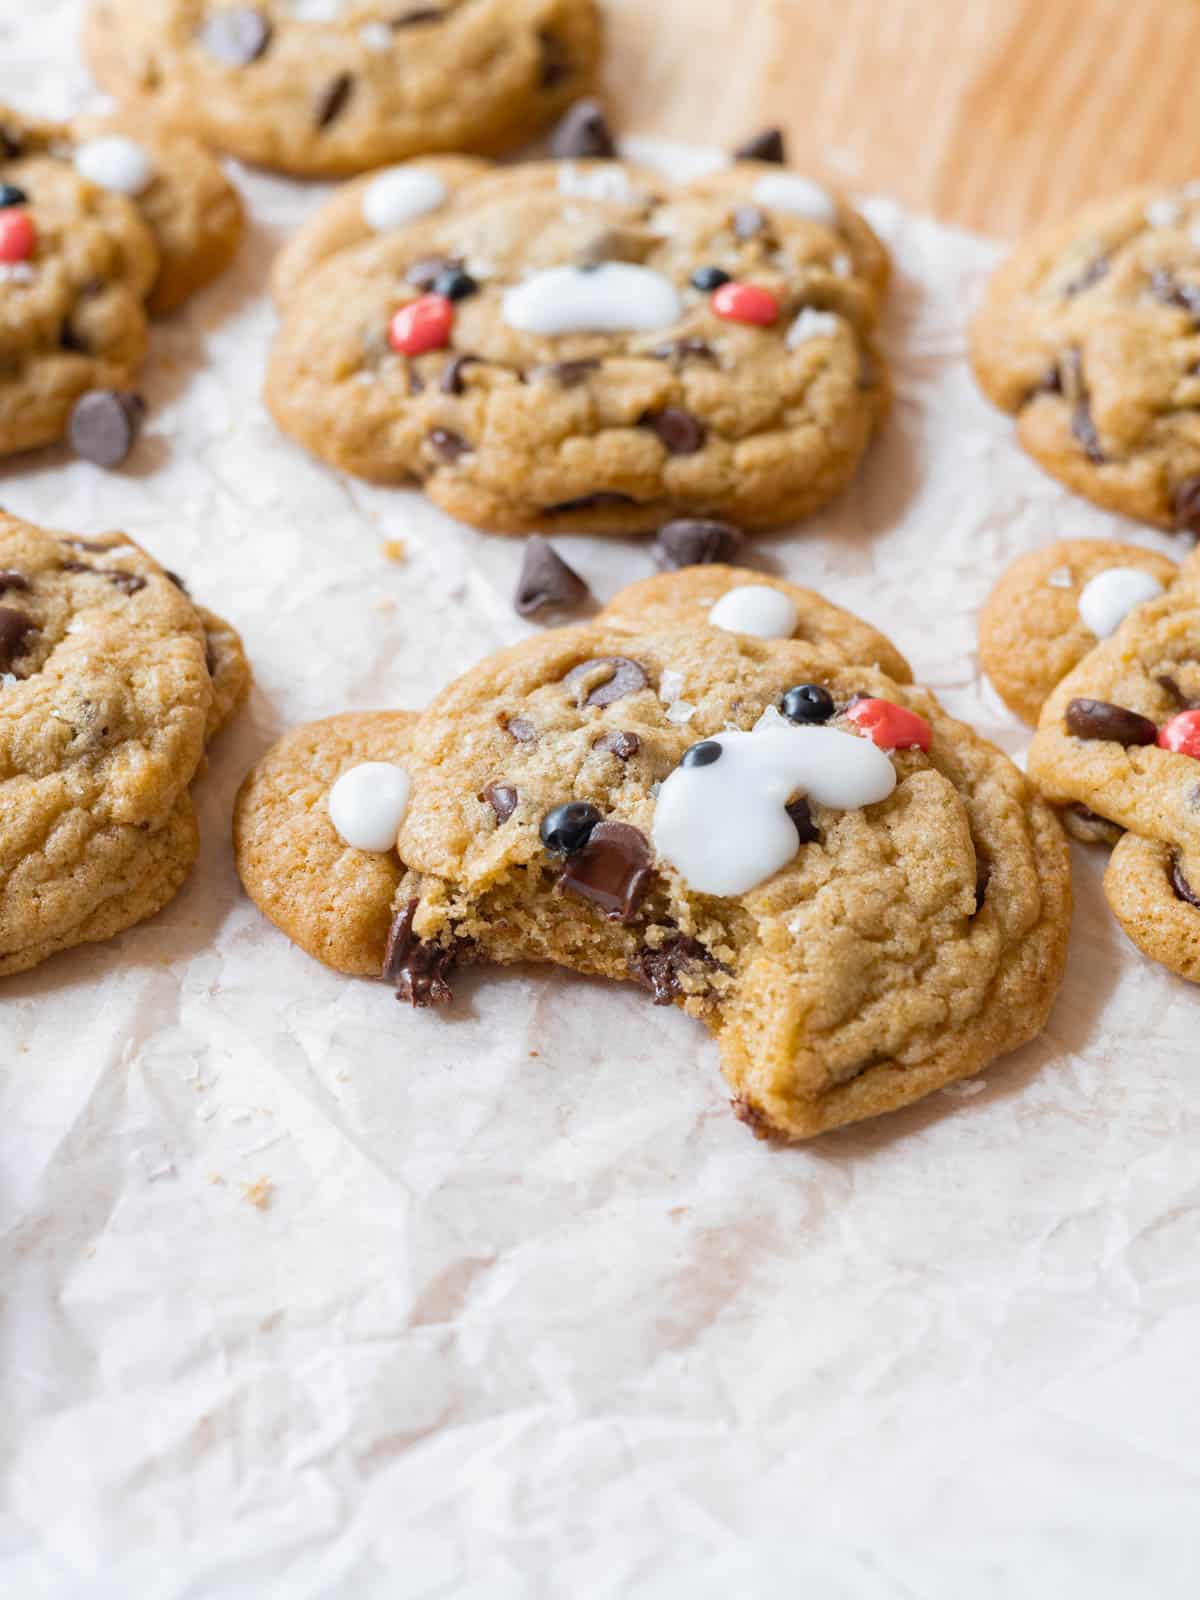
These delicious teddy bear cookies are soft, slightly chewy, and ready to eat in less than an hour! Make them for your next get-together, as a gift for someone you love, or bake for fun with your friends & family. ❤️
✉️ want to save this?
🐻 Why You’ll Love This Recipe
- They’re adorable! Why make regular chocolate chip cookies, when you can turn them into cute bears? They’re fun to make and are an adorable gift if you’re baking for someone you love.
- This is a quick and easy no-chill recipe, meaning you don’t have to refrigerate the dough 30 minutes-1 hour before baking! AKA.. you can eat them within an hour.
- You won’t need any special equipment. Simply mix everything in one bowl, scoop, and bake. All decorations are done with an easy 3-ingredient icing recipe.
Ingredients
To make these chocolate chip teddy bear cookies, you’ll need the following ingredients:

- This recipe calls for melted unsalted butter, which makes mixing easy! This means you don’t need electric beaters or even a hand whisk—a simple silicone spatula will do.
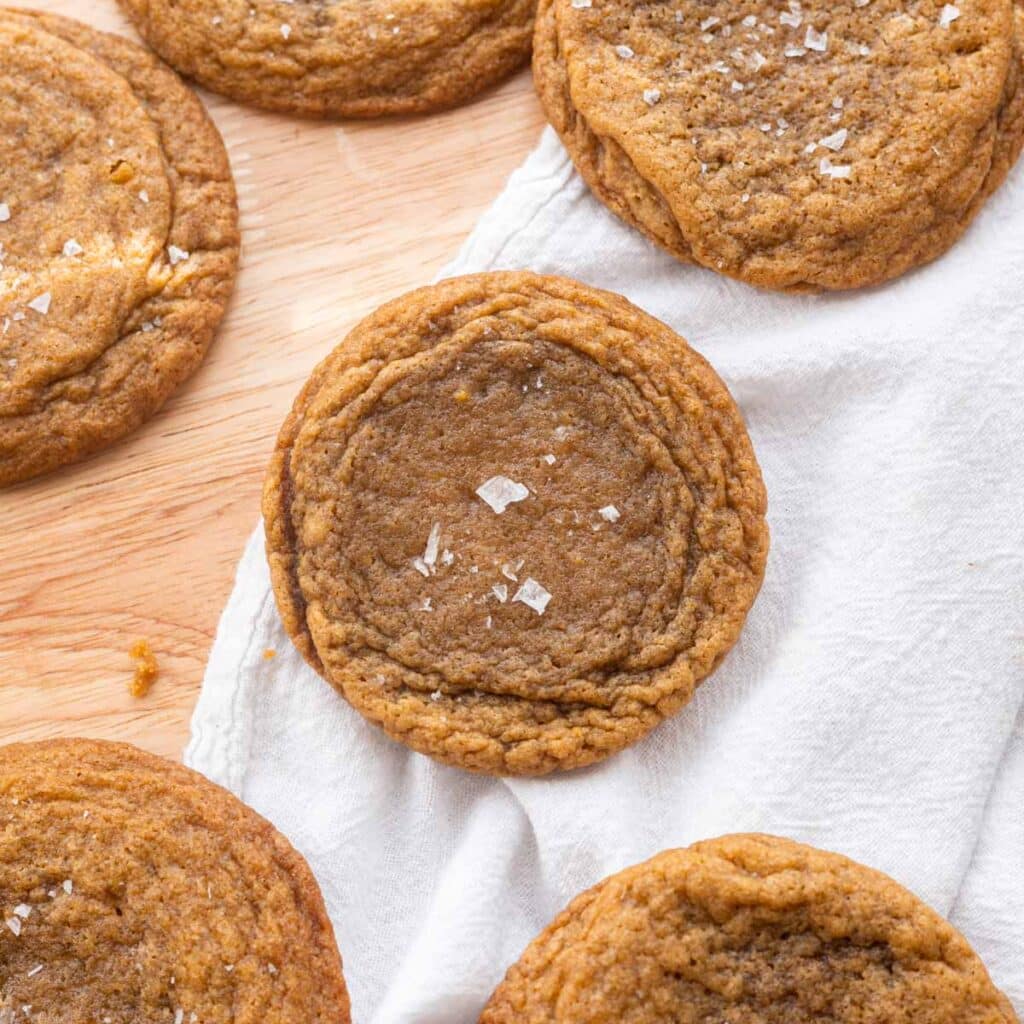
- After baking, the chocolate chip cookies are topped with flaky sea salt, which makes them so much more flavorful.
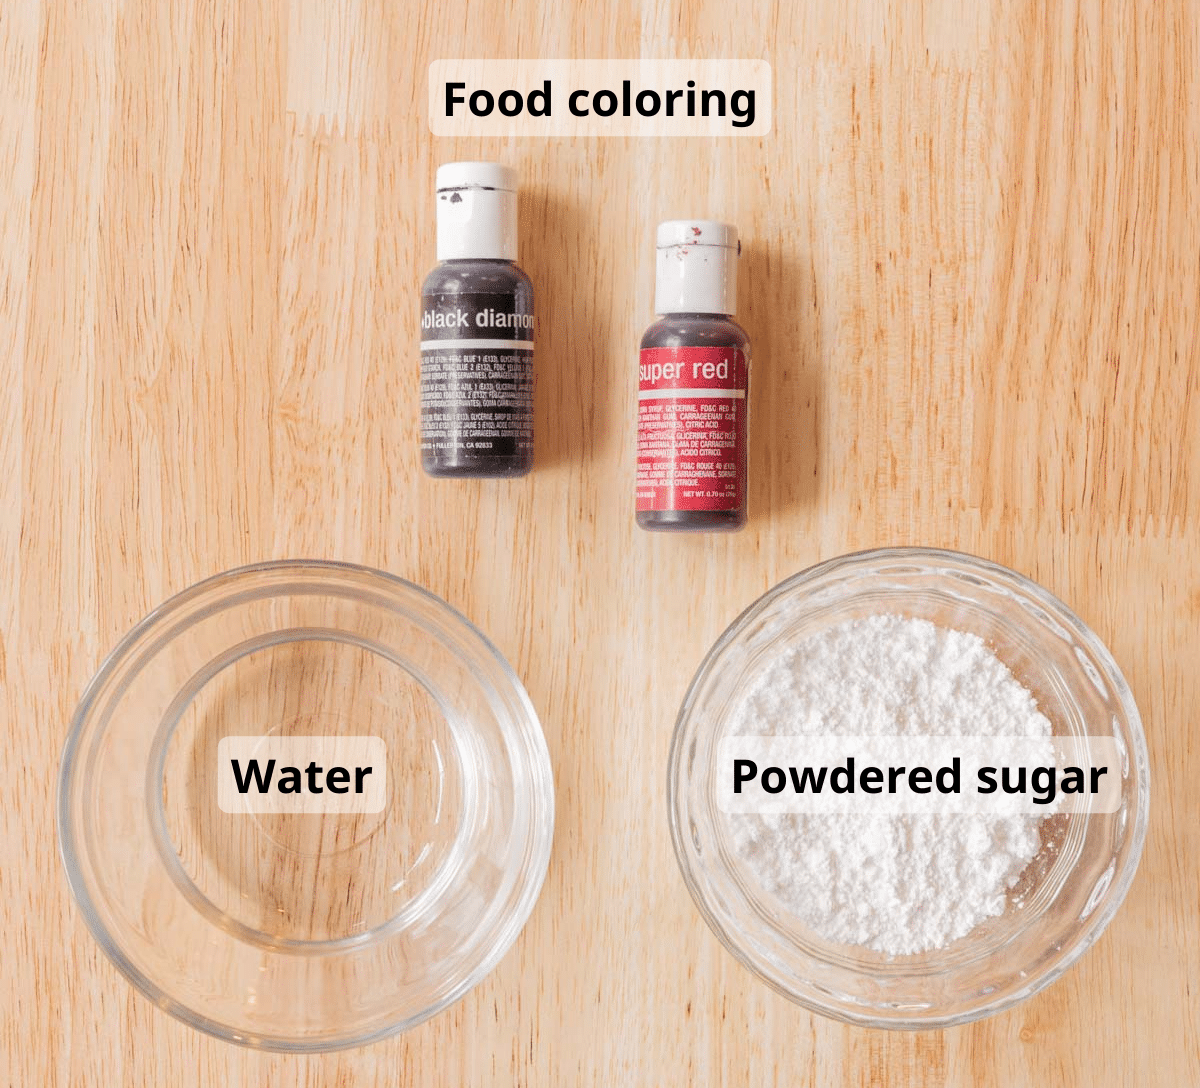
- For the easy cookie icing recipe, you’ll just need water, powdered sugar, and food coloring! I used black food coloring for the eyes and noses, and red food coloring for the blush.
For the full list of ingredients and measurements, see the recipe card below.
“These are the cutest cookies I’ve ever made! The recipe was so easy to follow and they turned out perfectly on my first try! I’ve never decorated cookies before and so I was a little intimidated, but the simple icing recipe made it so easy and I loved the outcome! I’ll definitely be making these again for my friends!” – Maurene, commenter
How To Make Cute Teddy Bear Cookies
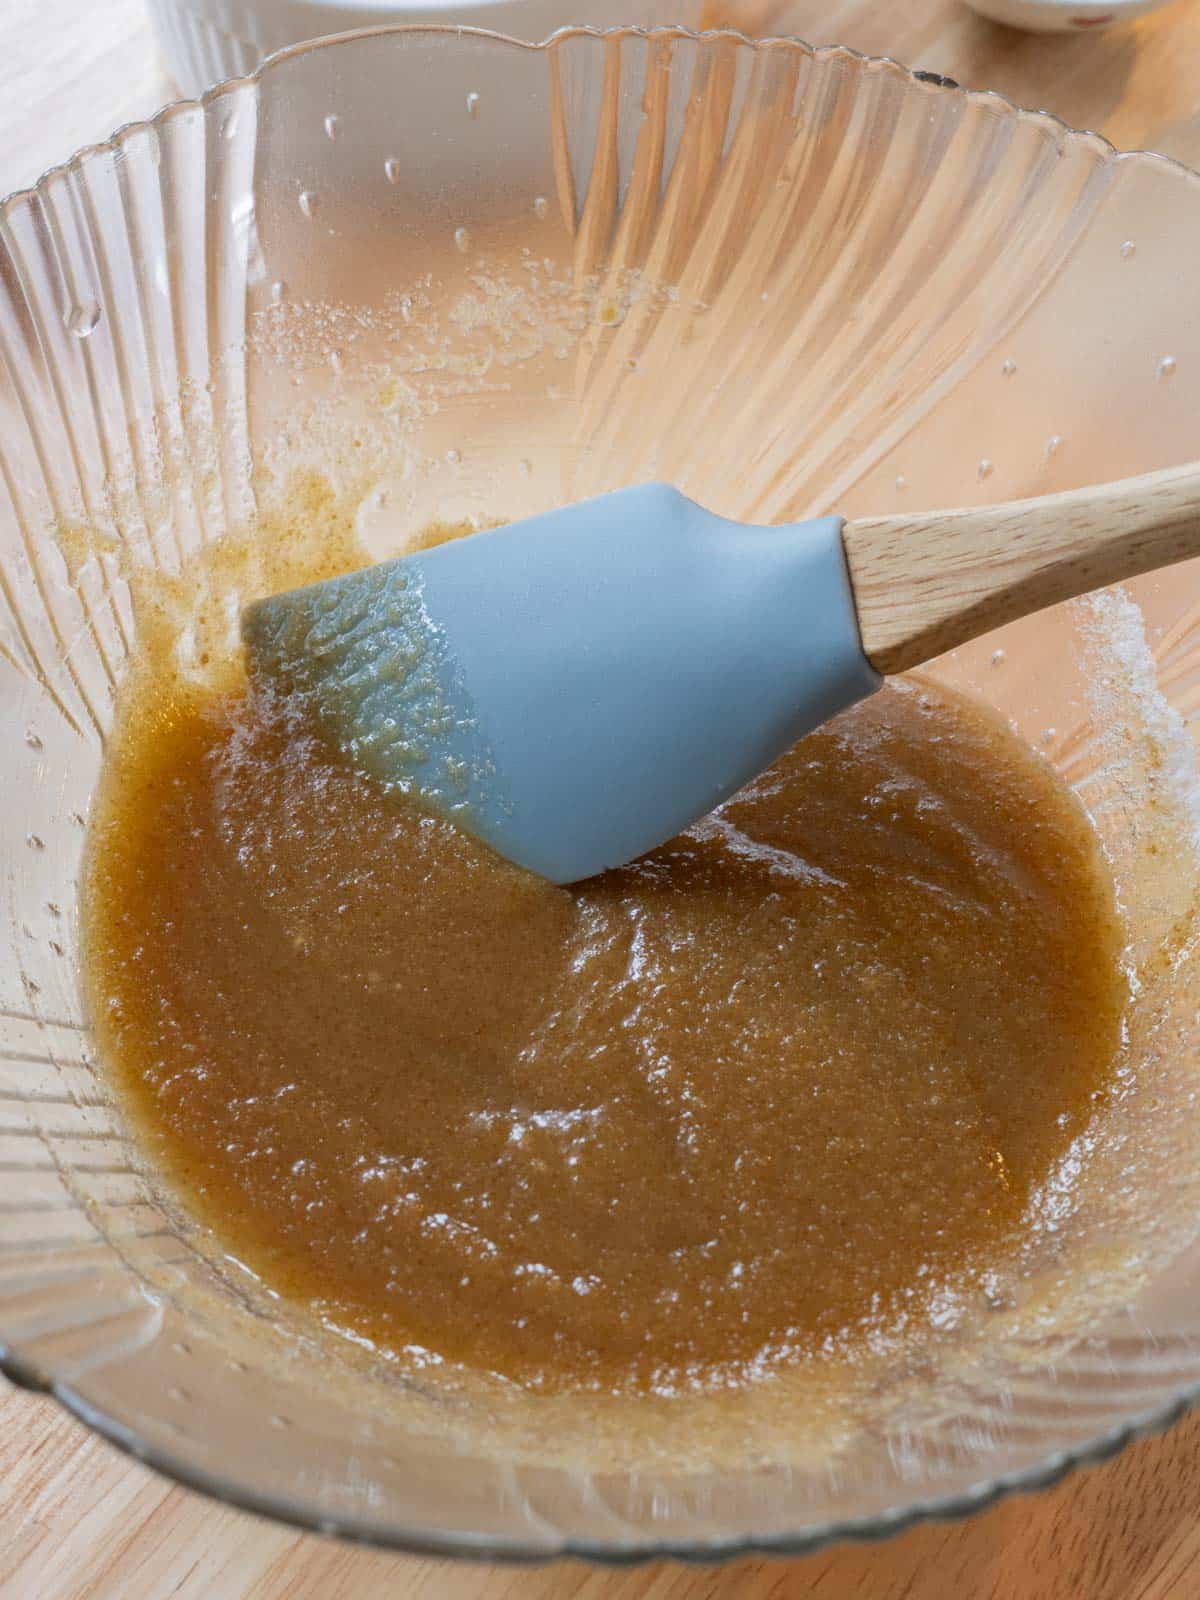
Step 1: In a large mixing bowl, use a silicone spatula to stir together melted butter and sugars.
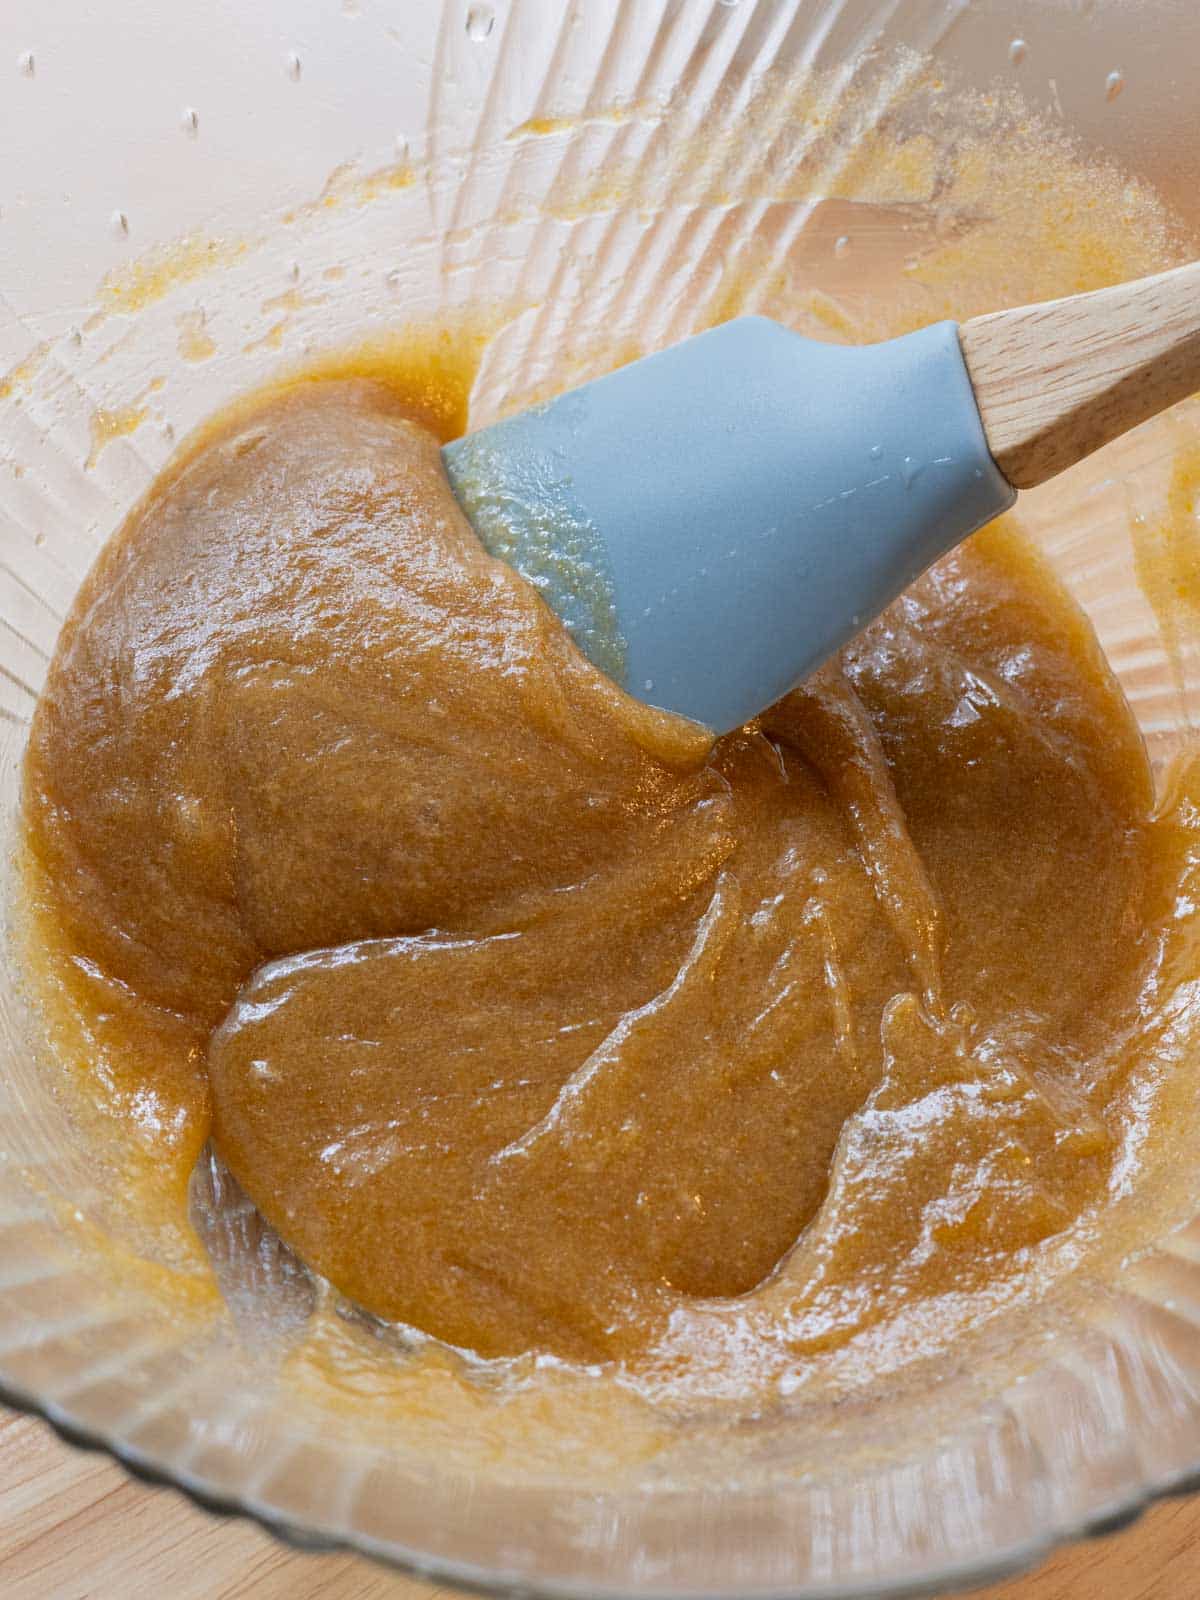
Step 2: Add egg and vanilla extract. Stir until smooth.
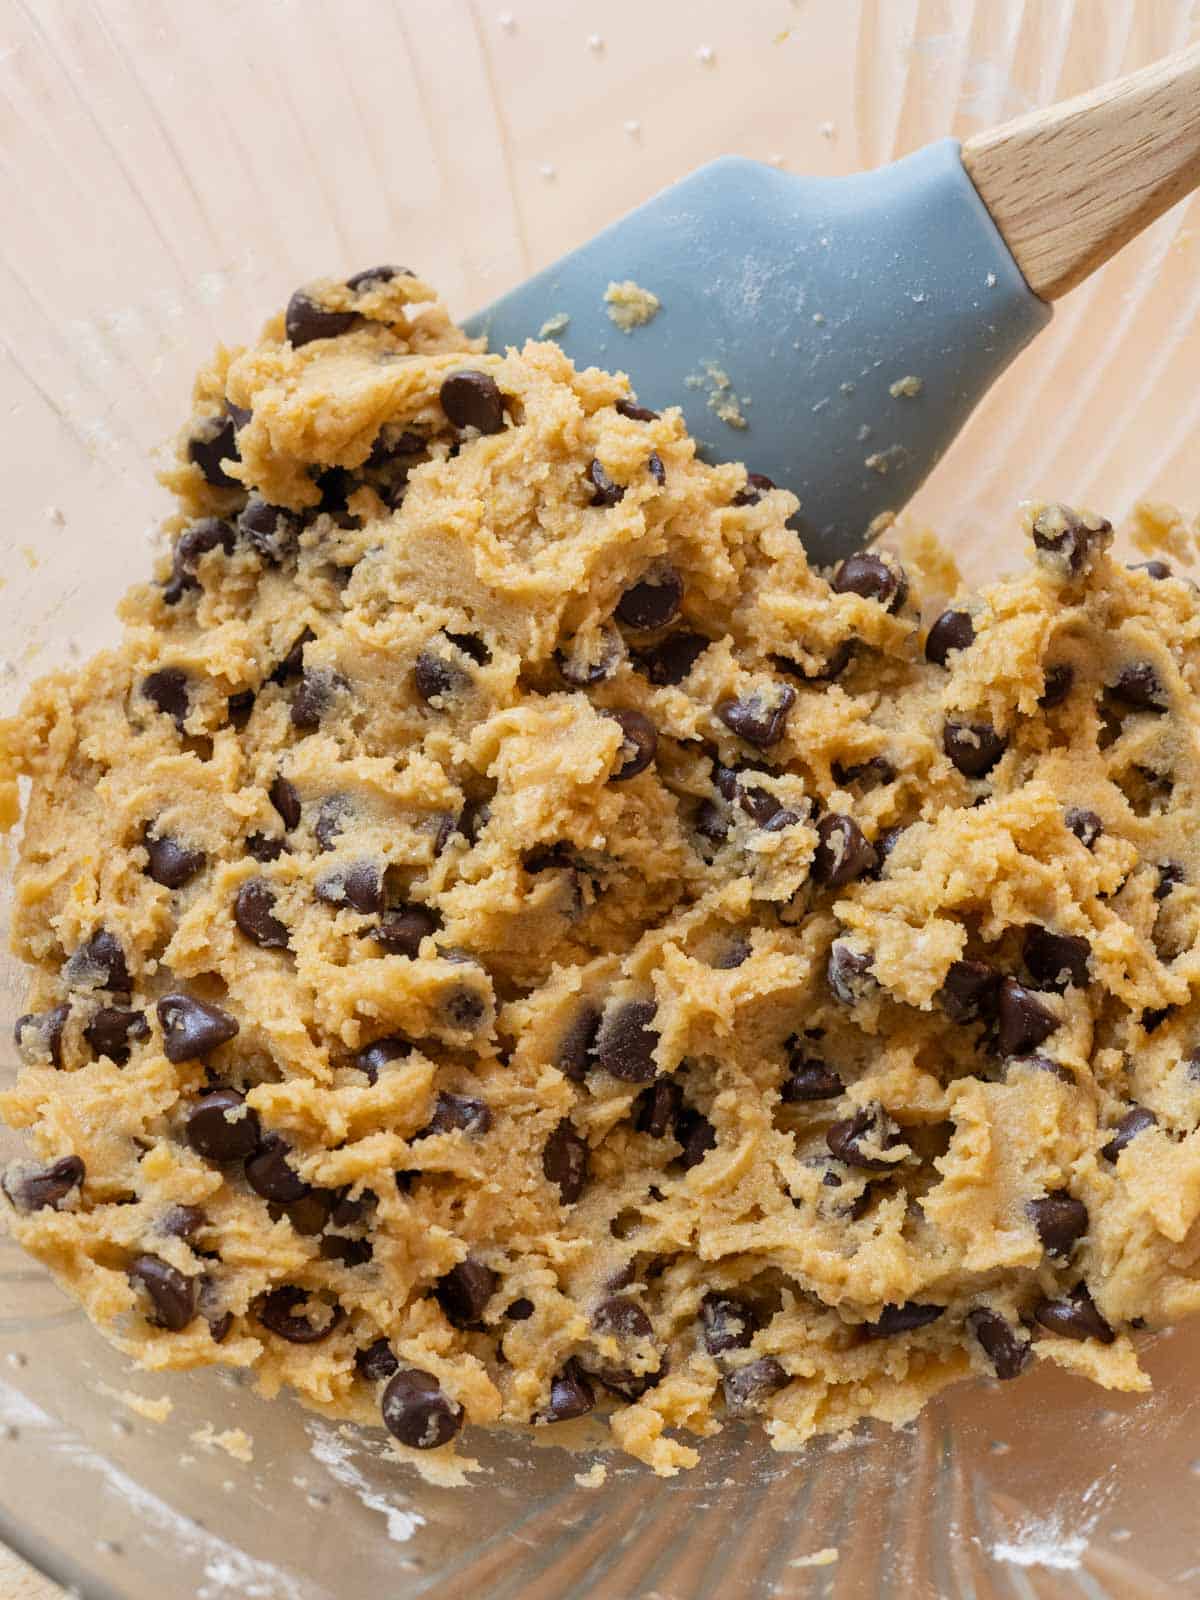
Step 3: Mix in dry ingredients and chocolate chips. Stir until no dry spots remain.
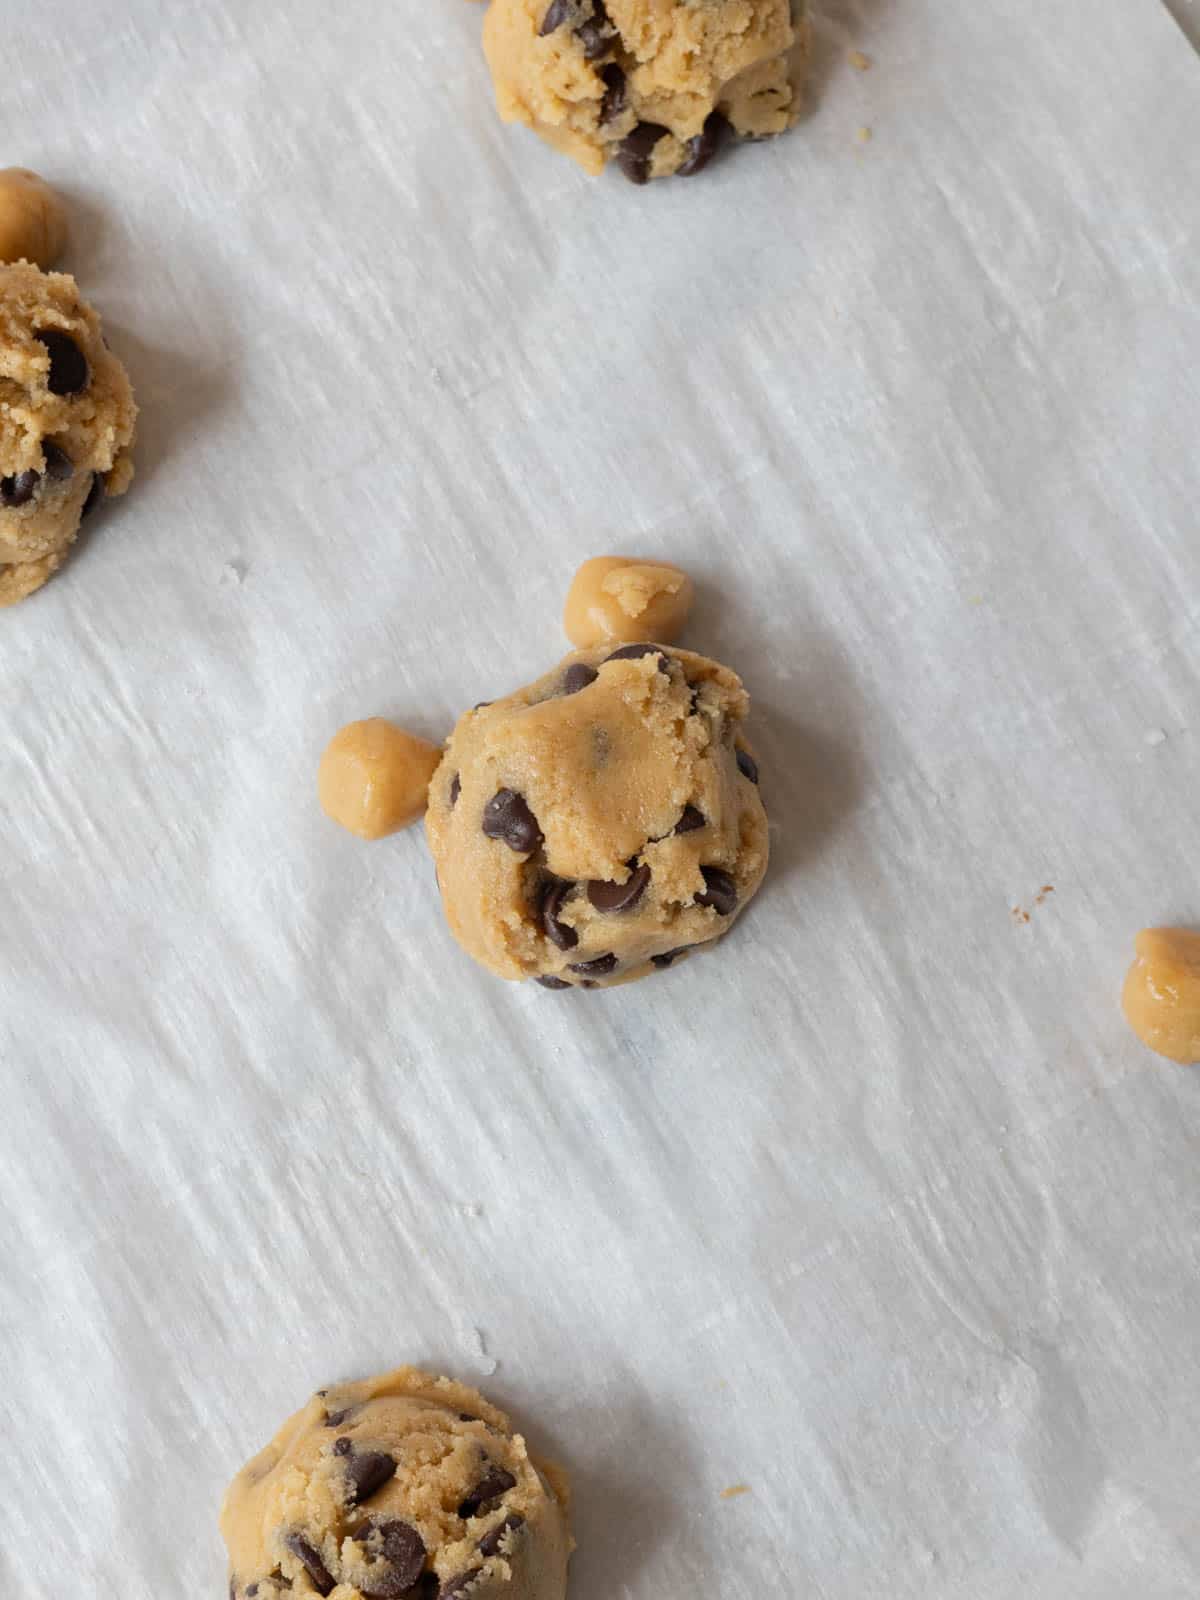
Step 4: Place 2-3 tablespoon cookie dough balls on a lined cookie sheet, 3-4 inches apart. Add ½ tsp balls for each ear as pictured. Bake at 350°F/177°C for 11-13 minutes, or until edges are set. Let cool on pan for about 5 minutes before transferring to wire rack.
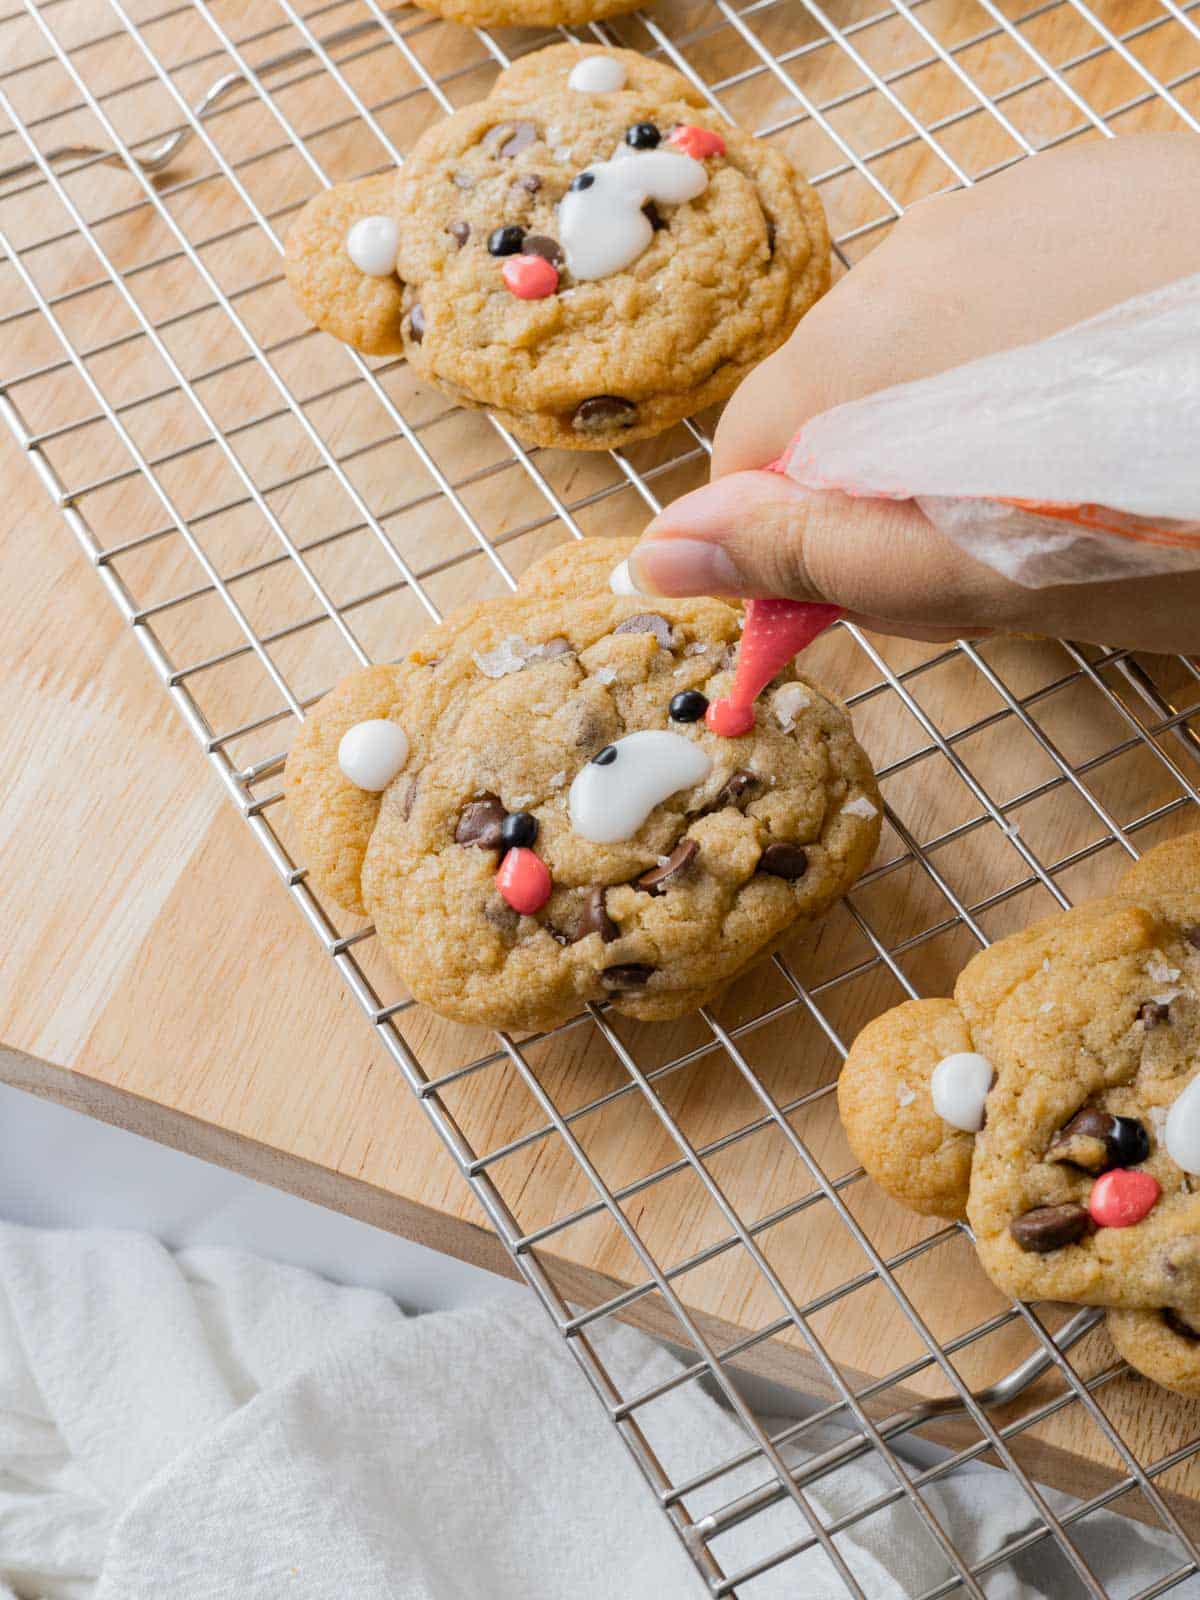
Step 5: Decorate cooled bear cookies using icing.
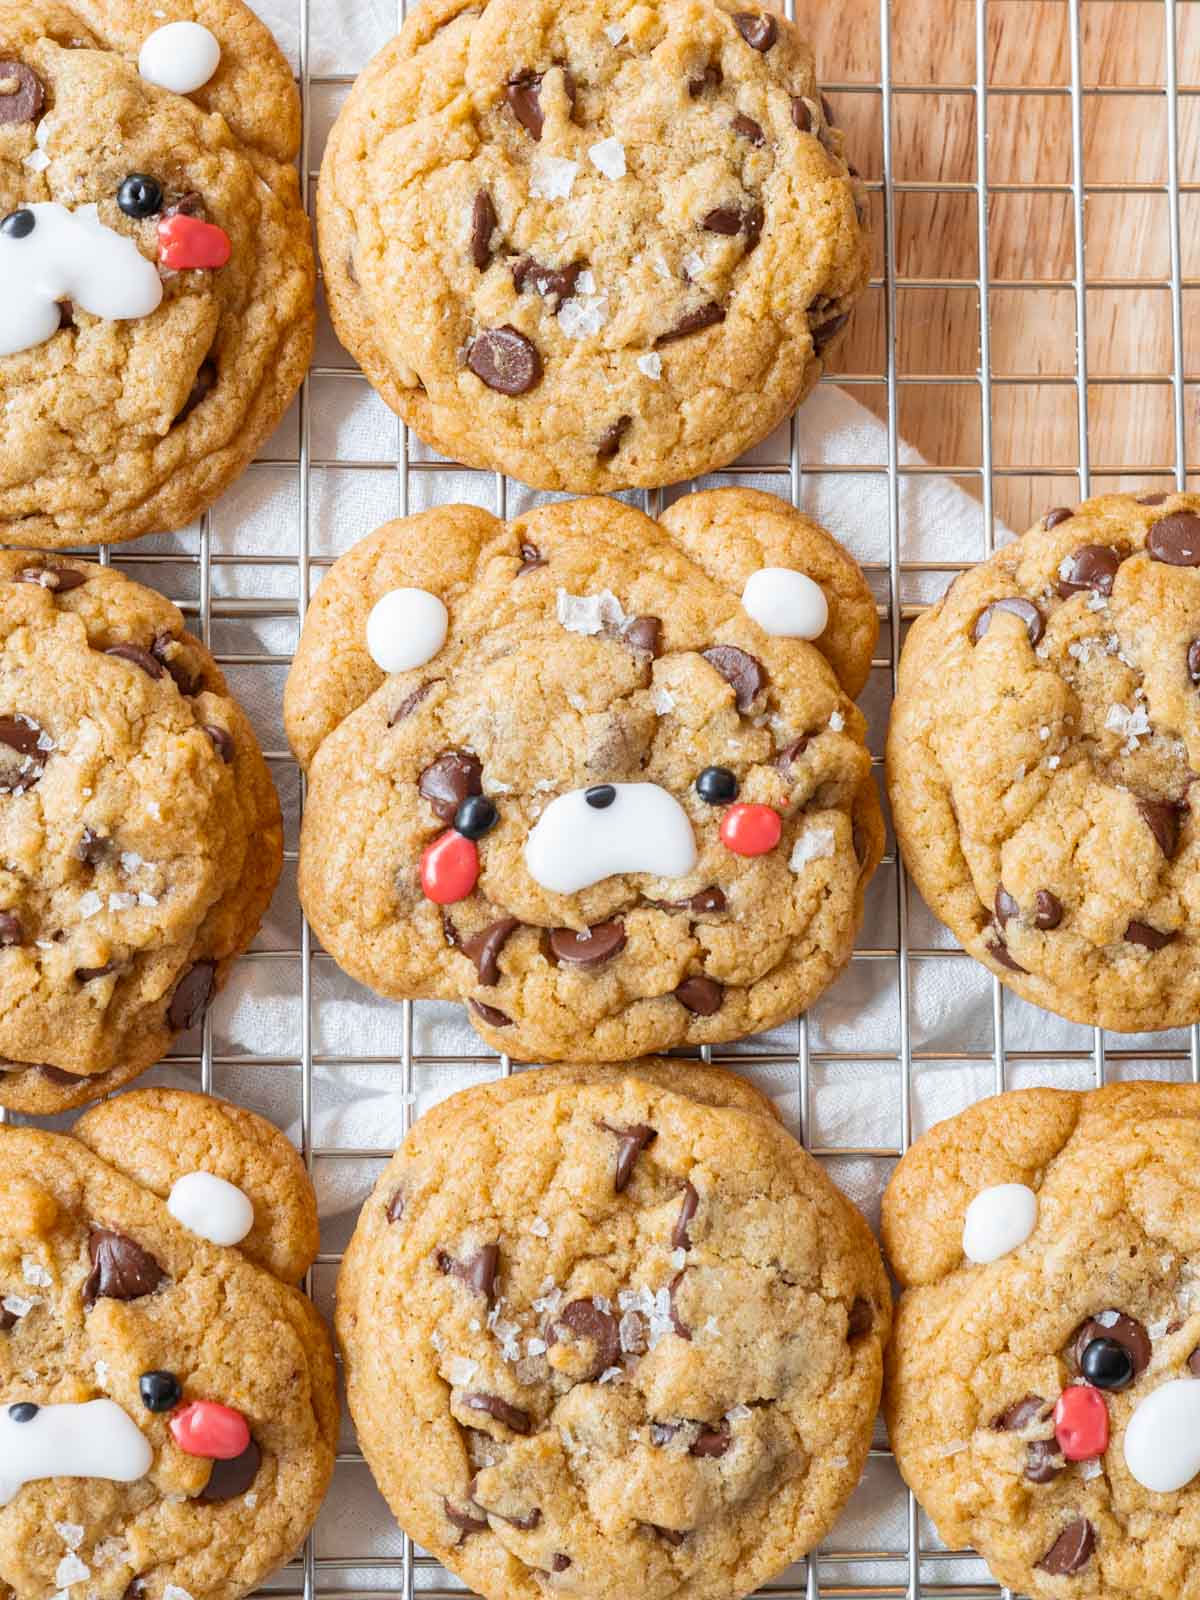
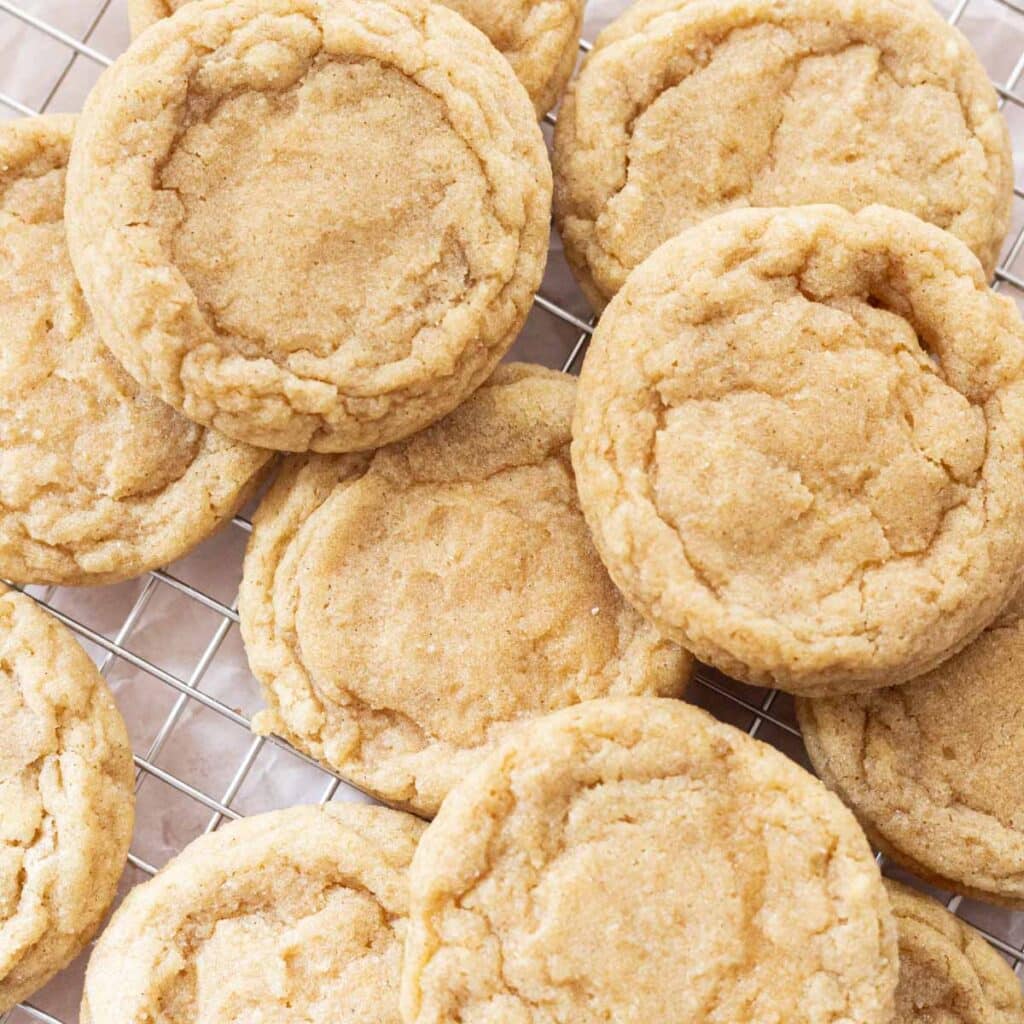
Step 6: Enjoy! Store cookies in an airtight container for up to 5 days. And there you have it… easiest chocolate chip cookies ever!
For full instructions, see the recipe card below.
💡 Baking Tips
- Weigh your ingredients! One of my favorite kitchen tools is a kitchen scale because it’s more accurate than measuring by volume. If you use cups, spoon the flour in gently, then level it with a knife or spatula.
- For rounder bears, use a silicone spatula to move the edges around your freshly baked, warm cookies.
Teddy Bear Cookie FAQs
Yes! To make these pumpkin cookies gluten-free, I recommend using a high quality 1:1 gluten-free flour, like King Arthur or Bob’s Red Mill.
You can use melted chocolates! I recommend using white chocolate for the ears and snouts, then milk/dark chocolate for the eyes and nose. For the blush, you can use red candy melts or dye white chocolate with oil-based red food coloring.
If you don’t have oil-based food coloring, then the chocolate will seize/become lumpy. To counter this, stir in a tsp of neutral oil (canola, vegetable) at a time, until it becomes smooth again.
Yes, you can. I recommend lining a plate or baking tray. Place the heads and ears on top; you don’t need to connect them now, since they may break apart when being stored. Freeze dough balls for about 1 hour.
Once they’re fully solid, transfer the dough balls to a large freezer bag or airtight container. They should keep for up to 3 months.
Bake as usual, but add about 2-3 more minutes to the baking time.
Storage
You can freeze the raw dough balls in an airtight container for up to 3 months. I recommend freezing the ears and heads separately, since they will likely break apart in the freezer anyway. Bake as usual—just add 1-2 more minutes to the total baking time.
For freshly baked cookies, allow them to fully cool. Then, store them in an airtight container at room temperature for up to 5 days.
❤️ More cookie recipes


Did you try this recipe?
Please leave a review & share it with me on Instagram, Facebook, Tiktok, or Pinterest!
Thank you so much! -Bianca ❤️
📖 Recipe
Teddy Bear Chocolate Chip Cookies (with EASY ICING RECIPE!)
✉️ want to save this?
Equipment
- Medium cookie scoop 2-3 tablespoon capacity
Ingredients
Dry ingredients:
- 1 ½ cup (187.5 g) all-purpose flour
- ¼ tsp (1 g) baking powder
- ½ tsp (2 g) baking soda
- ¾ tsp (4.5 g) fine sea salt
Wet ingredients:
- ½ cup (113.5 g) unsalted butter melted and cooled
- ⅓ cup (73.33 g) brown sugar packed
- ½ cup (100 g) granulated sugar
- 1 (1) egg
- 1 tsp (4 g) vanilla extract
Mix-ins:
- 1 cup (180 g) chocolate chips
Decorations for face:
- 4 tbsp (32 g) powdered sugar
- 1-2½ tsp (7.5-18.75 g) water
- food coloring black and pink or red
Instructions
Make the cookie dough:
- In a medium bowl, stir together all of the dry ingredients: 1 ½ cup (187.5 g) all-purpose flour, ¼ tsp (1 g) baking powder, ½ tsp (2 g) baking soda, and ¾ tsp (4.5 g) fine sea salt.
- In a large bowl, use a silicone spatula to mix melted ½ cup (113.5 g) unsalted butter, ⅓ cup (73.33 g) brown sugar, and ½ cup (100 g) granulated sugar until combined.
- Add 1 egg and 1 tsp (4 g) vanilla extract to the mixture. Stir until smooth.
- Dump in all of the dry ingredients and 1 cup (180 g) chocolate chips. Mix until on dry spots remain.
Scoop & bake cookies:
- Place oven rack in the middle of the oven. Preheat the oven to 350°F/177°C. Line two baking sheets with parchment paper/silicone mat.
- Use a medium cookie dough scoop to gather dough (about 2-3 tablespoons each) and plop onto lined baking tray, about 3-4 inches apart.
- For the ears, place 1 tsp dough balls on top left and right sides of each cookie.
- Bake for 11-13 minutes, or until edges are set and golden brown. Let cool on pan for about 5 minutes, then transfer to wire rack.Optional: For rounder bears, use a silicone spatula to push the edges around of your freshly baked, warm cookies. This will only work when the cookies are still hot.
Decorate:
- Note: You can a piping bag, toothpick, or cookie scribe to add on the details. I used piping bags. For the following steps, I use this one-bowl method to make the icing to limit how many dishes I need to clean! I started off with lighter colors and end with black.
- In a small bowl, add 4 tbsp (32 g) powdered sugar. Add ¼ tsp water at a time, mixing until you get a pipeable consistency. You may need up to 2 ½ tsp of water. If it's too liquidy, add more powdered sugar. If it's too stiff, add more water.
- Pour half of the mixture into a piping bag. This will be the white color for the snout and ears.
- To the remaining icing, add a drop of pink or red food coloring. Mix until combined, then add half of this mixture to another piping bag. This will be the blush.
- To the rest of the icing, add black food coloring. Mix until combined, then transfer all of the icing to another piping bag. This will be for the nose and eyes.
- Snip the very ends of the piping bags. First, pipe the snouts and ears using the white icing. Once the snouts are semi-dry, pipe the noses and eyes using the black icing. Finish with the pink icing for the blush.
- Enjoy! 🙂
Notes
- Storage: Store cooled, freshly baked cookies in airtight container at room temperature for up to 5 days.
- Tip for measuring ingredients: I weigh my ingredients with a kitchen scale, rather than using measuring cups because it is more accurate. If using measuring cups, I recommend spooning flour into the cup and overfilling it, then leveling it off with a knife.

This is the best recipe that I’ve tried. They are soft in the middle and crunchy on the corners. The taste is incredible.
Also, they’re really easy to make, as someone who has always struggled to get cookies right, they came out perfectly.
These cookies were really easy to make! and turned out really cute and yummy!!! I will definitely be making these again!!!
These were really good and easy to make! I made them for a bake sale and tripled the recipe they about 32 cookies and sold out and were delicious! I melted white and dark chocolate for the nose and eyes and dyed icing pink for the cheeks there were so cute thank you!
This was so fun, easy and fast!! They are so cute and SO YUMMY! Thank you!!
Hi Alice! Thank you soooo so much for your comment. Glad you enjoyed!! <3
Wonderful recipe and cookies! My family loved them and they tasted amazing! I didnt flattern them and left them as balls so the cookies turnex out to be thick which I personaly loved!
Hi Mia!! Thank you so much for your comment, I’m super glad you enjoyed the cookies 🙂 They’re so fun to make!
I just made the chocolate chip ones but they are so good and the recipe is really easy to remember! Highly recommend! ( I put them in for 12 mins and let them rest for 8). Awesome job💗❤️
Aww yay!! I’m so glad you enjoyed them, Morgania! <3
So easy, quick, delicious and adorable! I have made these cookies multiple times in the past month (including for my daughter’s school bake sale in which they sold in record time!) and each time they are perfect 😍 Thank you for your amazing recipes, Bianca! 💖
Loved these! They were really tasty and even with my poor decorating skills they came out cute. Thanks for sharing!
Hi, Maria!! YAY! I’m sooo glad to hear! Thank you so much for commenting. 🙂