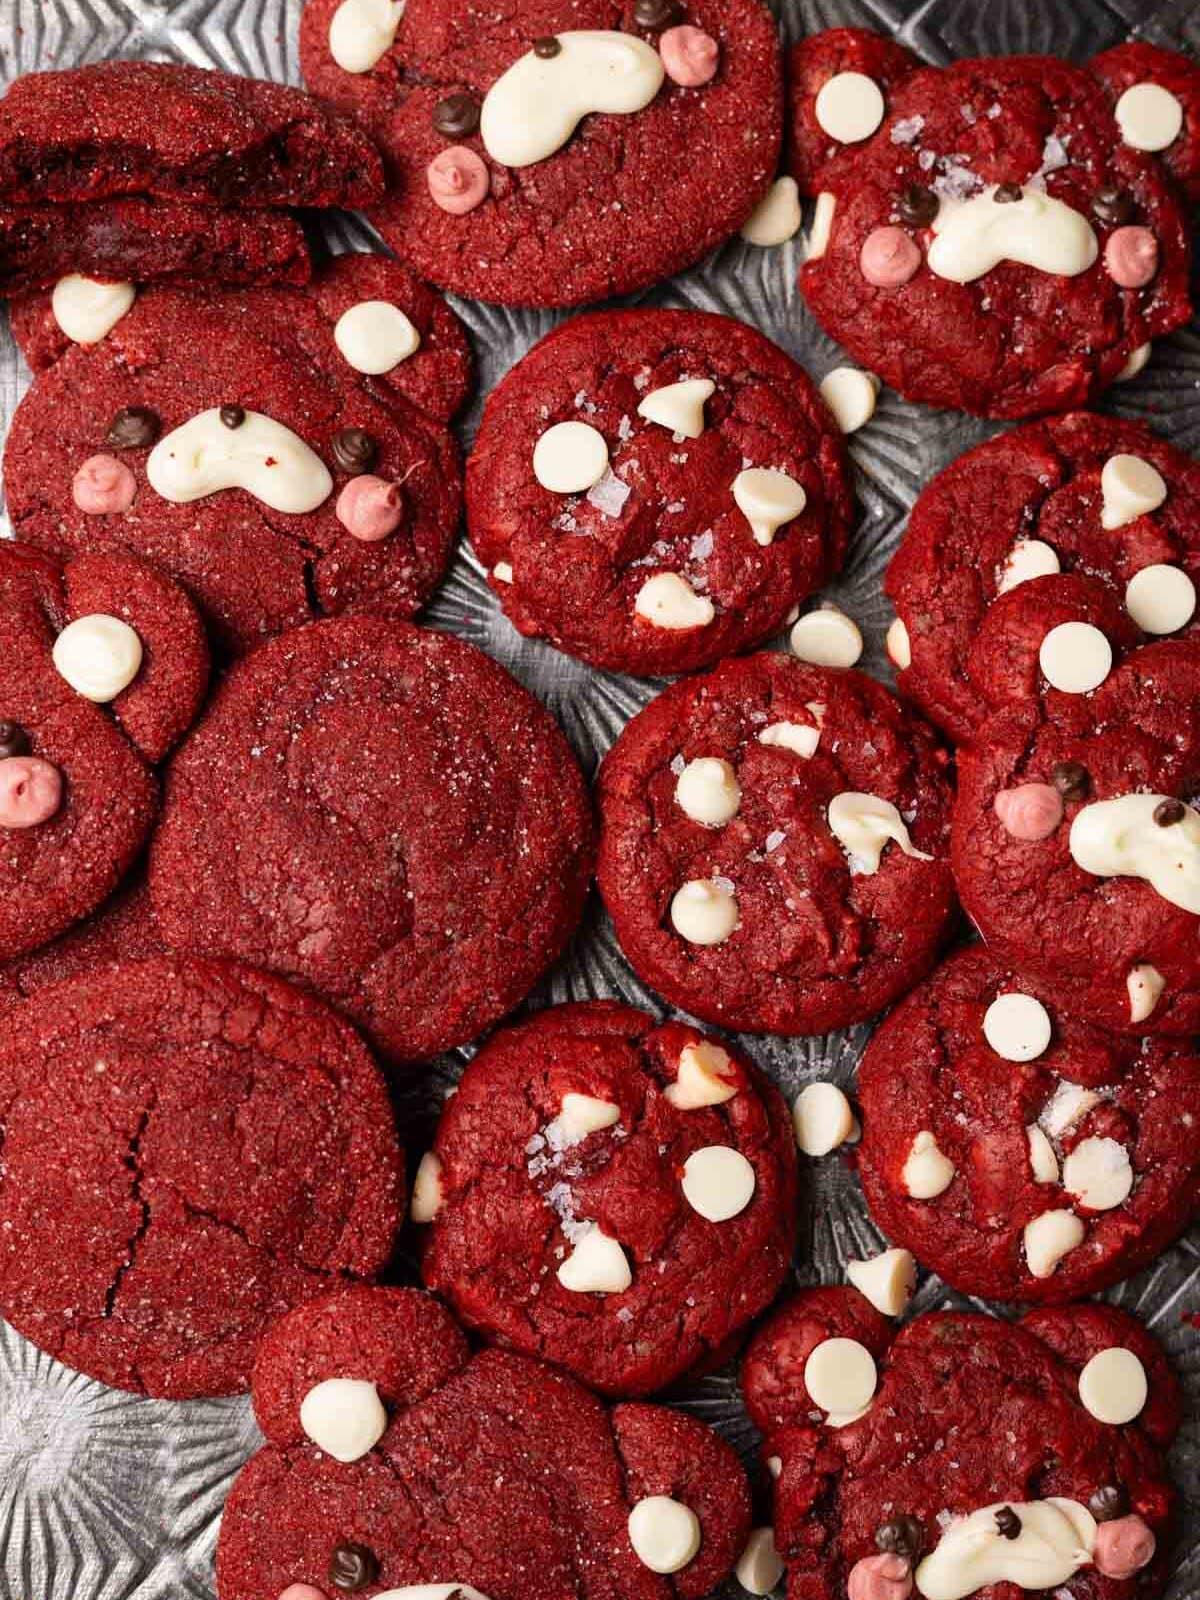
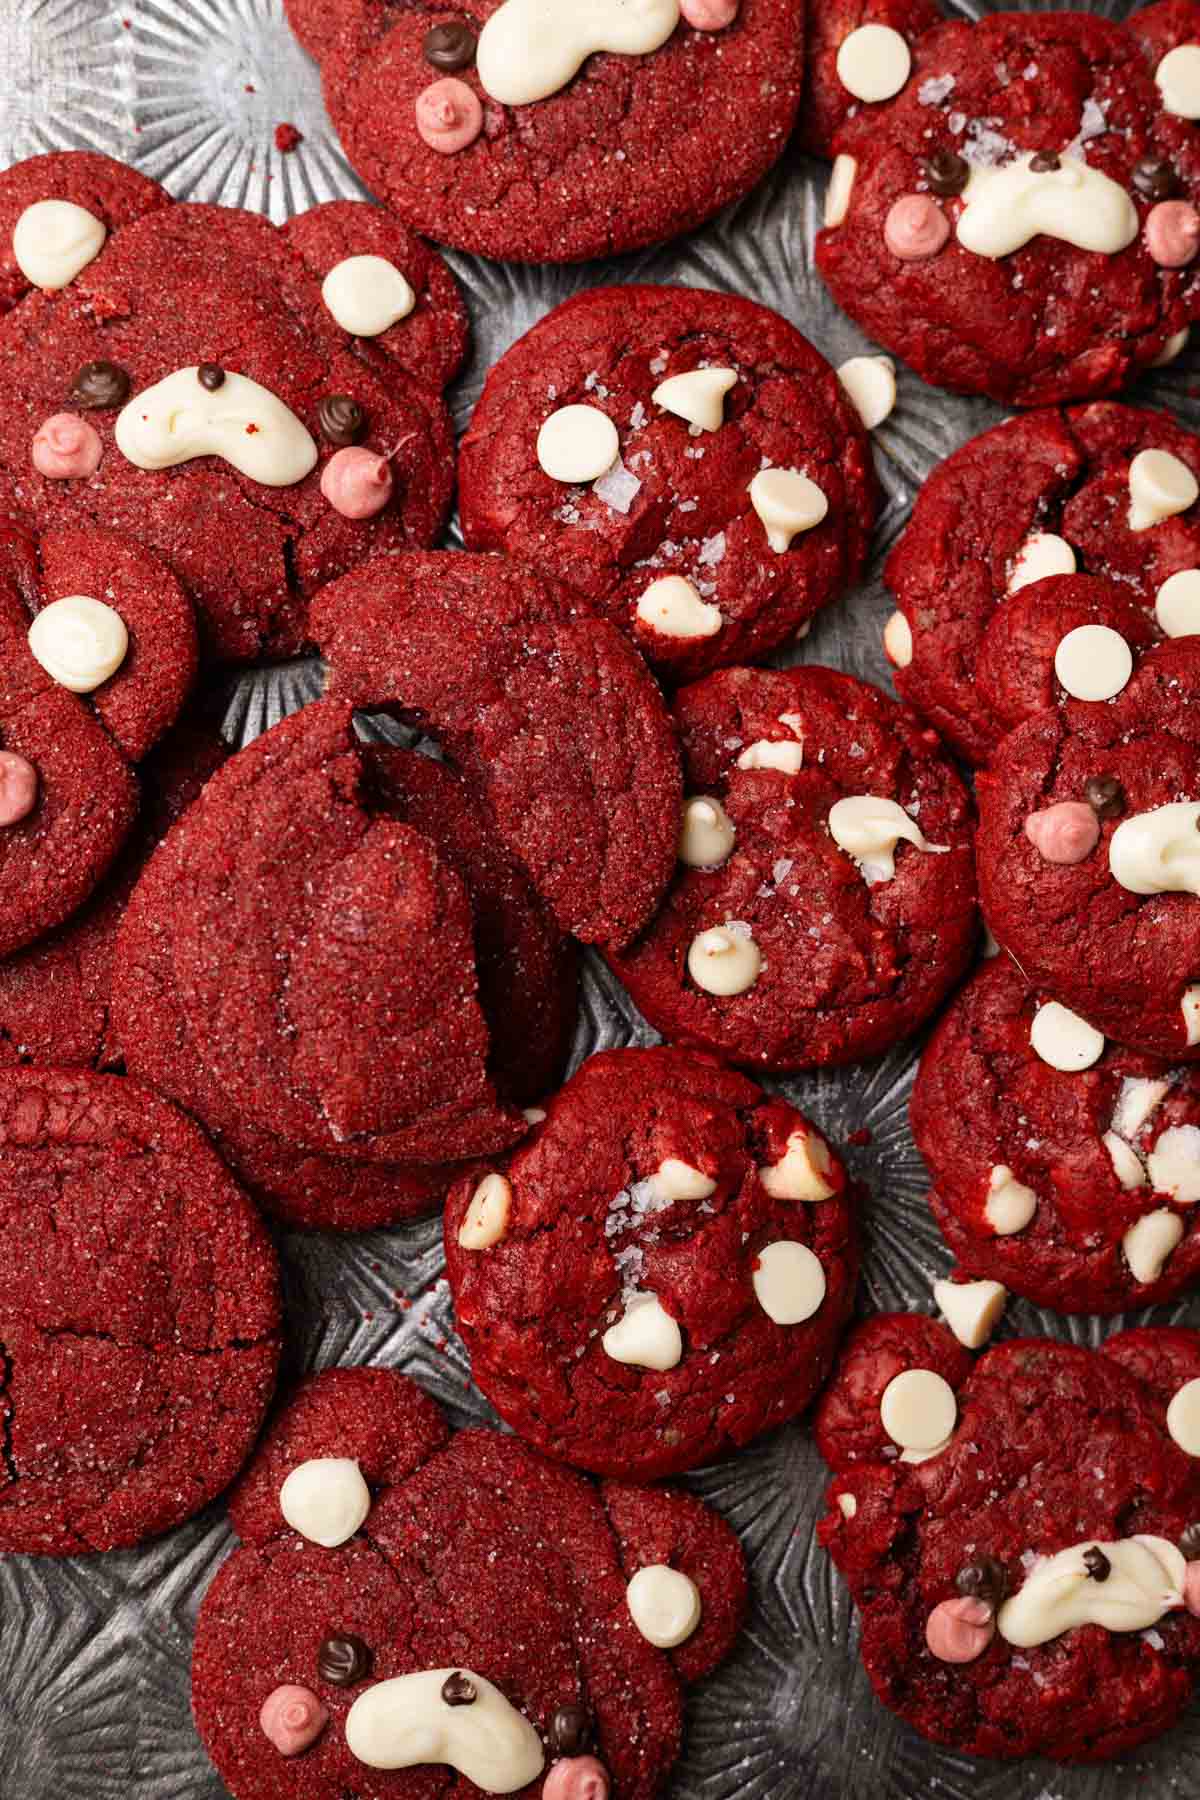
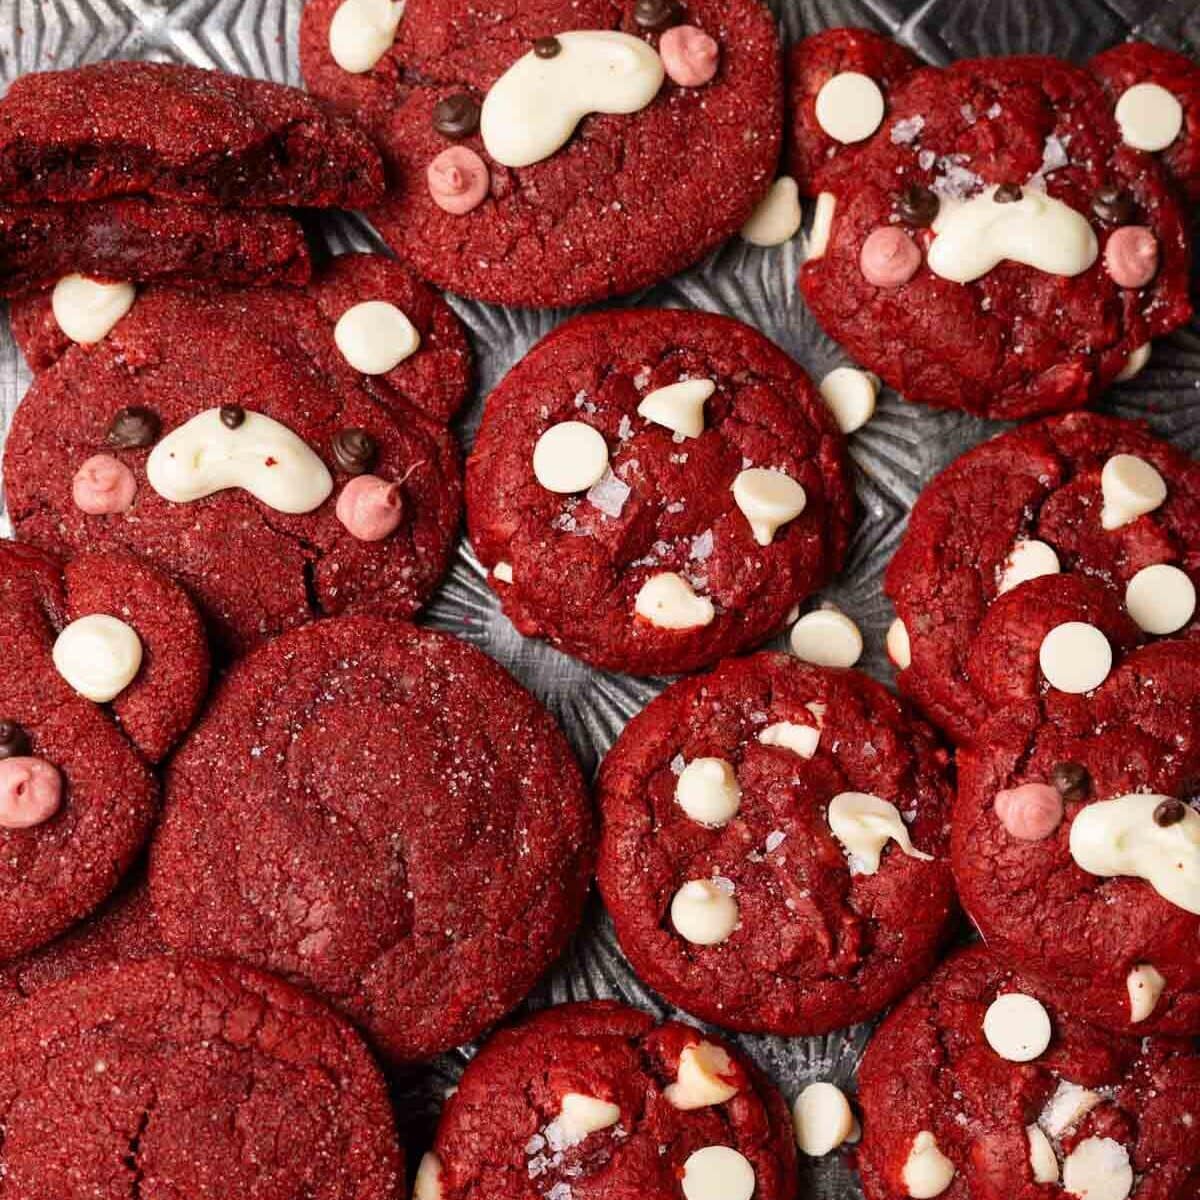
Delicious and easy red velvet cake mix cookies made two different ways: red velvet sugar cookies & white chocolate red velvet cookies with flaky sea salt! 🙂
Disclaimer: This post contains affiliate links! Clicking the links are no cost to you at all, but they help me earn commission as part of my income. All of my affiliate links are for products that I truly love using, and wouldn’t share otherwise. Any clicks are really appreciated! <3
✉️ want to save this?
About these red velvet cake mix cookies
why I LOVE boxed cake mix
Ever feel like making cookies, but don’t want to measure out a bunch of ingredients? Well, this boxed cake mix method may be the solution for you!
And if you’re wondering “why use boxed cake mix?”, it’s because it is SUPER convenient. The ratio of the ingredients are tried, tested, and true; they’re pretty much foolproof. The mixes are known to be sooo rich, flavorful and consistent. And since pre-made red velvet cake mix is already vibrantly red and delicious, you already knowwww it’ll make the perfect red velvet cookie dough.
this is a two-in-one recipe post!
To make box cake mix cookies, all you’ll need are a few extra ingredients: eggs, butter, cornstarch, plus any mix-ins. And for this post, I decided to include two recipes in one—red velvet sugar cookies and red velvet chocolate chip cookies! So, for the mix-ins, you’ll just need some sugar, white chocolate chips, and flaky sea salt. That’s it.
I’d love to try the box cake cookie method out on other flavors like funfetti, yellow, or chocolate. Or maybe in the future, I’ll try making brookies out of brownie mix. But if you have other flavors/bakes you’d like to see, please feel free to let me know in the comments!
So, are you ready to learn how to make red velvet cookies from cake mix? If so, keep on reading!
*For red velvet cookies made from complete scratch, check out my red velvet cookie recipe!
Equipment
- Large bowl
- Silicone spatula: A silicone spatula helps you scrape the sides and bottom of your mixing bowl, ensuring sure all dry ingredients are incorporated.
- Small bowl
- Small cookie scoop: Each cookie dough ball was about 1 ½ tbsp.
- Cookie sheets
- Parchment paper or silicone mats
- Wire rack
And if you want to decorate the cookies into bears, which is totally optional:
- 2 Small microwave-safe mixing bowls
- 1 small silicone spatula
- 3 piping bags or toothpicks
- Scissors
Ingredients
- Red velvet cake mix: I used Duncan Hines.
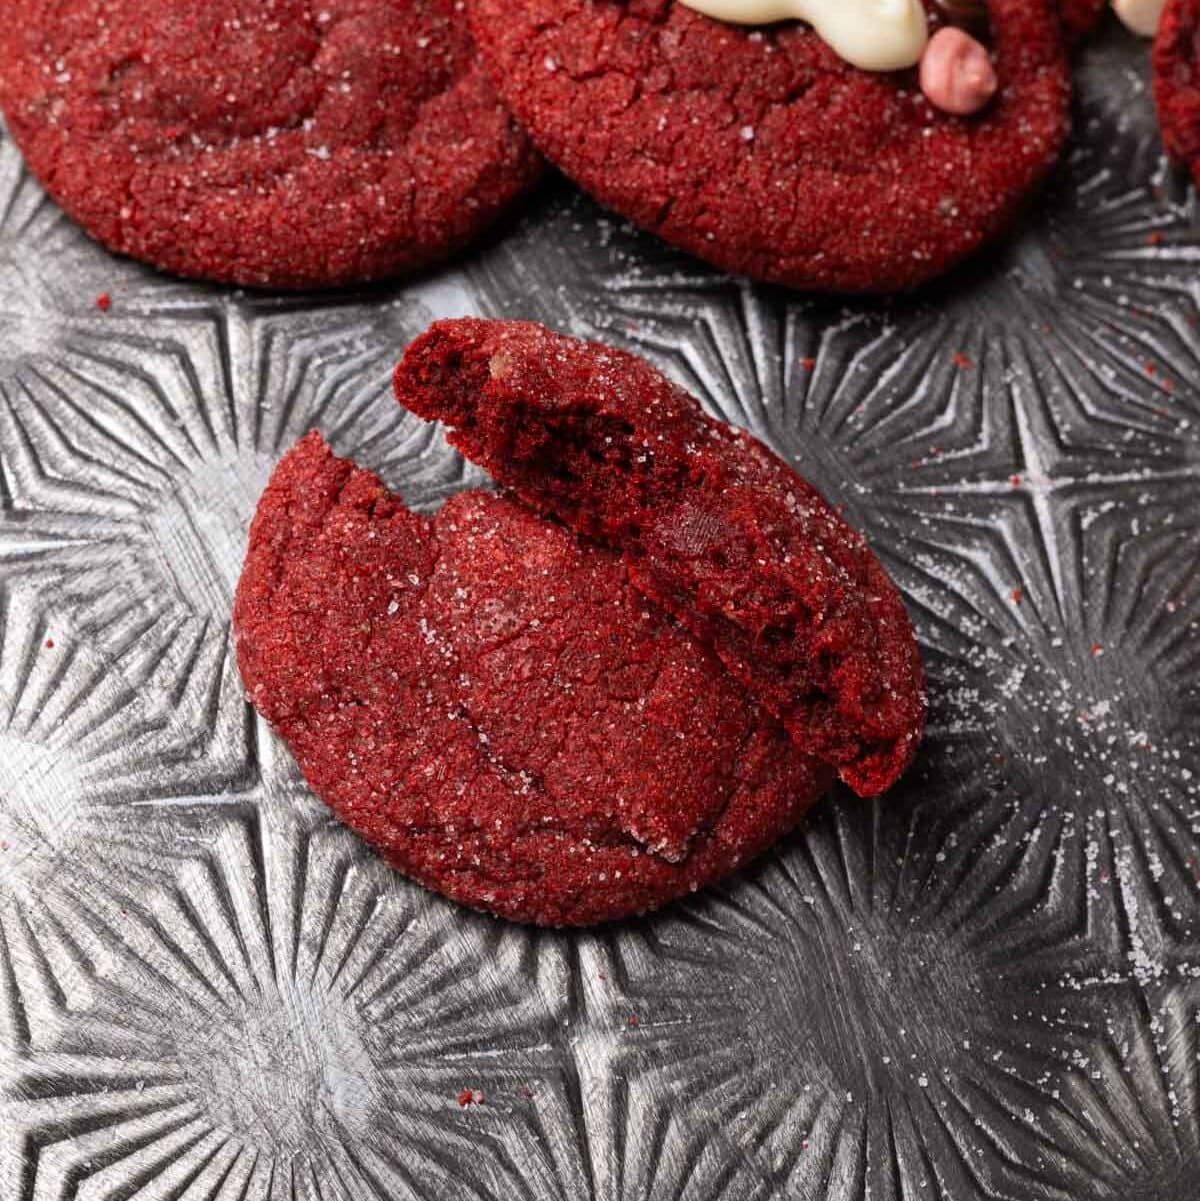
- Cornstarch: This helps keep the cookies soft and chewy!
- Unsalted butter: I like using Vital Farms.
- Eggs
- Granulated sugar
- White chocolate chips
- Flaky sea salt
Again, this is optional if you’d like to follow the bear design:
- White chocolate chips
- Milk chocolate chips
- Oil-based food coloring (pink or red)

How to make cookies out of cake mix
- Mise en place: aka “put in place”. This French saying simply means measure out all of the ingredients and prep your equipment beforehand. This helps you stay more organized and move more seamlessly in the kitchen while you make these mini cookies.
- Mix red velvet cookie dough ingredients: In a large bowl, combine cake mix, cornstarch, melted butter, and eggs until no dry spots remain.
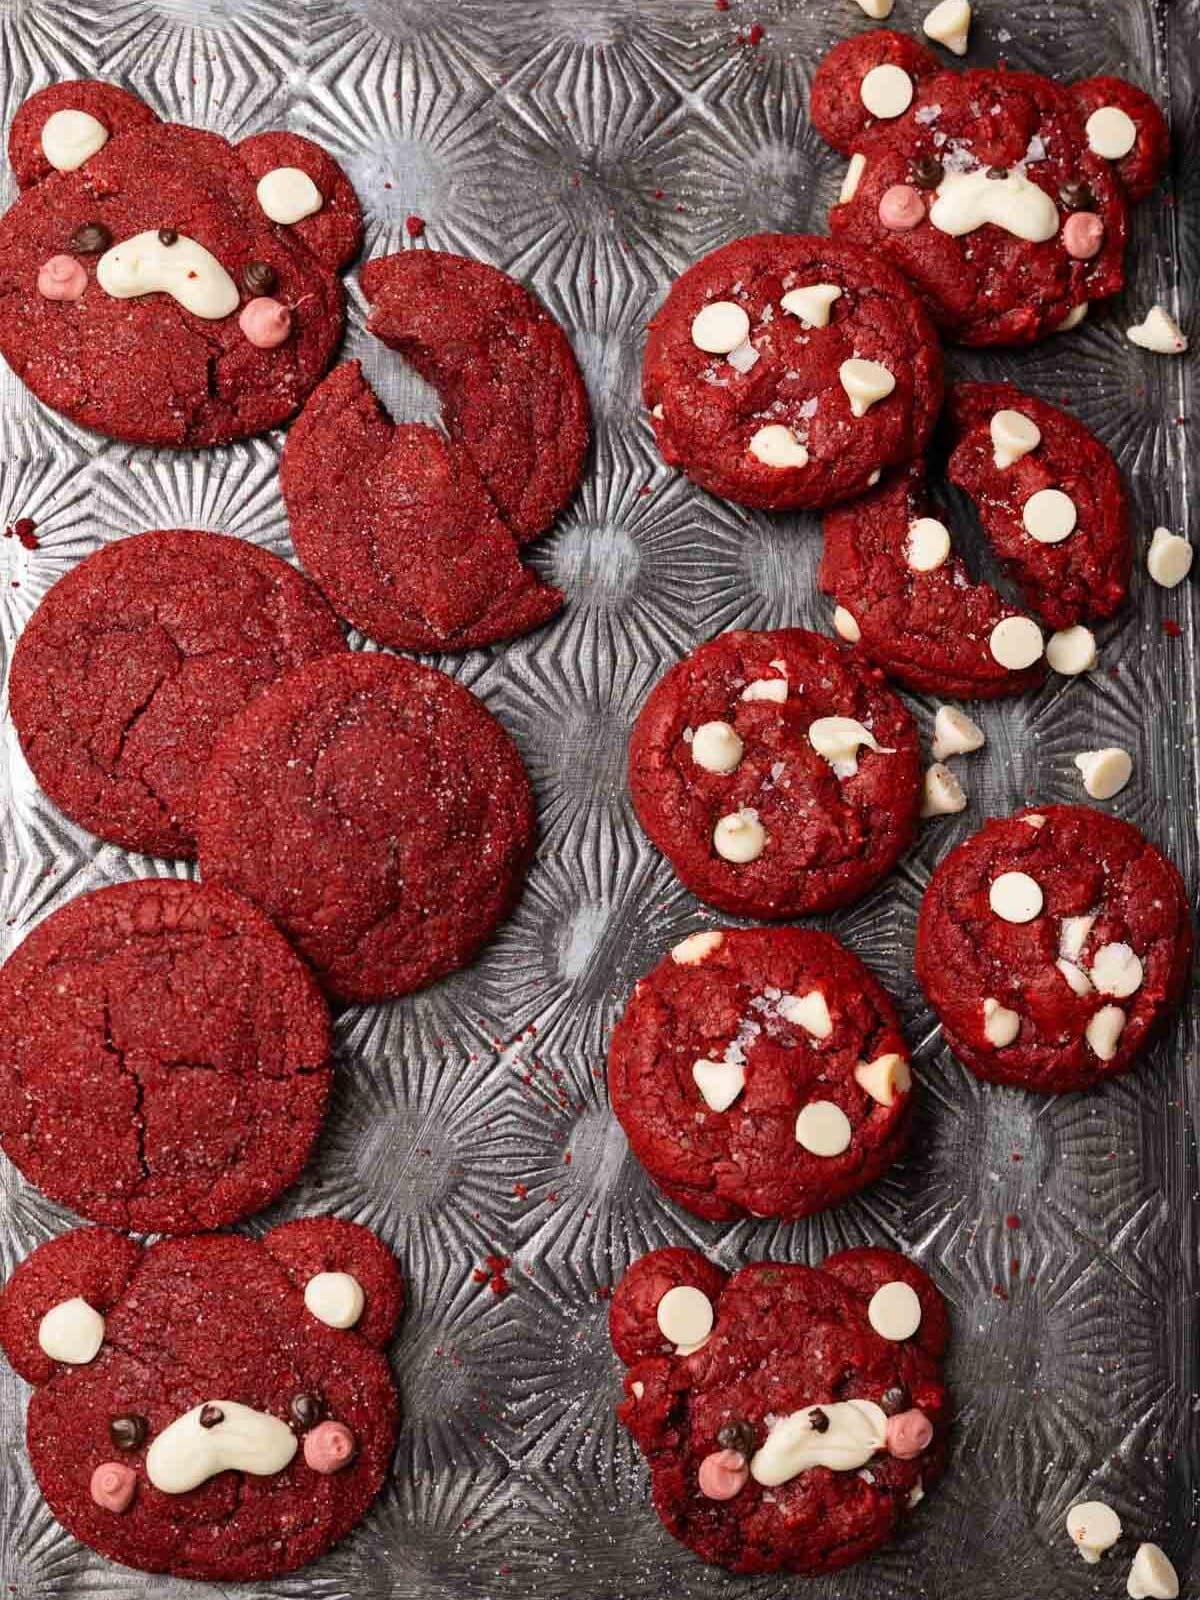
- If making red velvet sugar cookies: Scoop 1 ½ tbsp balls of dough and roll into sugar. Place cookies on baking sheet, spacing them apart by 2-3 inches. If making a bear design like I did, roll ½ tsp balls of dough. Each ball will be for one ear. Coat them in sugar and place 2 ears on top of each cookie. Repeat with remaining dough. Bake at 350°F/177°C for 8 minutes, then bang cookie sheet on oven rack or heat-safe surface. This will cause the cookies to deflate and crinkle. Bake for 2 more minutes, or until edges are set. Bang cookie sheet one last time and let cool on sheet for 5 minutes.
- If making red velvet white chocolate chip cookies: Fold white chocolate chips into batter. Scoop 1 ½ tbsp balls of dough and place on baking tray, spacing cookies 2-3 inches apart. Again, if making a bear design like I did, roll ½ tsp balls of dough. Each ball will be for one ear. Coat them in sugar and place 2 ears on top of each cookie. Repeat with remaining dough. Bake at at 350°F/177°C for 9-11 minutes, or until edges are set.
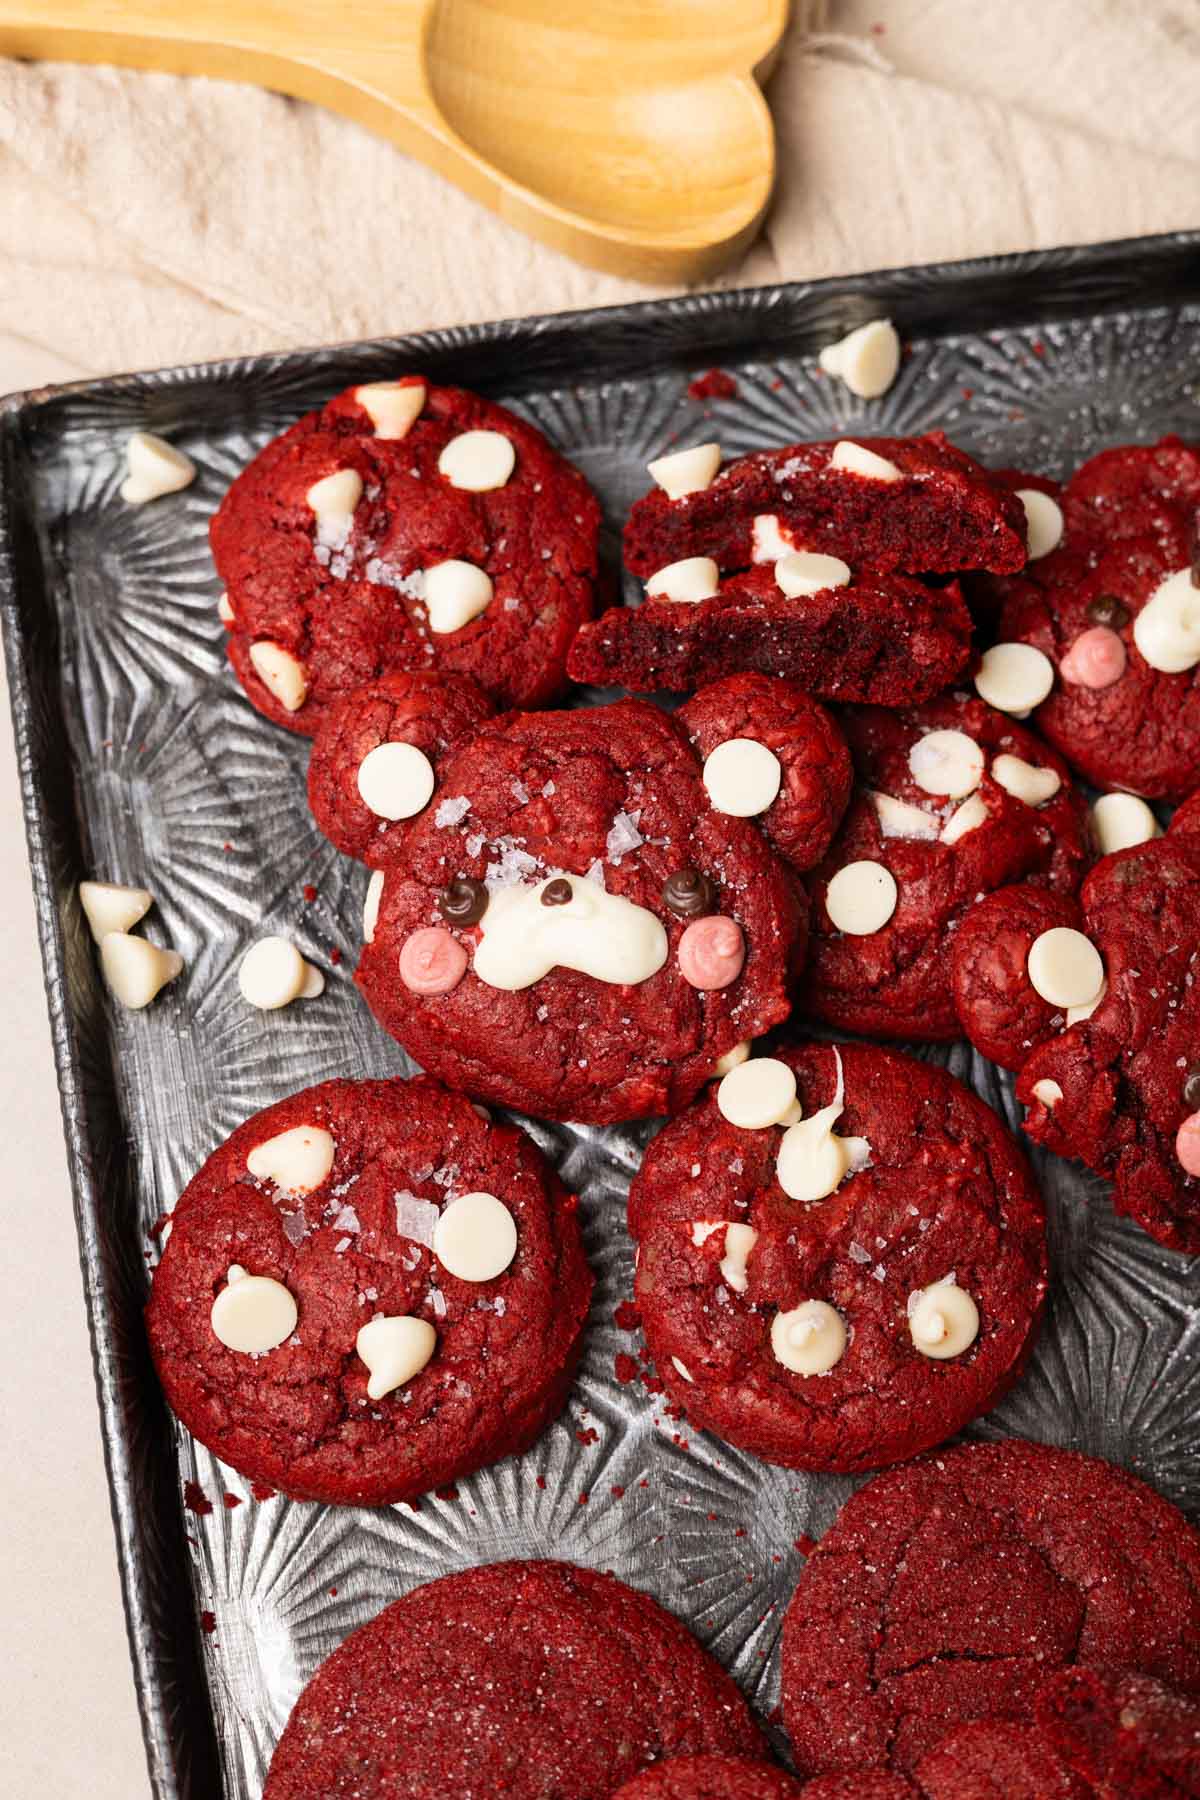
- Decorate (optional): If decorating as bears, use melted chocolate to draw on the faces.
- Store: You can store the red velvet cake mix cookies in an airtight container at room temperature for up to 7 days.
Red velvet cake mix cookie variations
- Add other mix-ins: Feel free to add chopped nuts, sprinkles, chocolate chips, mini marshmallows, M&M’s, etc.!
- Roll in powdered sugar: Before baking, roll the balls of dough in powdered sugar! This will make crinkle cookies.
Tips
This is totally optional, but if you want to get perfectly round cookies, you can scoot them! Basically, once the cookies are out of the oven, immediately place a circle cookie cutter or mug (larger than the cookie) on top of a warm, oddly-shaped cookie. Move it around in a circular motion… this will help shape them into perfectly round cookies!
And if you want to make the red velvet white chocolate chip cookies even more ~aesthetic~, I recommend the following: once the cookies are warm, plop on 2-3 white chocolate chips on top, then sprinkle on flaky sea salt. This will show more of the white chocolate in the cookies while also adding more flavor. They’ll be picture perfect!
FAQs
I haven’t tried other ones yet, but will in the near future! I’m going to try funfetti, yellow cake mix, etc. I’ll keep you posted!
I found adding cornstarch helps make the cookies extra soft!
How to store cookies
If you’d like to store the red velvet cookie dough, I recommend lining a tray or plate with parchment/wax paper. Then, arrange the raw cookie balls in a single layer and freeze for about 1 hour.
Once the cookie dough balls are frozen, you can transfer them to an airtight container and freeze for up to 3 months. Bake as usual, but add 1-2 extra minutes.
If you’d like to store freshly baked cookies, wait until they are fully cool. Then, transfer the red velvet cookies to an airtight container at room temperature for up to one week.
Other cookie recipes
- Red velvet cookies (from scratch, no boxed cake mix!)
- Frog matcha cookies
- Strawberry Kirby cookies
- Brown butter sugar cookies
I really hope you enjoy this red velvet cookie recipe. If you make these cookies from cake mix, I’d love to see them. You can tag me at #bitesbybianca / @bitesbybianca on Instagram. Enjoy! 🙂
Video tutorial
📖 Recipe
Red Velvet Cake Mix Cookies
✉️ want to save this?
Equipment
- 1 small bowl for sugar cookies
- 2 microwave-safe bowls, optional for bear design
- 1 small silicone spatula, optional for bear design
- 3 Piping bags optional for bear design
- 1 pair of scissors, optional for bear design
Ingredients
Red velvet cookie dough:
- 15.25 ounces (432.33 g) red velvet cake mix I used an entire box of Duncan Hines Red Velvet cake mix
- 1 tablespoon (8 g) cornstarch
- ½ cup (113.5 g) unsalted butter melted and cooled
- 2 (2) eggs
For red velvet sugar cookies:
- ¼ cup (50 g) granulated sugar
For red velvet white chocolate chip cookies:
- ¼ cup (33 g) white chocolate plus more for topping for half a batch of cookies; if using all dough, add ½ cup.
- flaky sea salt for topping
Optional decorations for bear design:
- 3 tablespoons (44.36 g) white chocolate
- ½ tablespoon (7.5 g) milk or dark chocolate
- oil-based pink food coloring, see steps
Instructions
For the red velvet cookie dough:
- Preheat the oven to 325°F/162°C. Line two baking sheets with parchment paper/silicone mat.
- In a large bowl, use silicone spatula to mix together all of the ingredients: 1 15.25 oz package red velvet cake mix, 1 tbsp cornstarch, ½ cup melted butter, and 2 eggs.
- For the next steps, you can either make red velvet sugar cookies, red velvet white chocolate chip cookies, or both! I chose to do both. First, I scooped, rolled and baked about 13 sugar cookies. Then to the rest of the batter, I folded in white chocolate chips, scooped, and baked. Feel free to do the same or only make one flavor!
For red velvet sugar cookies:
- Add ¼ cup granulated sugar to small bowl.
- Use cookie scoop to gather dough (about 1 ½ tablespoons each) and roll into granulated sugar. Place cookie dough balls on lined baking sheet about 3 inches apart. Repeat with remaining dough.
- To make bears (optional): For the ears, take about 1 tsp of dough, split it in 2, and roll them in sugar. Place them on top left and right sides of a cookie dough ball on the baking sheet.
- Bake for 8 minutes, until cookies have slightly puffy centers. Bang cookie tray on wire rack or heat-safe surface. This will make cracks in the dough and deflate them. Bake for another 2 minutes, or until edges are set.
- Remove from oven and bang cookie tray one last time. Optional: For rounder, more aesthetic cookies, take a something circular (cookie cutter, mug, cup) and larger than your cookies, and place it on top of a warm, freshly baked cookie. Move the circular object around to shape the edges of the cookie until it becomes rounder.
- Allow to cool on sheet for at least 5 minutes, then transfer to wire rack.
For red velvet white chocolate chip cookies:
- If you split the cookie dough into two, fold in ¼ cup of white chocolate chips. If you are turning all of the cookie dough into white chocolate chip cookies, add ½ cup white chocolate chips.
- Use cookie scoop to gather dough (about 1 ½ tablespoons each). Place cookie dough balls on lined baking sheet about 3 inches apart. Repeat with remaining dough.
- Bake for 9-11 minutes, or until edges are set. Immediately sprinkle flaky sea salt on top. Optional: For rounder, more aesthetic cookies, take a something circular (cookie cutter, mug, cup) and larger than your cookies, and place it on top of a warm, freshly baked cookie. Move the circular object around to shape the edges of the cookie until it becomes rounder. Then, top with a few more mini chocolate chips.
For the bear faces (optional):
- Note: You can a piping bag, toothpick, or cookie scribe to add on the details. I used piping bags.
- Add white chocolate to small microwave-safe bowl and microwave in 30-second intervals, stirring in between, until fully melted.
- Leave about a tablespoon of melted white chocolate and transfer the rest to a piping bag. Use this for the snouts and ears.
- To the remaining white chocolate, add a drop of oil-based pink food coloring. Transfer to piping bag and use this for the blush.If you don't have oil-based food coloring, then the chocolate will seize/become lumpy. To counter this, stir in a tsp of neutral oil (canola, vegetable) at a time, until it becomes smooth again.
- Melt dark or milk chocolate in another bowl, transfer to piping bag, and use this to draw on the eyes and nose.
- Enjoy!
Notes
- Store cookies in an airtight container at room temperature for up to 7 days.