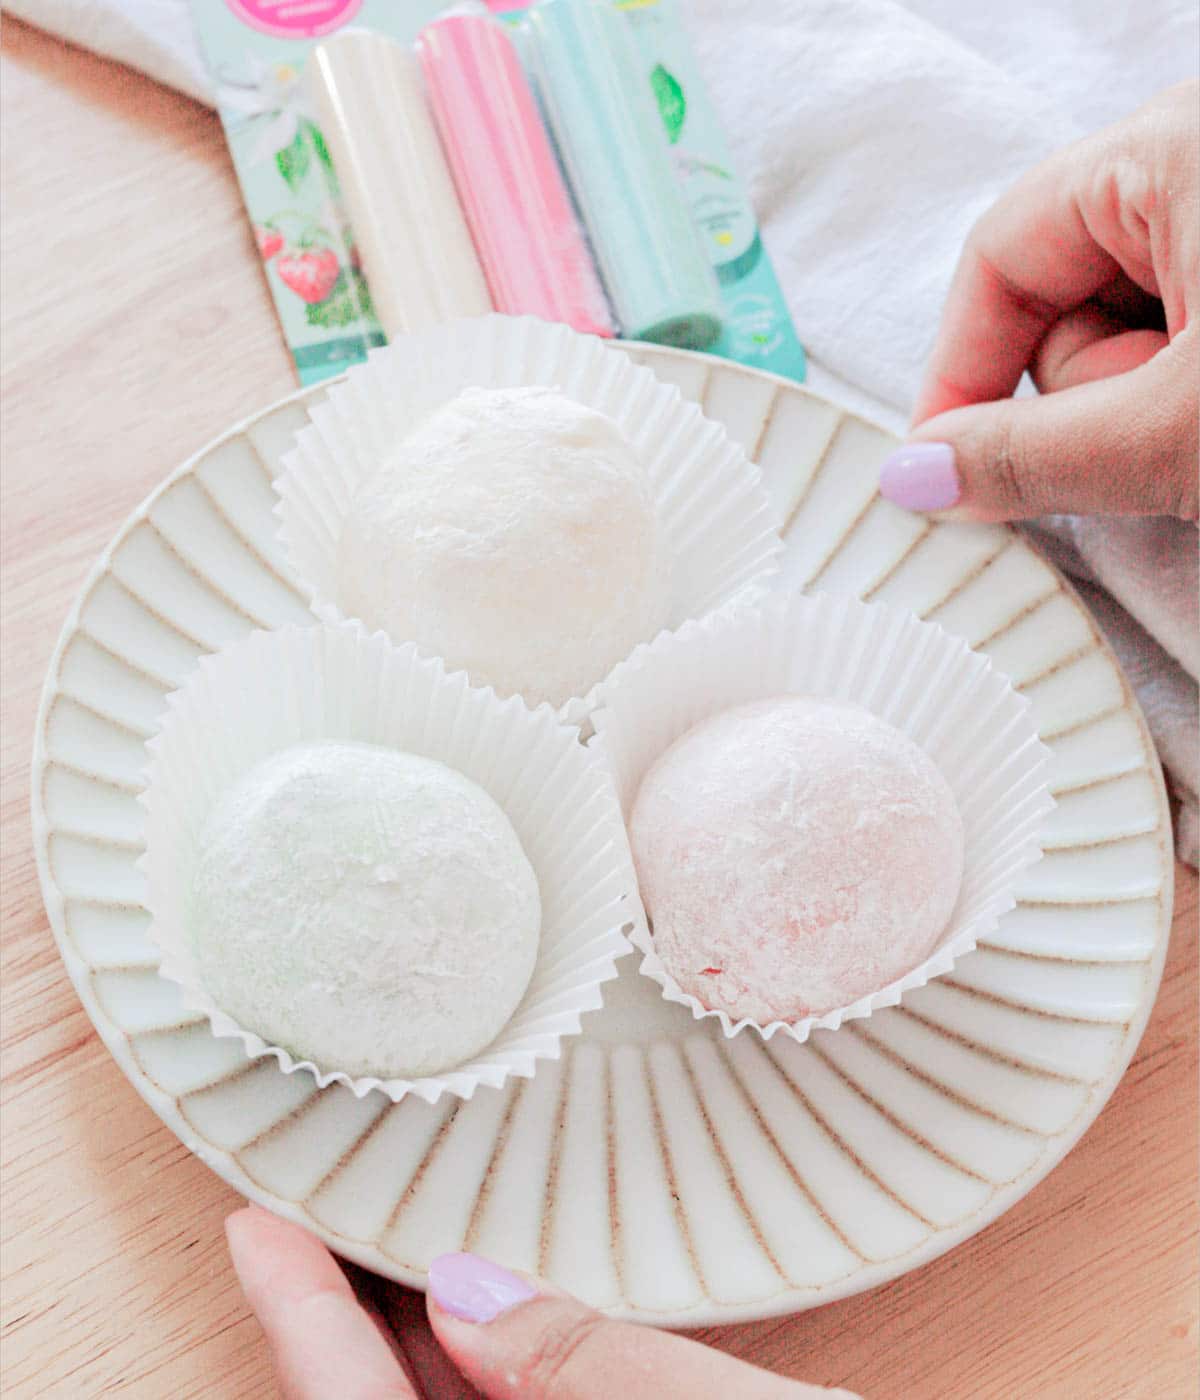
Love mochi ice cream and want to make it from scratch? Follow my easy tutorial to make any flavor you want! And feel free to batch make it… so you always have mochi ice cream in stock. 😀
✉️ want to save this?
❤️ Why You’ll Love This Recipe
- You won’t need any special equipment. You can make the mochi dough in the microwave or on the stovetop! No fancy equipment required.
- It’s versatile. You can flavor the mochi dough with cocoa powder, matcha, or other powders. And you can fill them with any ice cream flavor you want!
Looking for more mochi recipes? Try out my matcha mochi brownies!
Ingredients
To make mochi ice cream from scratch, you’ll need the following ingredients:
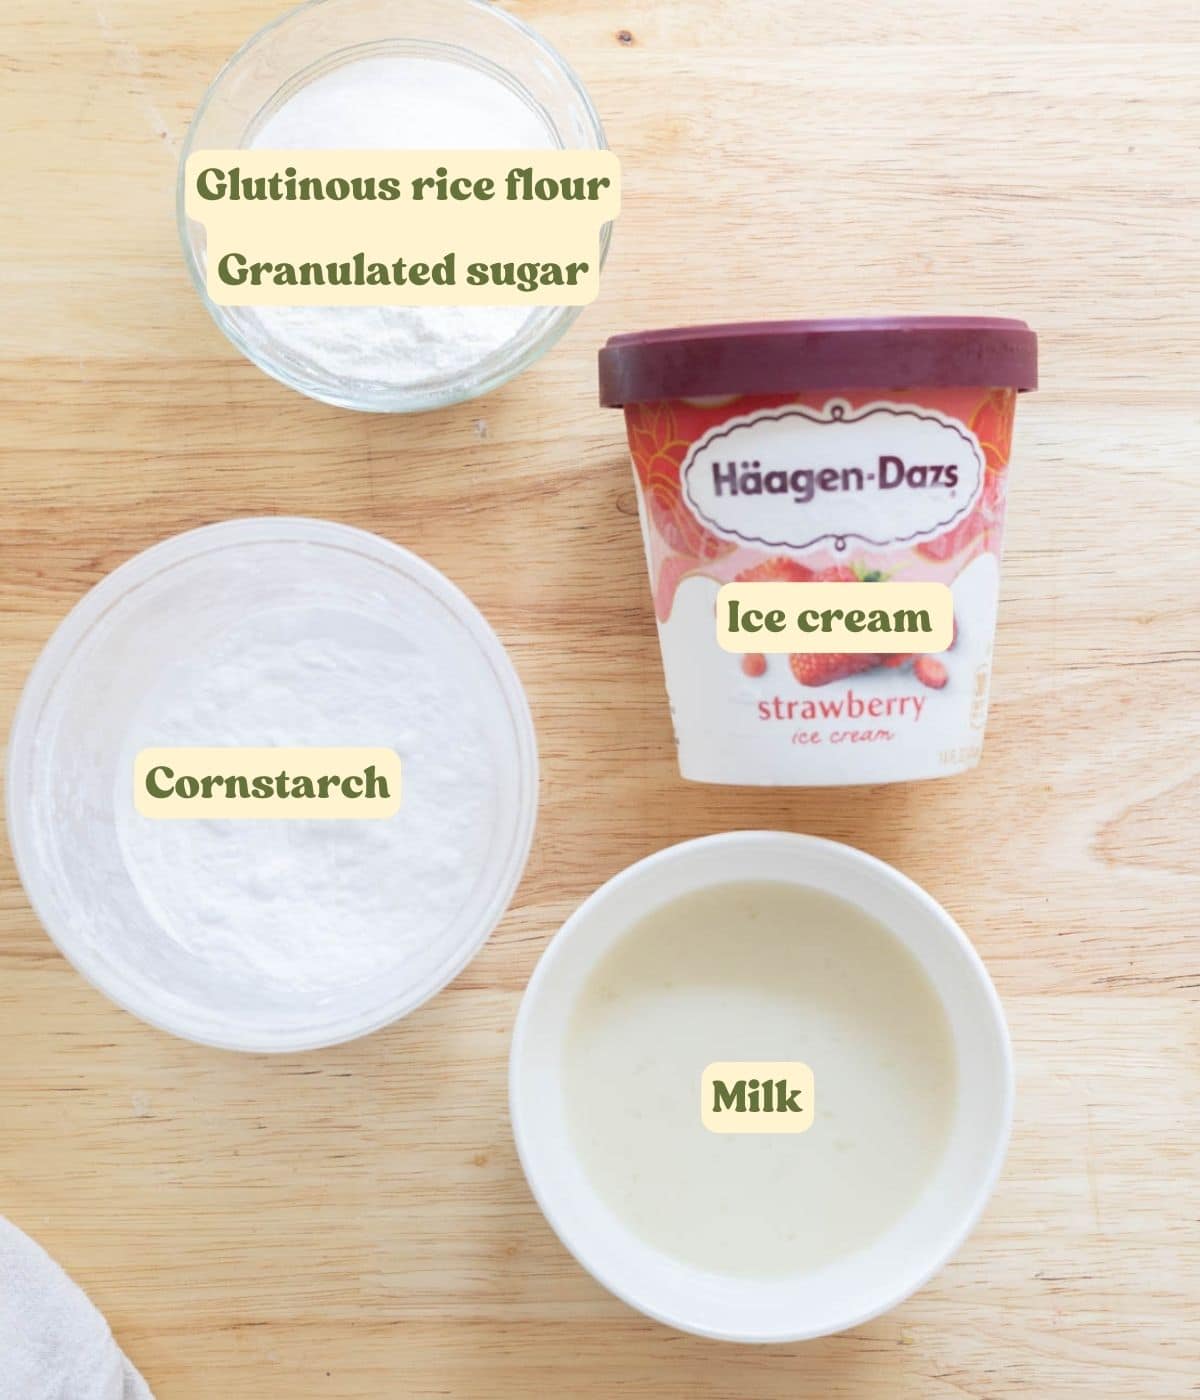
- This recipe requires glutinous rice flour, also known as sweet rice flour. A popular brand, which I used, is Koda Farms. You can also use shiratamako, which is granular instead of a fine flour. Just make sure it’s fully mixed in with the milk!
- For a bit of sweetness, add some granulated sugar.
- Traditional mochi dough uses water, but you can also use any type of milk.
- Cornstarch is used to help the mochi dough from sticking when you roll it out.
- You can use any ice cream flavor you want!
- If you want to color the dough, you can use food coloring or natural food dyes, like beetroot powder or matcha. (not pictured)
- If you want to flavor the dough, you can use extracts or powders. For example, you can add almond extract or matcha powder. (not pictured)
For the full list of ingredients and measurements, see the recipe card below.
💡Recipe Tips
- Weigh your ingredients! One of my favorite kitchen tools is a kitchen scale because it’s more accurate than measuring by volume. If you use cups, spoon the flour in gently, then level it with a knife or spatula.
- Keep things chilled, especially for step 1! As soon as you scoop out your ice cream into the cupcake liner one by one, immediately pop it in the freezer. If you wait until you scoop all of them, your first scoops might already be melted. And also make sure your mochi dough is cooled to room temperature before wrapping the ice cream!
How to Make Chewy Mochi Ice Cream
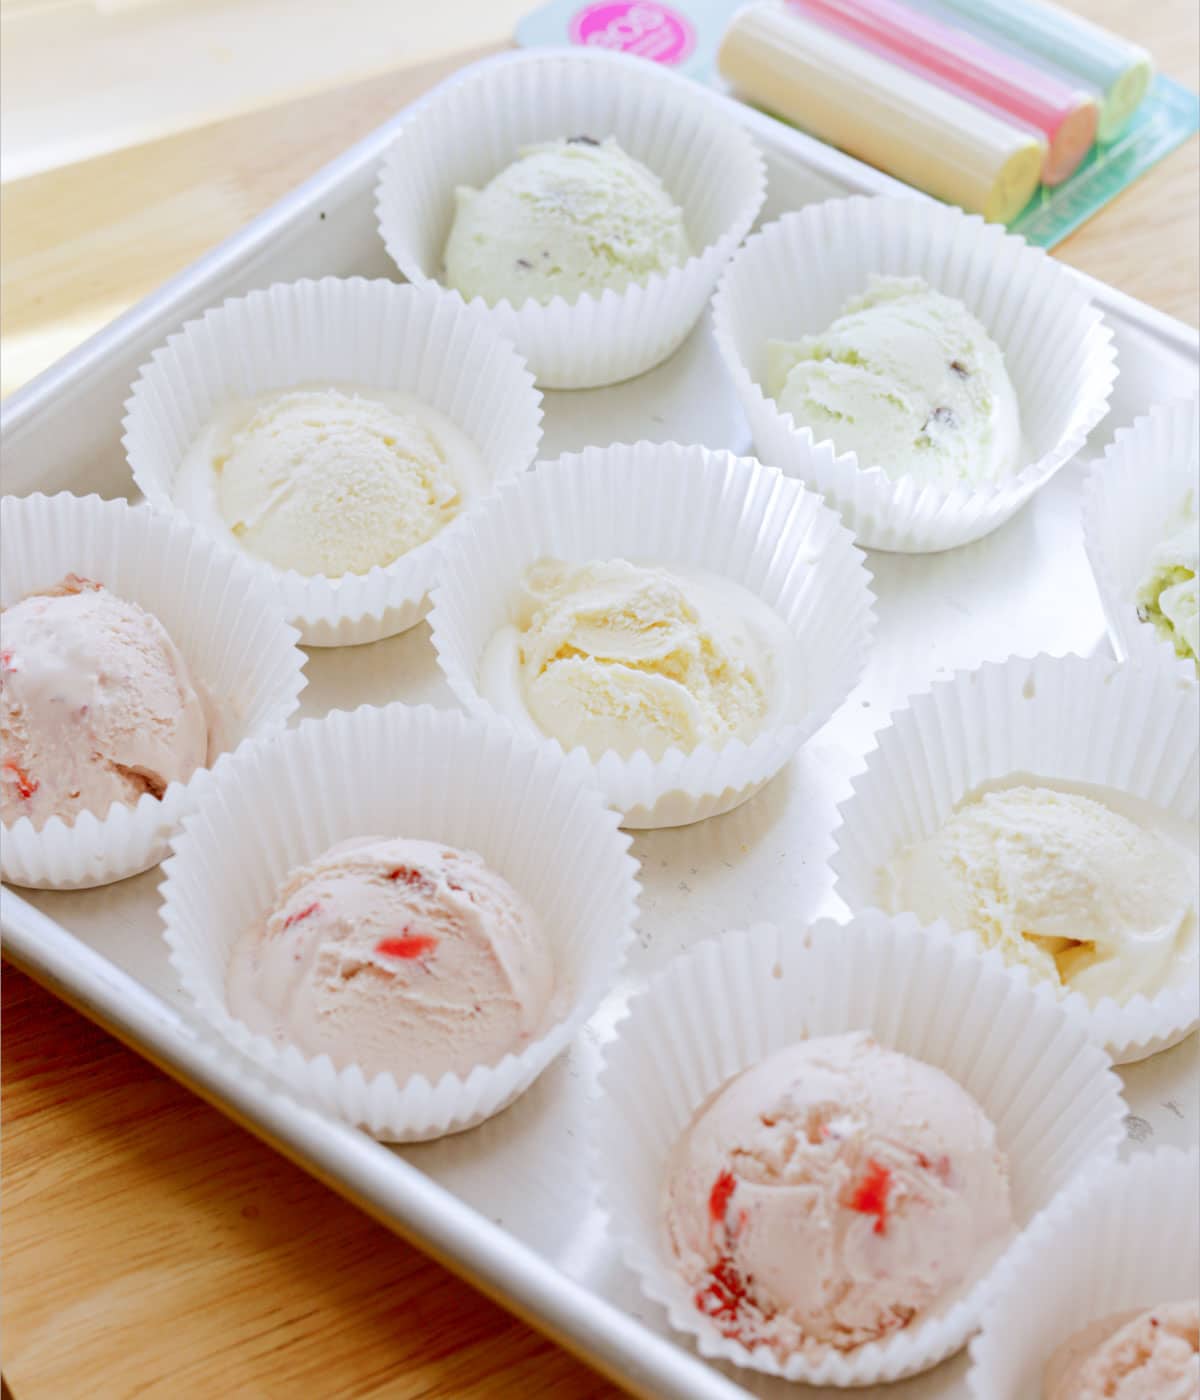
Step 1: Scoop 2-3 tablespoons of ice cream into a cupcake liner. Place onto plate or baking tray, and freeze for at least 2 hours or overnight. This will make wrapping the mochi dough much easier.
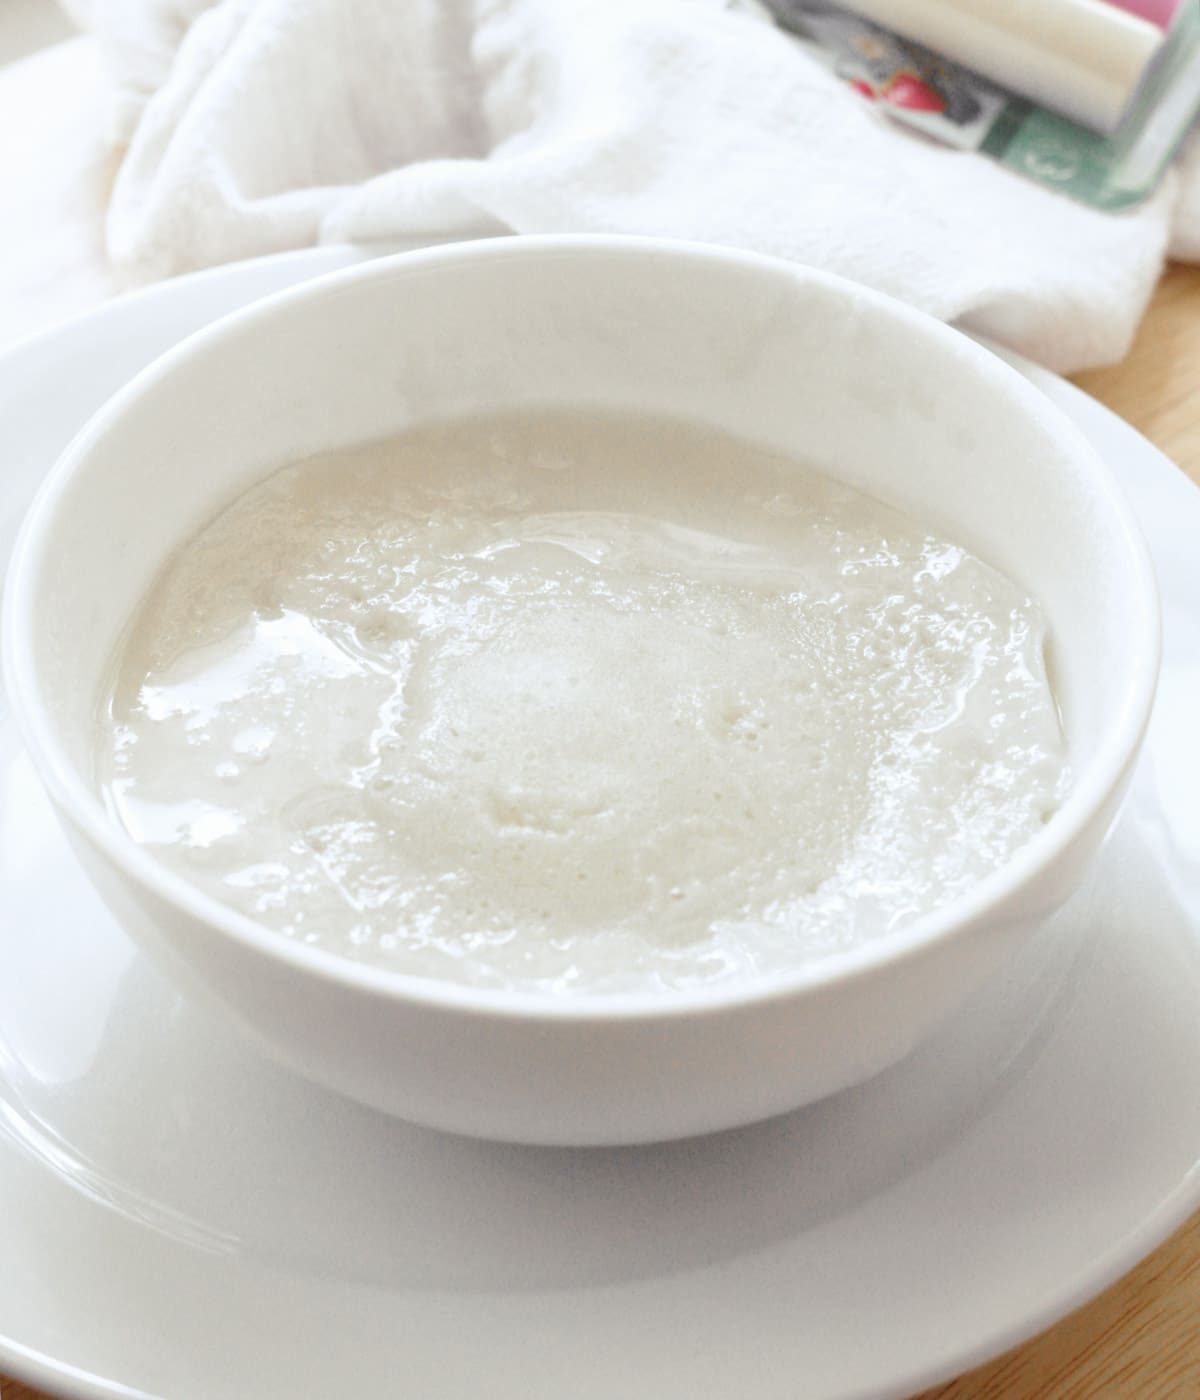
Step 2: In a microwavable bowl, mix glutinous rice flour, sugar, milk, and food coloring (optional) until smooth. Cover bowl with plastic wrap or plate, then microwave for 1 minute. It should be shiny and no longer liquidy. You can also taste it—if there is a really grainy mouthfeel, cook it longer. If it needs longer, mix with silicone spatula and heat at 30 second intervals until you get the consistency pictured above.

Step 3: Generously dust work surface with cornstarch and plop mochi dough on top. Sprinkle on cornstarch and let rest for about 5 minutes, or until it’s cool enough to touch. Then, knead until the dough becomes super stretchy and elastic, about 5 minutes. I like to wear gloves and hold the mochi in the air, stretching and folding it between gloved hands, instead of working it on the table.
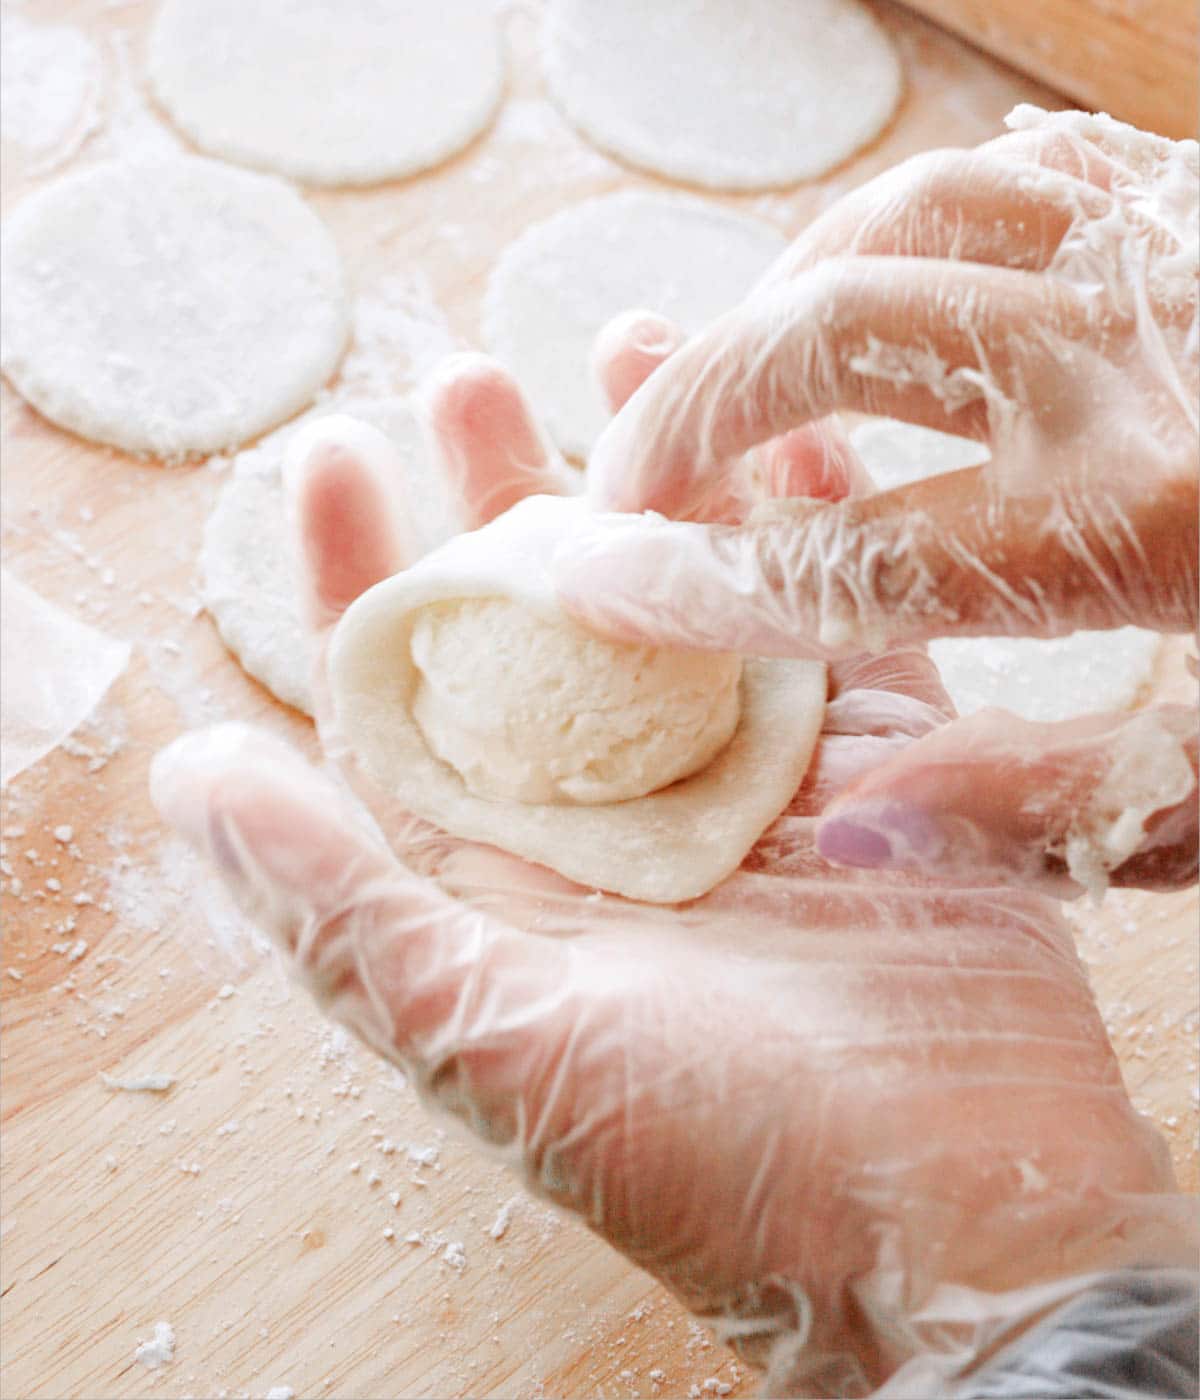
Step 4: Generously dust work surface with cornstarch. Add mochi dough, then generously sprinkle more cornstarch. Roll out until it is about 1/4 inch thick. Let rest until fully cooled (so ice cream doesn’t melt when wrapping!), or transfer to a cornstarch-dusted sheet pan, lightly cover and chill in fridge for 10 minutes. Cut out 3-4 inch circles. Wrap the ice cream with the mochi dough, pinching the edges tightly. Place in a fresh cupcake liner. Freeze for at least 1 hour before eating. Let thaw for 5-10 minutes so mochi softens, and enjoy!
For full instructions, see the recipe card below.
“DUUUUDE.” – my boyfriend 😂
Mochi Ice Cream FAQs
No, regular rice flour will not work! You need sweet rice flour, which is made from a shorter-grain rice and is what gives mochi its qq texture!
Mochi is a Japanese treat made with sweet rice flour, aka mochiko! The dough can be enjoyed by itself, but it is also popularly enjoyed when there’s a filling inside, like red bean, fruit, or ice cream!
Yes! Just make sure it’s fully mixed in with the wet ingredients.
Storage
Store mochi ice cream in an airtight container in the freezer for up to 3 months. Before eating, let thaw at room temperature for 5-10 minutes.

Did you try this recipe?
Please leave a review & share it with me on Instagram, Facebook, Tiktok, or Pinterest!
Thank you so much! -Bianca ❤️
📖 Recipe & Video
Homemade Mochi Ice Cream
✉️ want to save this?
Equipment
- Small sheet tray or plate
- Medium microwaveable bowl
- Microwaveable plate
- gloves
- circle cookie cutters
- plastic wrap
Ingredients
- ½ cup (75 g) glutinous rice flour aka sweet rice flour
- ⅔ cup (162.67 g) milk any kind, can sub water
- ⅛ cup (25 g) granulated sugar
- food coloring optional
- ice cream any kind
- cornstarch for dusting
Instructions
Prep:
- Tip: If your kitchen is warm, keep your tray or plate in the freezer and scoop the ice cream one ball at a time.
- Place 6 cupcake liners on your quarter sheet tray.
- Scoop 2-3 tablespoons ice cream balls into each cupcake liner. Work quickly, as the ice cream may start to melt.
- Freeze ice cream balls until solid, at least 2 hours. This will make wrapping the mochi dough much easier!
Make mochi dough:
- In a medium microwaveable bowl, mix ½ cup glutinous rice flour, ⅔ cup milk, and ⅛ cup granulated sugar until well combined. If you want to color the dough, mix in a few drops of food coloring!
- Cover bowl with plastic wrap or plate. Place on another plate (so it's easier to handle when hot!) and microwave for 1 minute.
- Remove cover and fold mochi dough with silicone spatula. The dough is ready when it looks shiny and has absorbed all the liquid. You can also taste it—if there's a grainy mouthfeel, cover and microwave in 30-second intervals, folding after each, until smooth.
Roll out mochi:
- Generously dust work surface with cornstarch. Transfer mochi on top, then dust with more cornstarch. Let sit for about 5 minutes, or until it's cool enough to touch.
- For extra chewiness , I recommend kneading it. I like to do to this by stretching and working the dough in between my hands (see video above for example). After about 5 minutes of kneading, it should be super elastic!
- Dust work surface again with cornstarch and add mochi. Sprinkle more cornstarch on top, then roll it out into a ¼-inch thick rectangle.
- Lightly cover and let sit until completely cool, so the ice cream doesn't melt during assembly. You can let it sit at room temperature for ~20 minutes, or plop onto a cornstarch-dusted sheet pan, lightly cover, and place in fridge for 10 minutes.
Assembly:
- Prepare 6 fresh cupcake liners for the finished mochi.
- Use circle cutter to cut out ~4 inch circles. They just have to be big enough to wrap around the ice cream!
- Work with one mochi circle at a time:Hold one dough circle in hand and place frozen ice cream ball in the center. Pull the dough edges up and over, fully enclosing the ice cream. Pinch edges tightly to make sure the ice cream is sealed well.
- Place the wrapped mochi seam-side down in a liner and return to the freezer. Repeat with the remaining mochi.
- Freeze for 1 hour before serving, so the ice cream firms up a bit. When ready to eat, let sit at room temp for 5 minutes to soften the dough.Enjoy! See notes for storage information.