
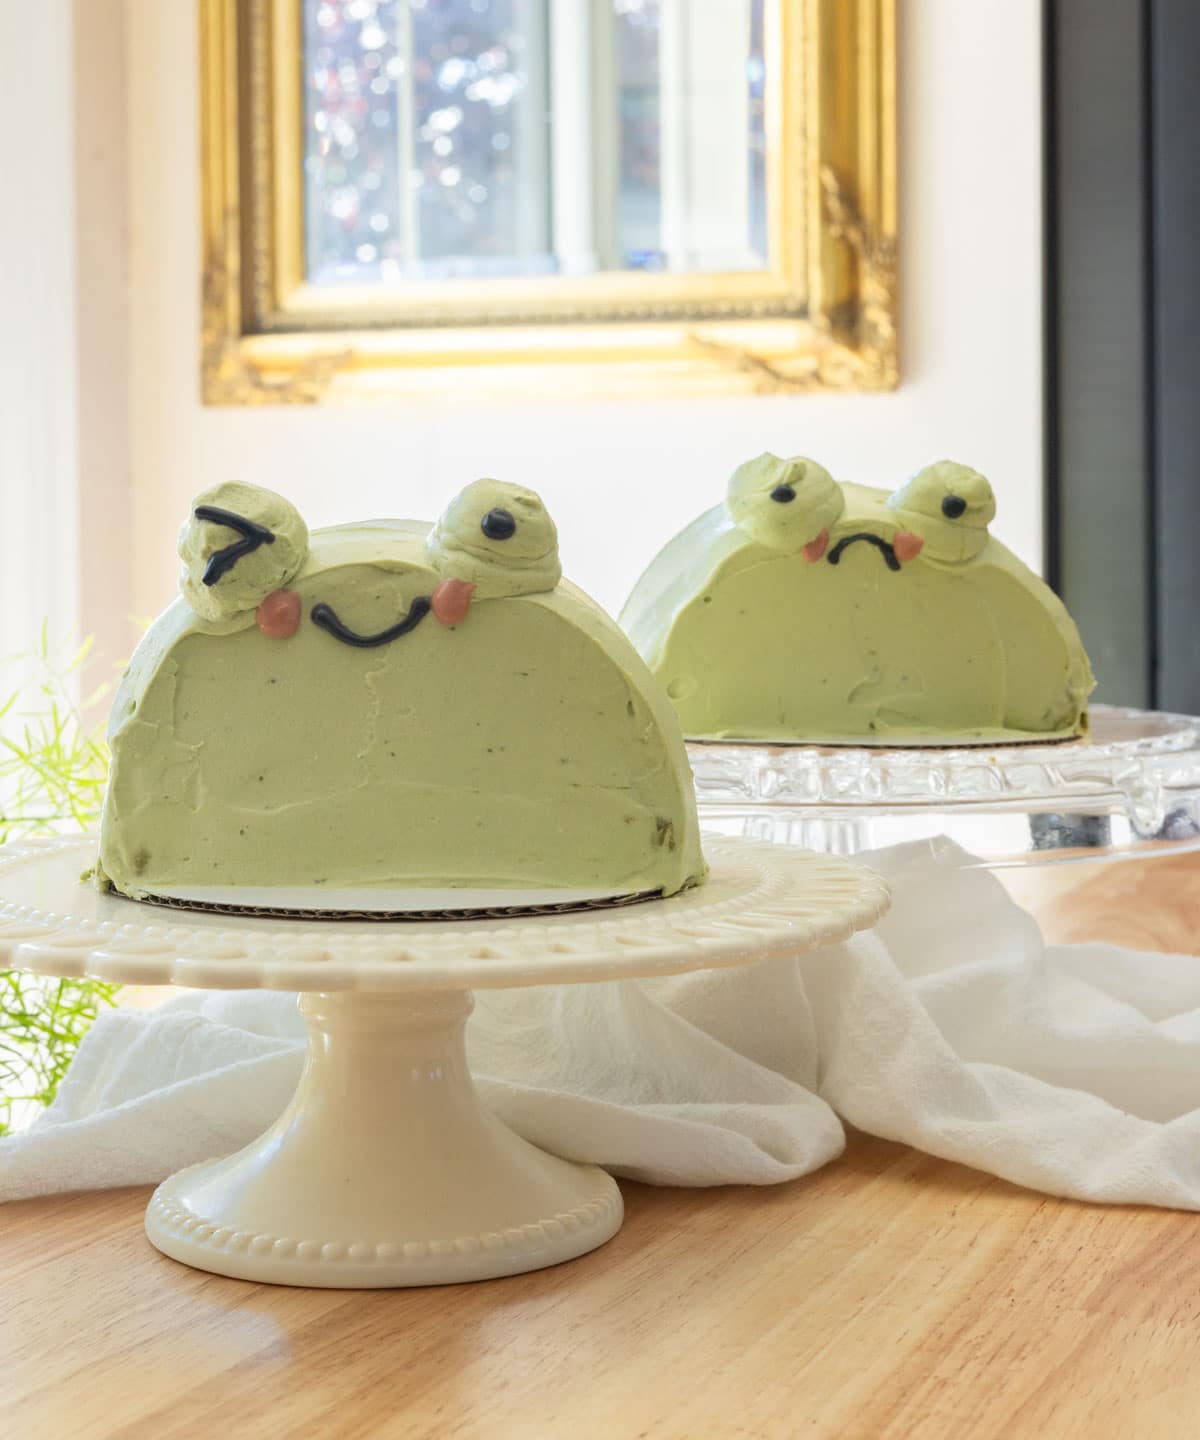
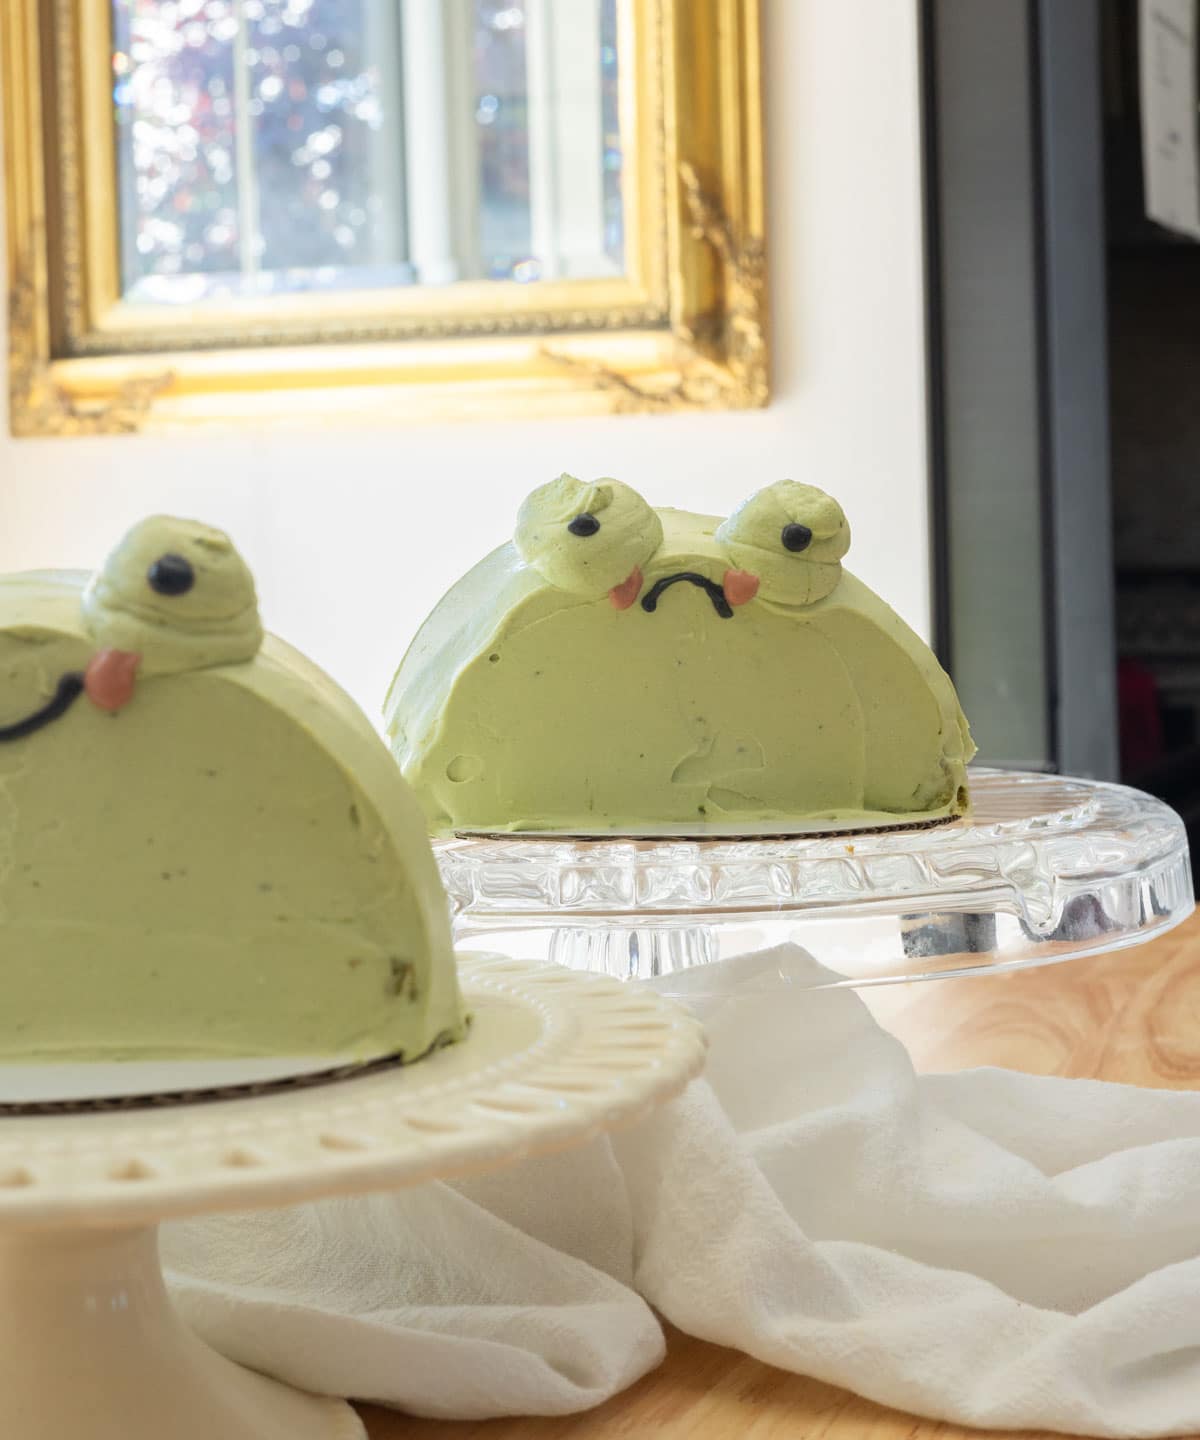
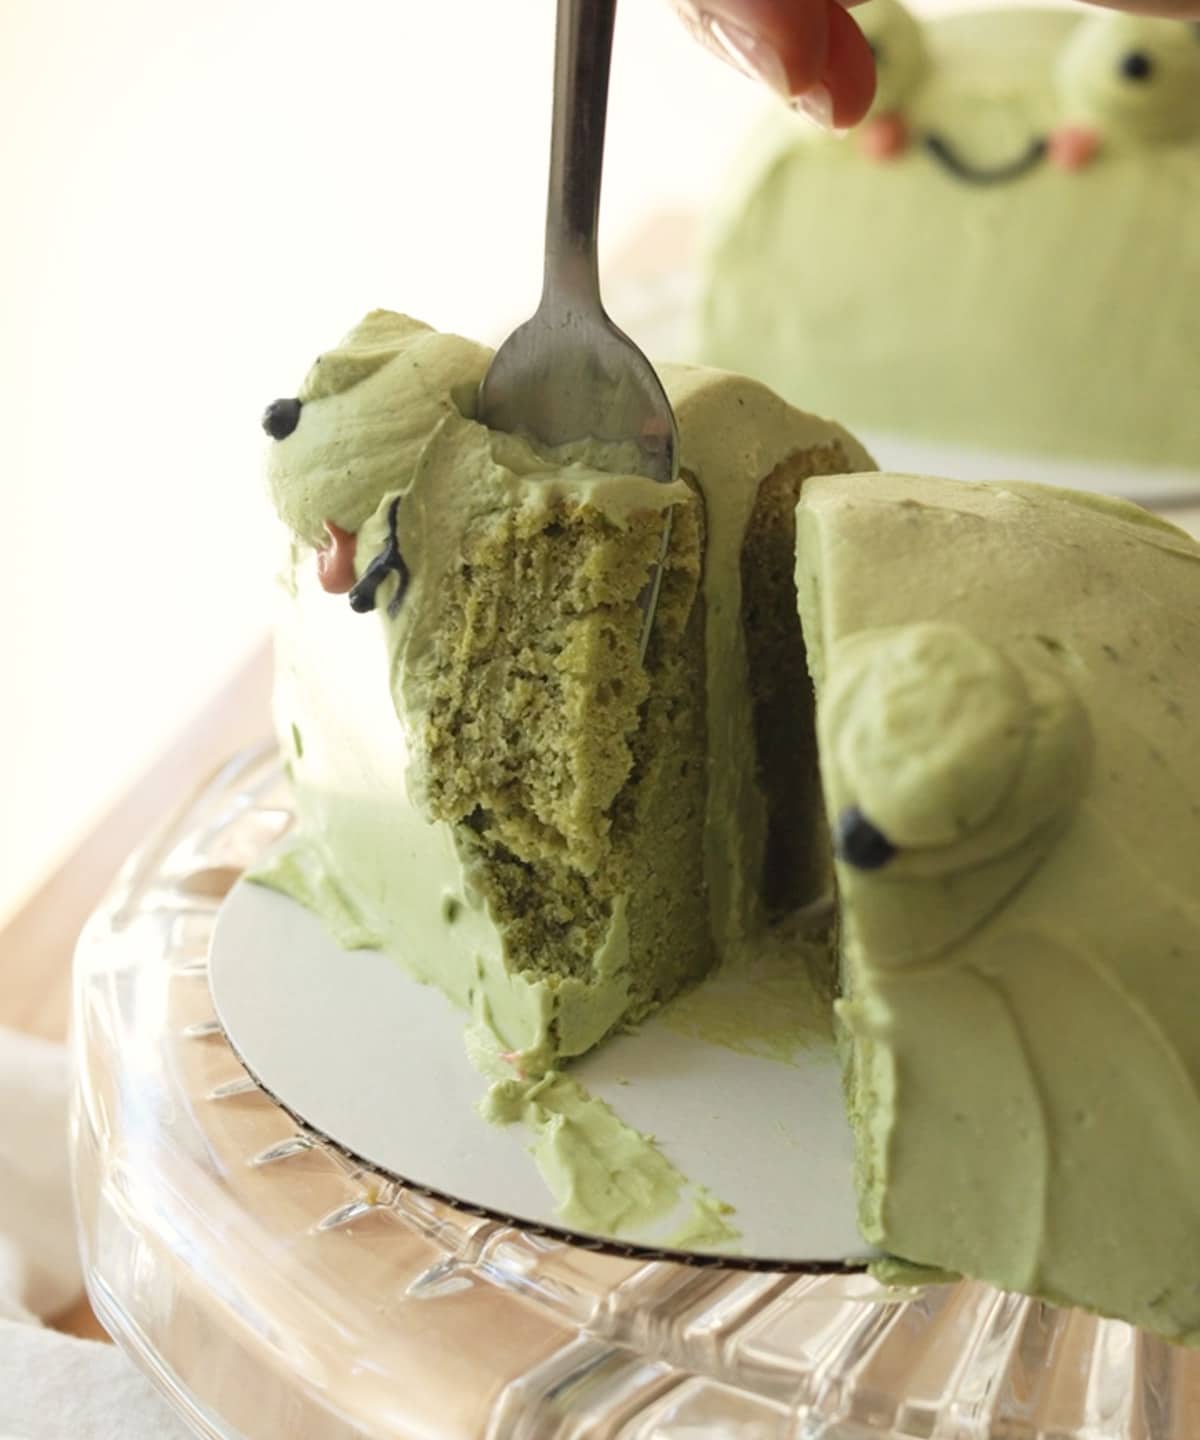
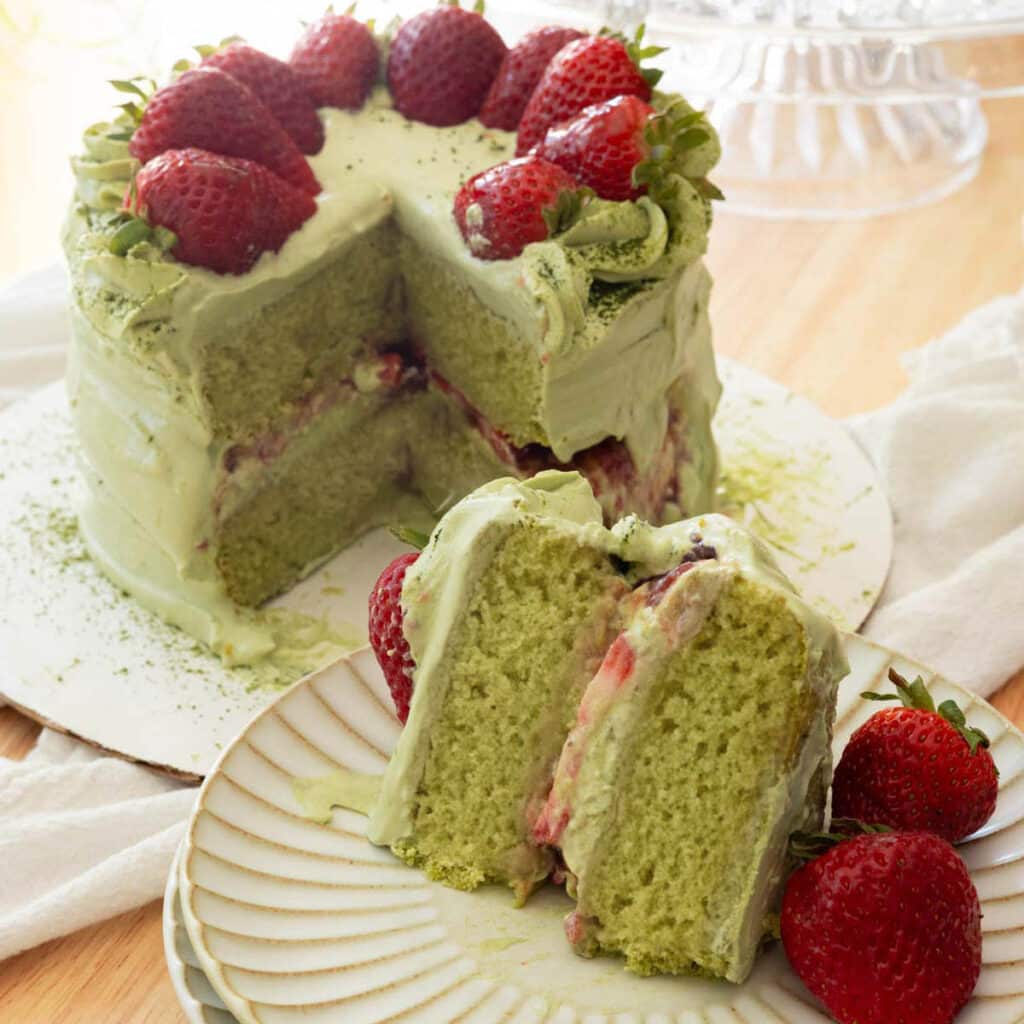
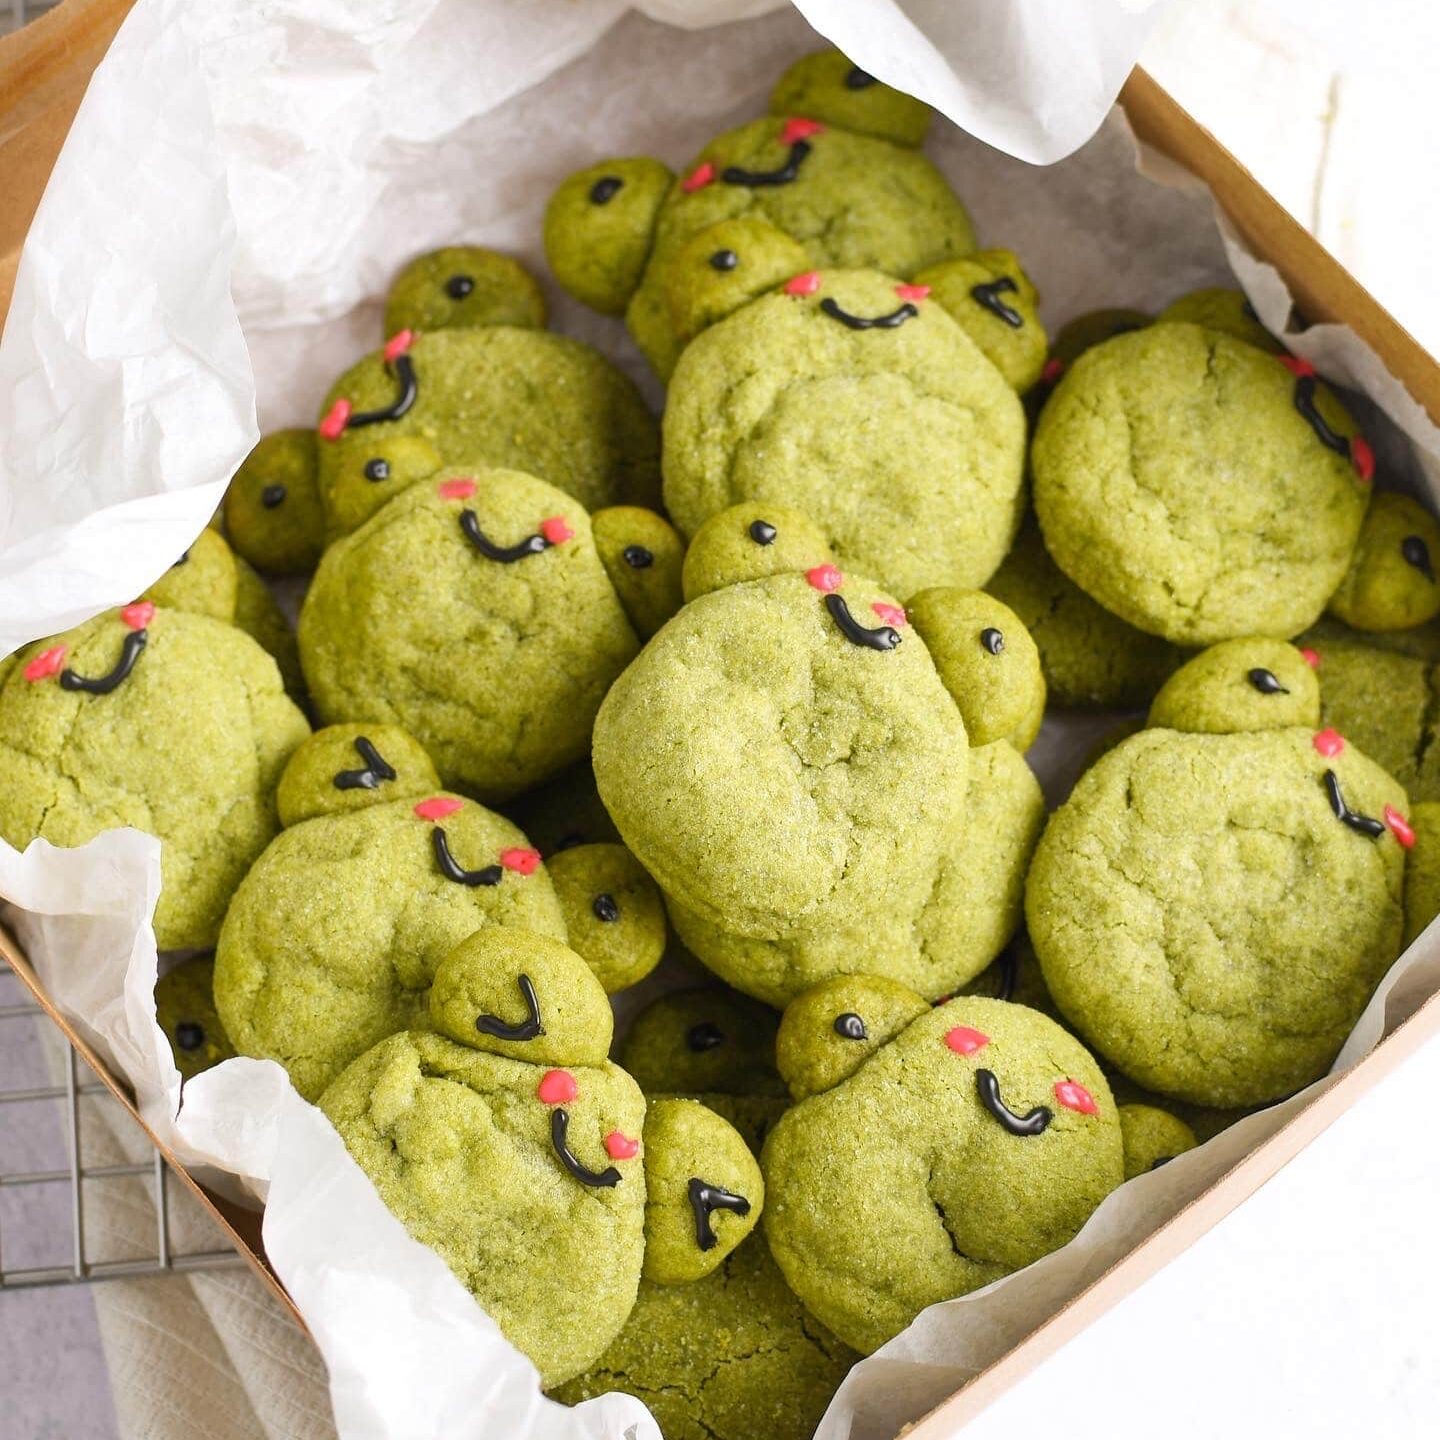
This easy tutorial will walk you through how I decorated two cute frog cakes. The cakes are light, fluffy, and full of matcha flavor. Plus, the design is simple for any beginner baker to tackle! 🐸
Want to make a different flavor? Feel free to use any cake recipe you like, even if it’s boxed cake mix + store-bought frosting. Simply follow my step-by-step assembly instructions to create your frog cake in whichever flavor you desire! 🙂
Note: This blog post was updated June 5, 2024. I revamped the recipe, plus added new pictures to show the decorating process in full.
✉️ want to save this?
Why You’ll Love This Recipe 🐸
- It’s adorable and delicious! Why have a regular matcha cake, when you can make it frog-shaped?! It’s perfect for any matcha lovers out there. And frog lovers.
- The design is great for beginner cakers. The whipped cream is simple to make and in my opinion, much easier to work with than buttercream.
- You can make it your own. Feel free to use any cake recipe you want, even if it’s boxed cake mix or store-bought icing! Just follow along my decorating steps, and you’ll have your own frog cake made your way.
Ingredients
To make this frog cake, you’ll need the following:
Ingredient Notes:
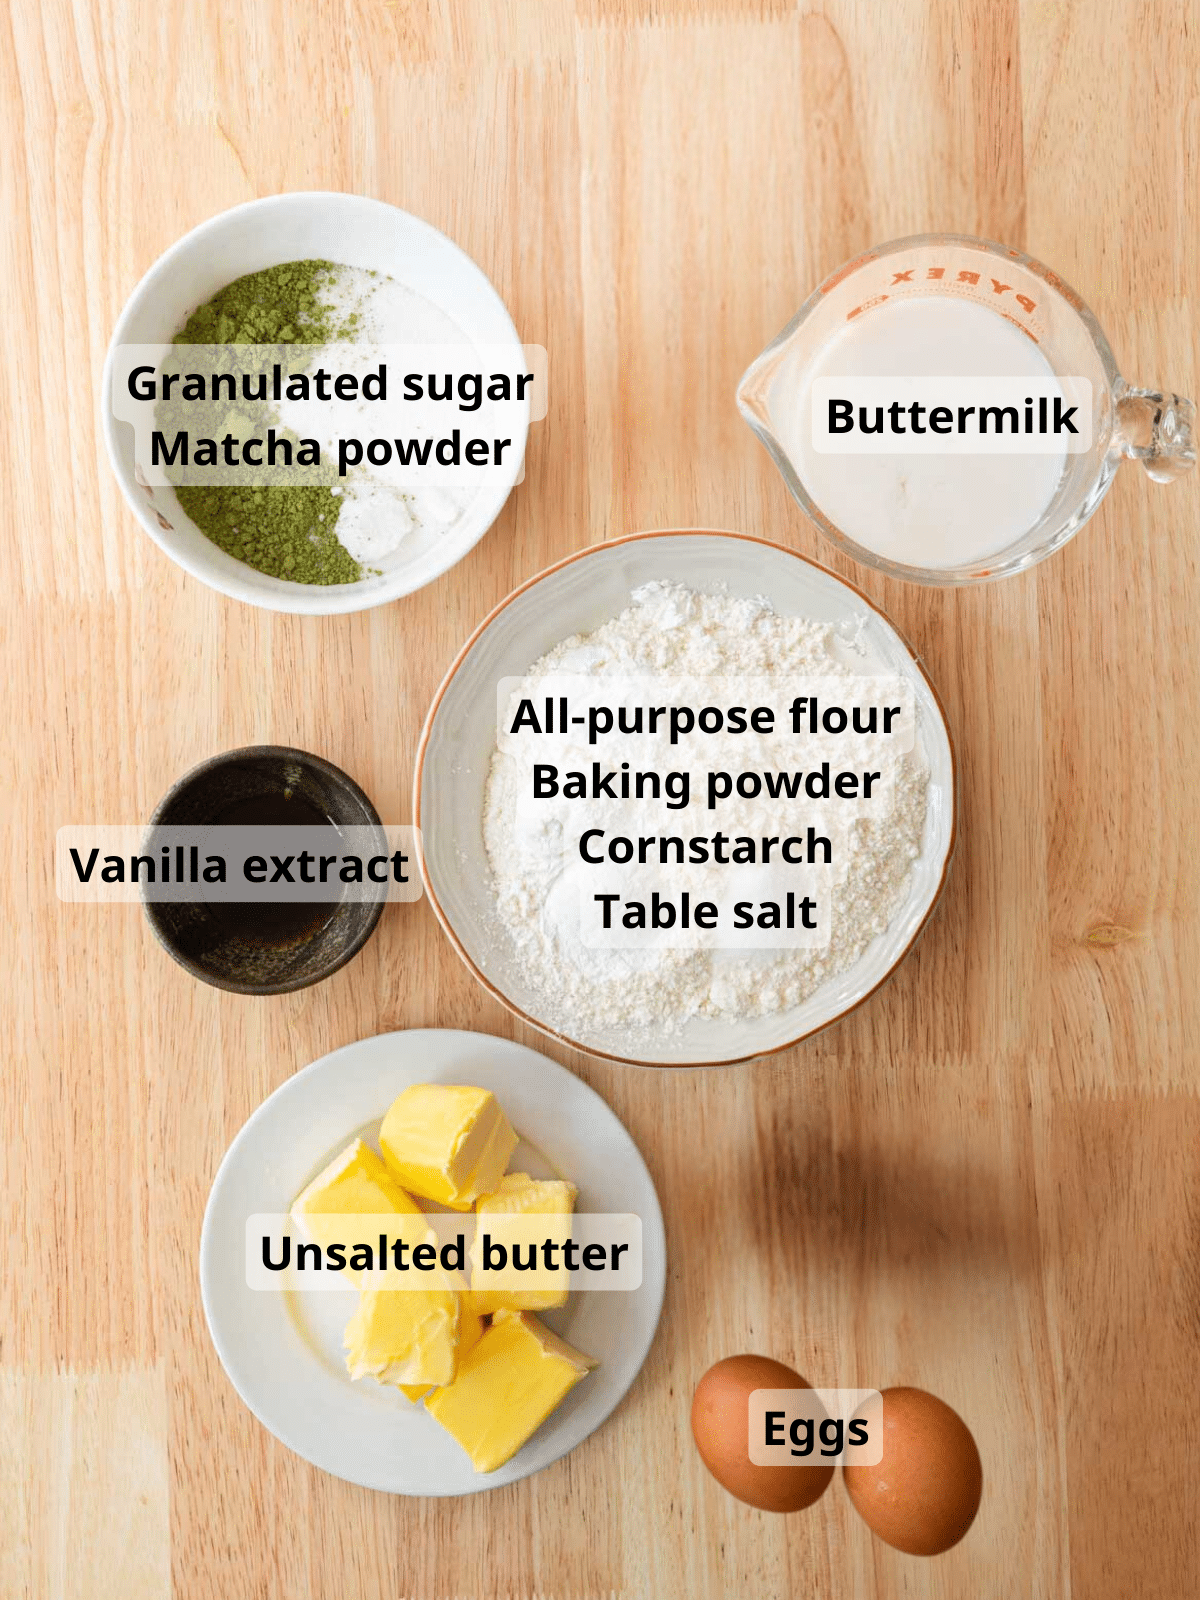
For the matcha cake layers:
- Unsalted butter is creamed together with granulated sugar and culinary matcha powder until light and fluffy.
- The eggs are separated into egg yolks and egg whites. The egg yolks are added to the creamed butter mixture and the egg whites are whipped into stiff peaks, then gently folded into the batter later on. This helps create a really fluffy cake!
- Since I couldn’t find cake flour, I used all-purpose flour + cornstarch. This pretty much mimics cake flour, creating more tender, softer cake layers.
- Buttermilk also helps create tender cake layers, in addition to adding moistness and tanginess.
- No buttermilk? For every cup of buttermilk, replace it with 1 cup whole milk + 1 tablespoon vinegar or lemon juice. Stir together and let it sit for at least 5 minutes before using.
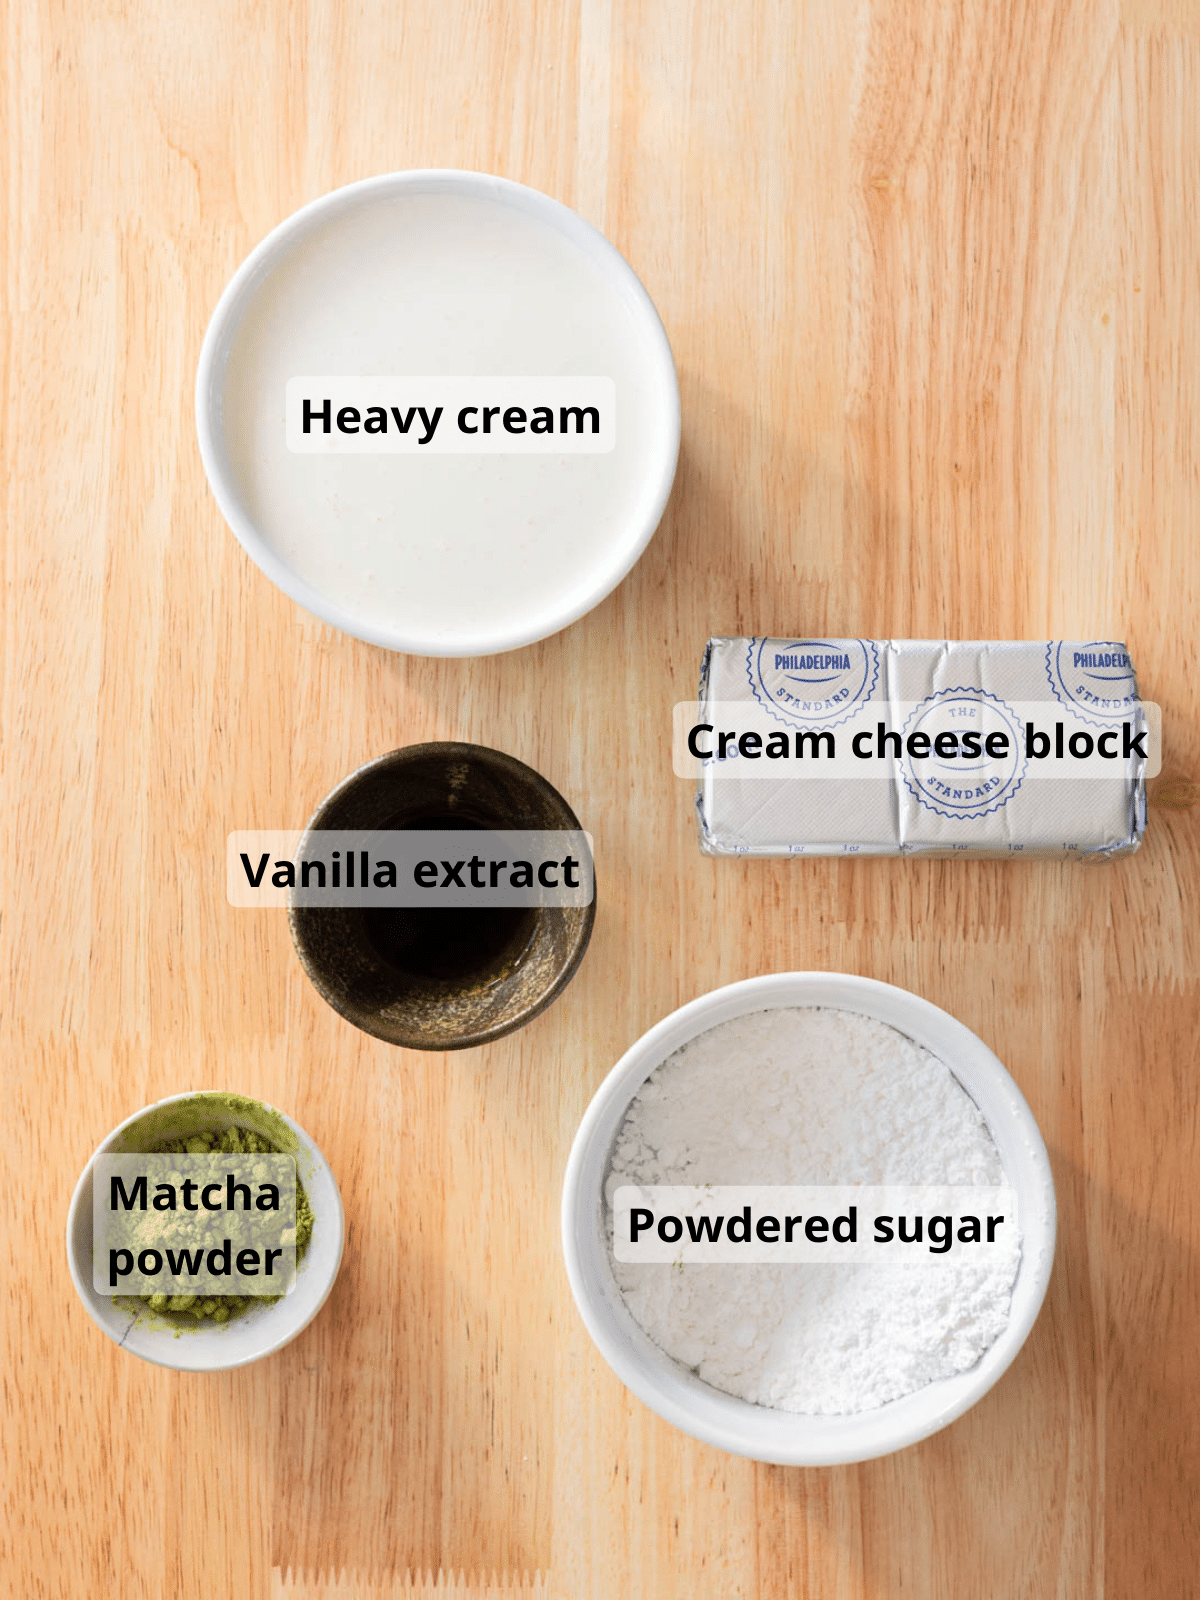
For the matcha whipped cream frosting:
- Make sure to use chilled heavy cream (interchangeable with heavy whipping cream) so it whips up easily.
- To stabilize our whipped cream, we will be using a few oz of a softened full-fat cream cheese block. The high fat content provides the structure and thickness the whipped cream needs when frosting or decorating desserts.
- It is very important to use block cream cheese instead of whipped cream or cream cheese from a tub. They have added ingredients that will not work as well in this recipe.
- Powdered sugar, culinary matcha powder, and vanilla extracts provides the sweetness and flavor we’re looking for.
- ***NOT PICTURED*** Black cocoa powder and freeze dried strawberry powder will be used to dye the frosting! I find that using natural dyes instead of artificial gel coloring in whipped cream is better because the colors don’t bleed into each other as quickly.
For the full list of ingredients and measurements, see the recipe card below.
Step-By-Step Instructions
Bake the cake layers:
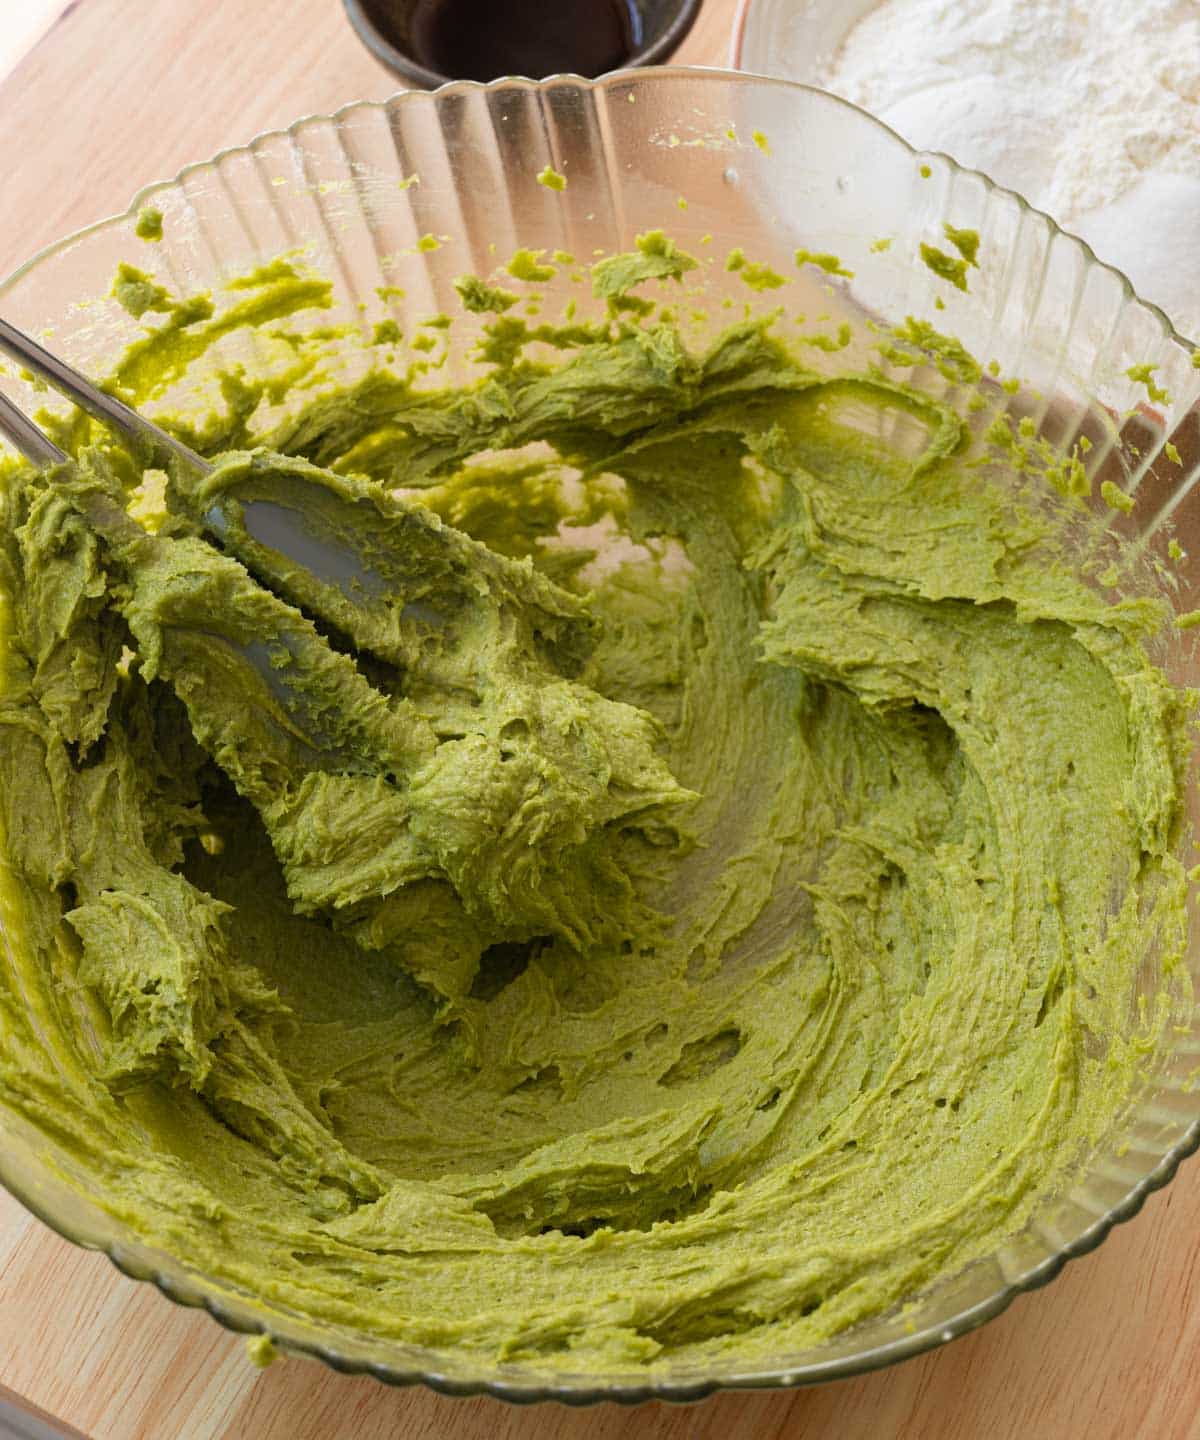
Step 1: Whip unsalted butter, sugar, and matcha powder until light and fluffy. Mix in egg yolks and vanilla extract.
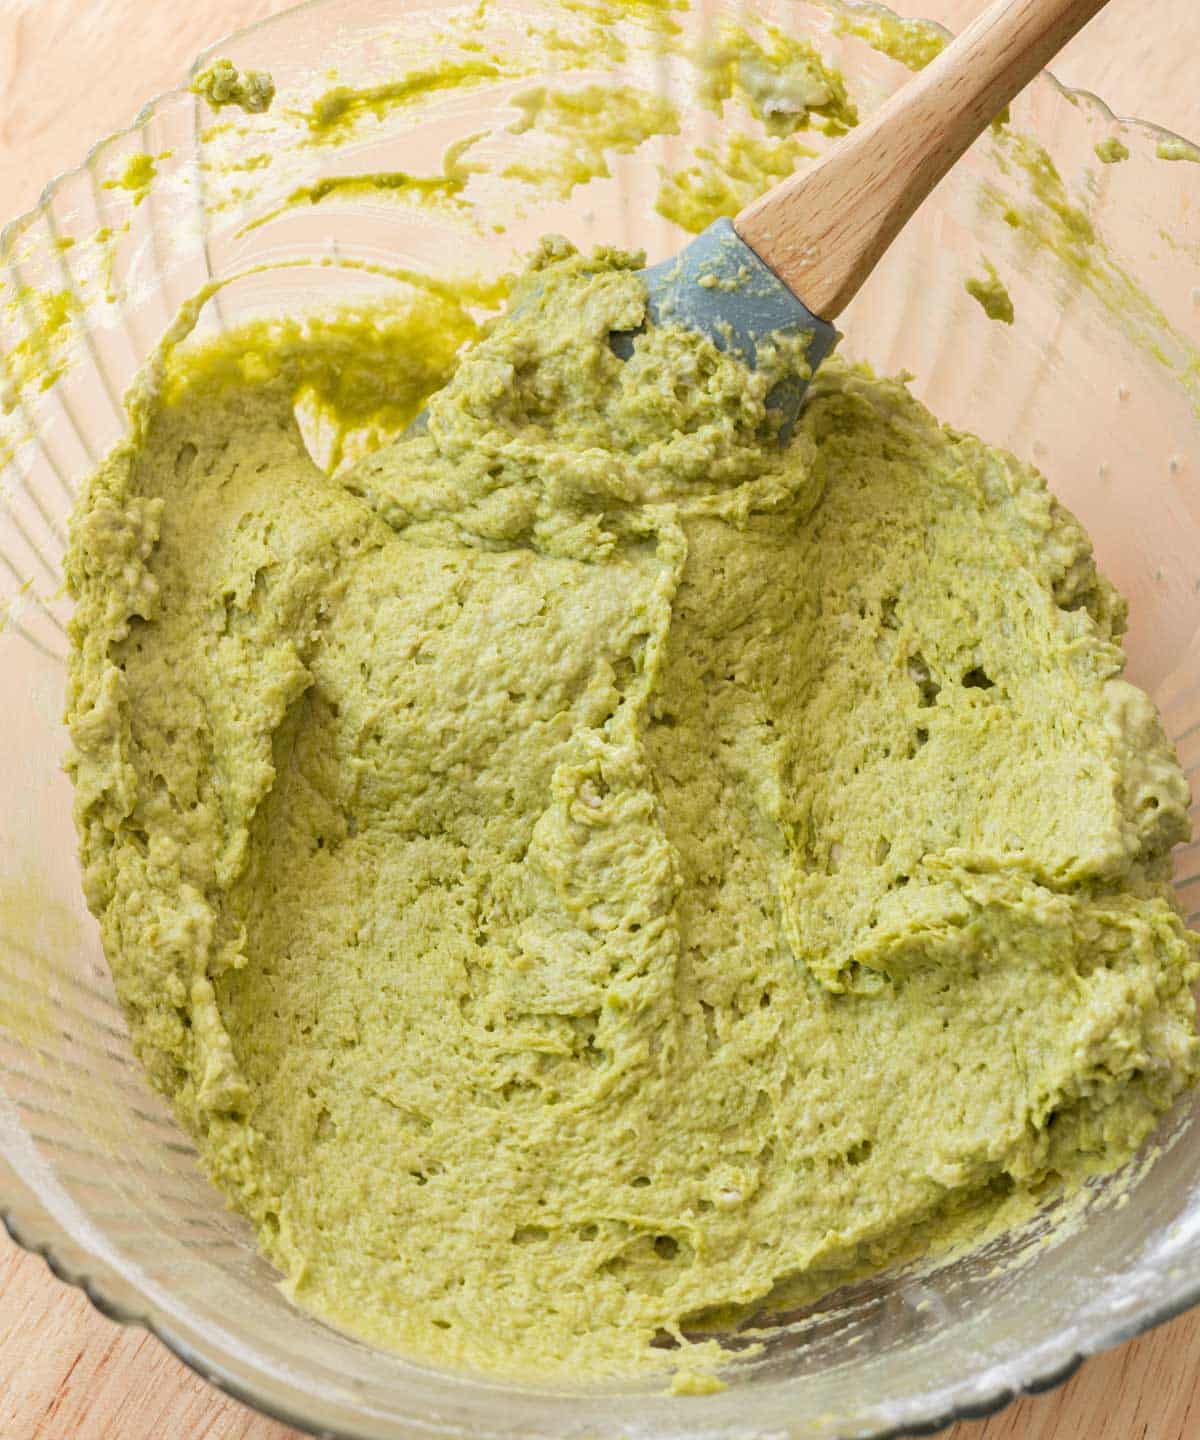
Step 2: Stir in half the dry ingredients until mostly combined, then stir in half of the buttermilk. Make sure to scrape the sides and bottom of bowl. Repeat once more. The mixture should be thick and fluffy—do not over mix.
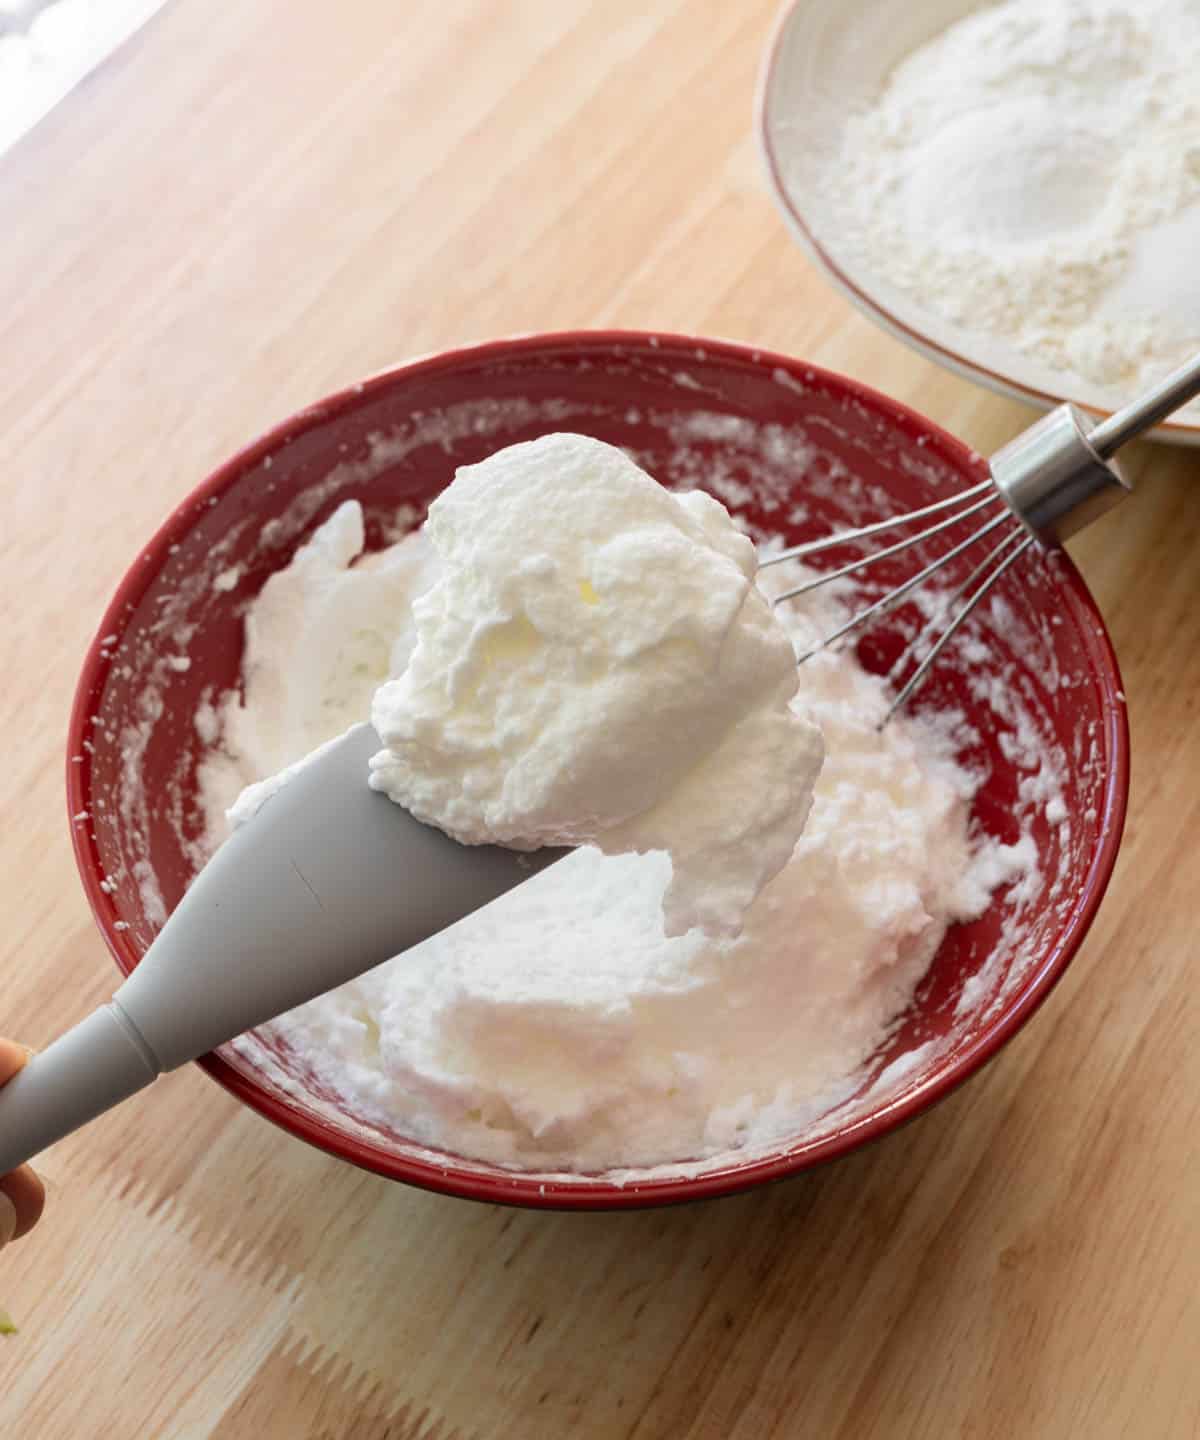
Step 3: In a separate bowl, whip egg whites until you get fluffy, thick stiff peaks. Gently fold this into your cake mixture.
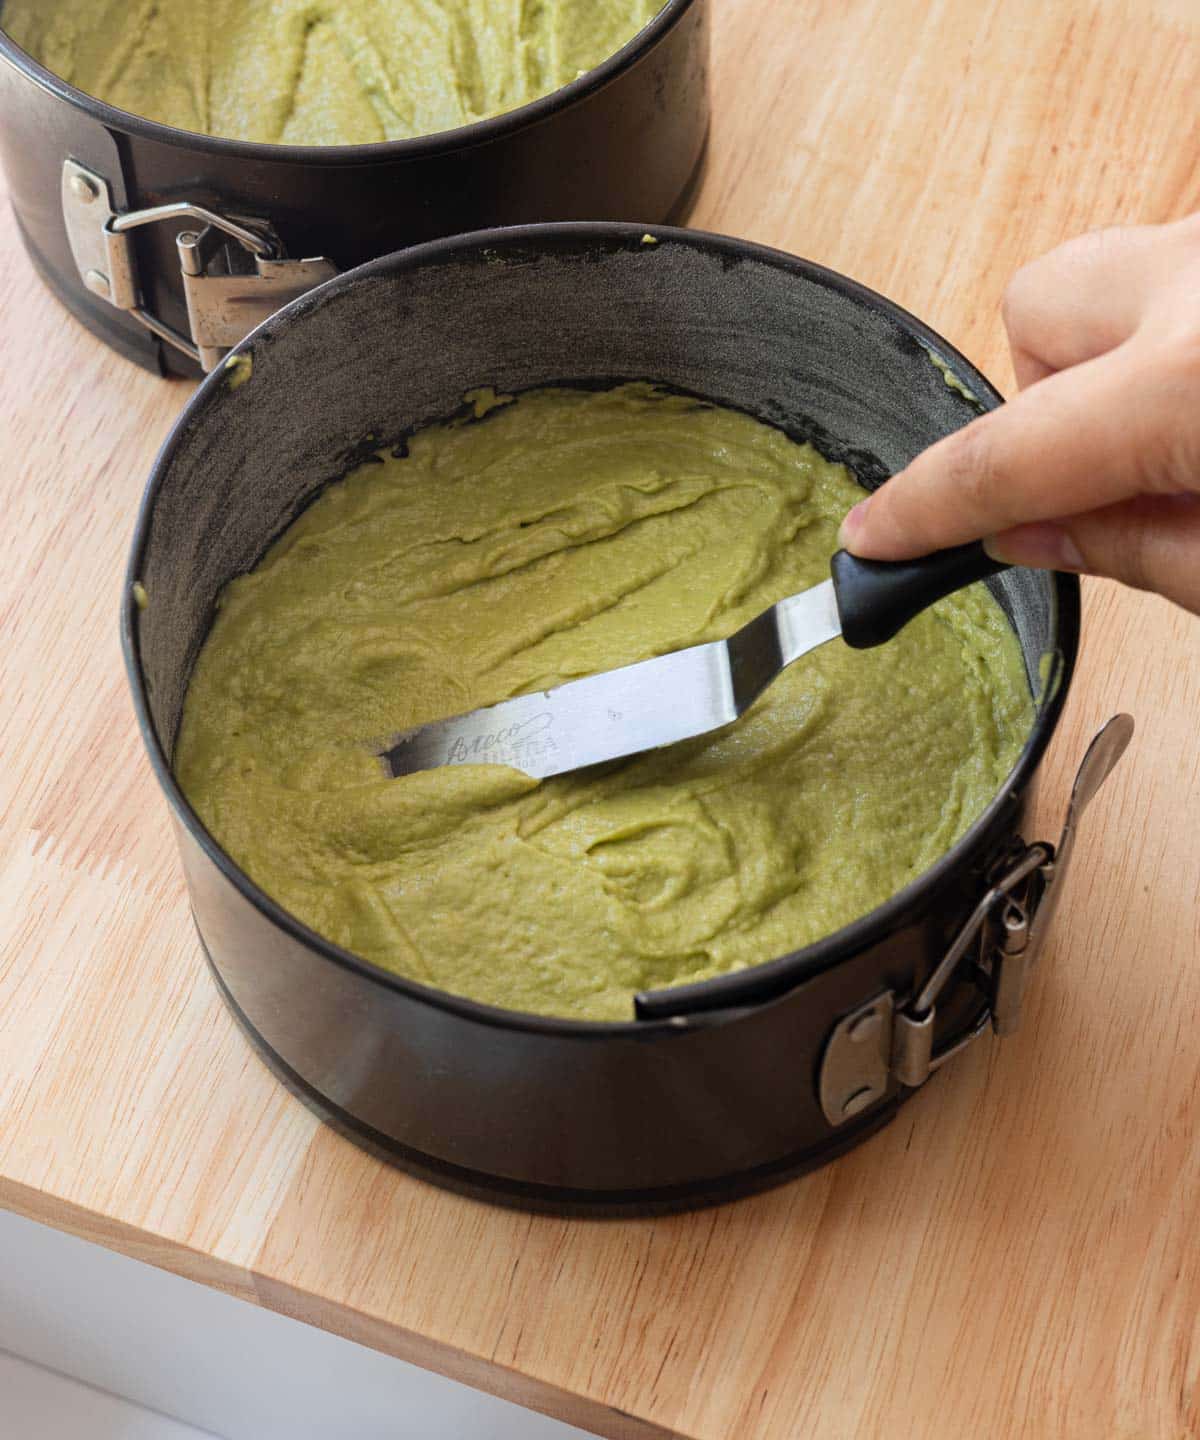
Step 4: Spread cake batter evenly into two greased and lined 6-inch springform pans (about 3-inches tall). Bake at 325°F/162°C for 35-45 minutes, or until toothpick inserted in the center comes out clean. Let cake layers cool in pan for about 15 minutes. Remove cakes from pans to fully cool on wire racks before leveling and decorating.
Make the whipped cream frosting:
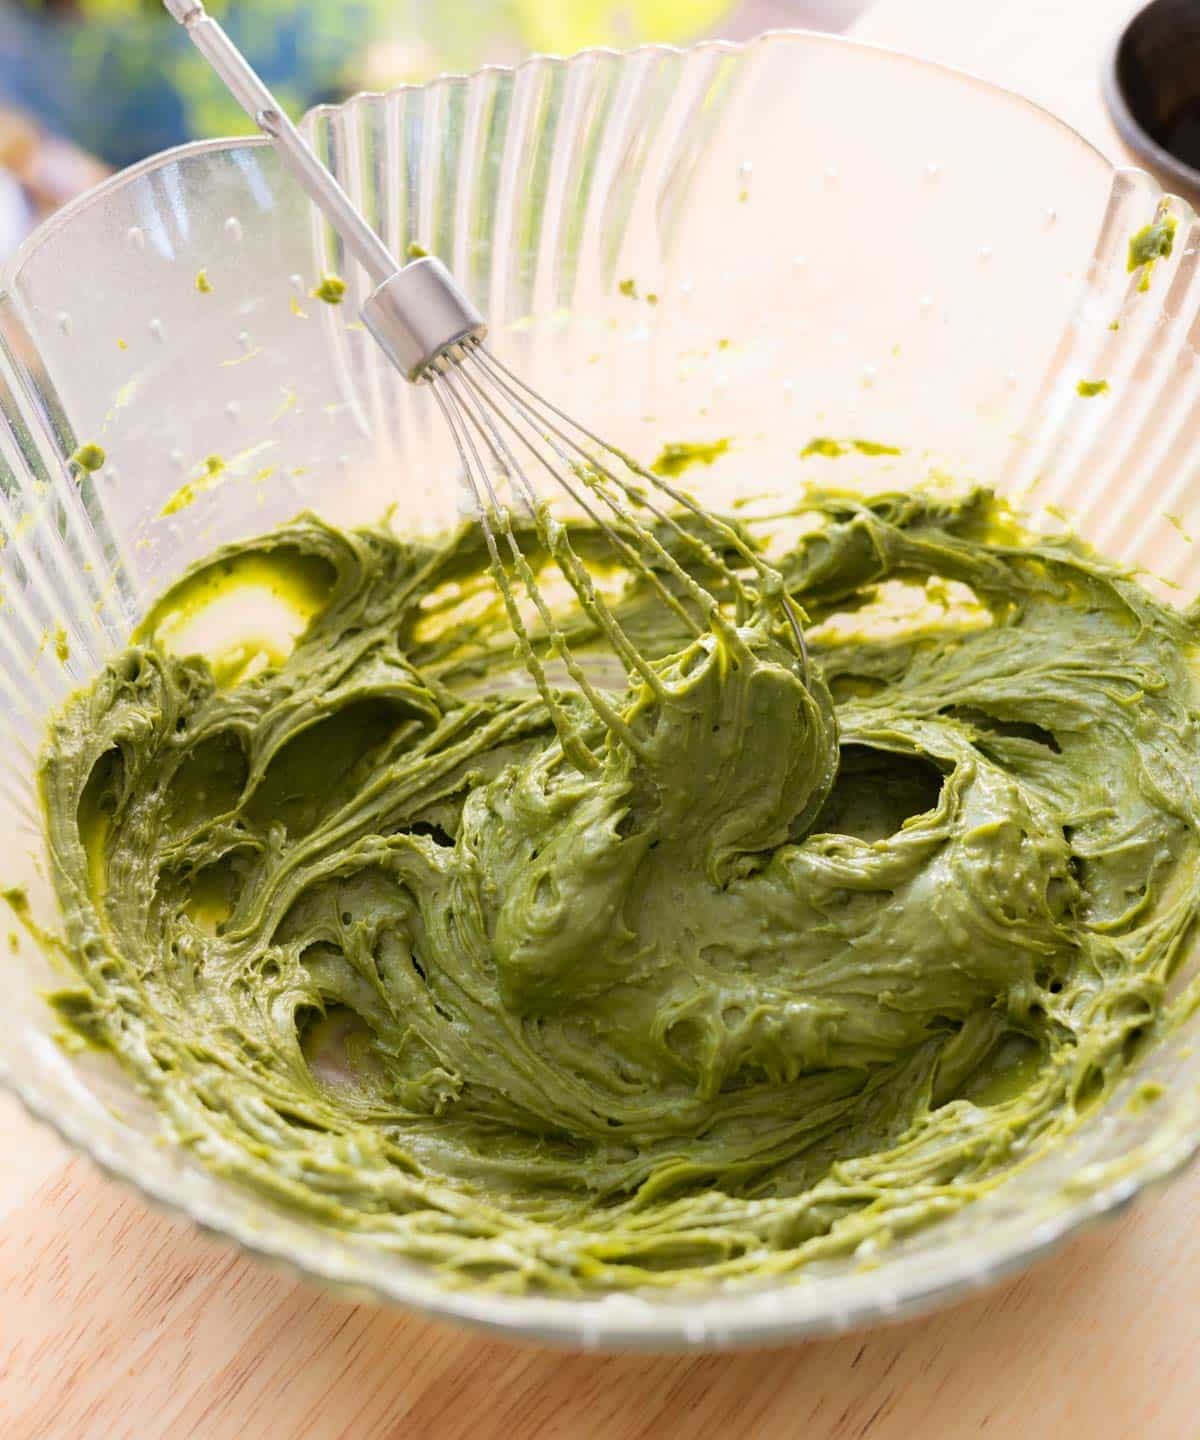
Step 5: Using an electric whisk, mix the softened cream cheese and matcha powder on medium speed until smooth, about 2-4 minutes. Turn the mixer to low and beat in the powdered sugar a third at a time until just combined.
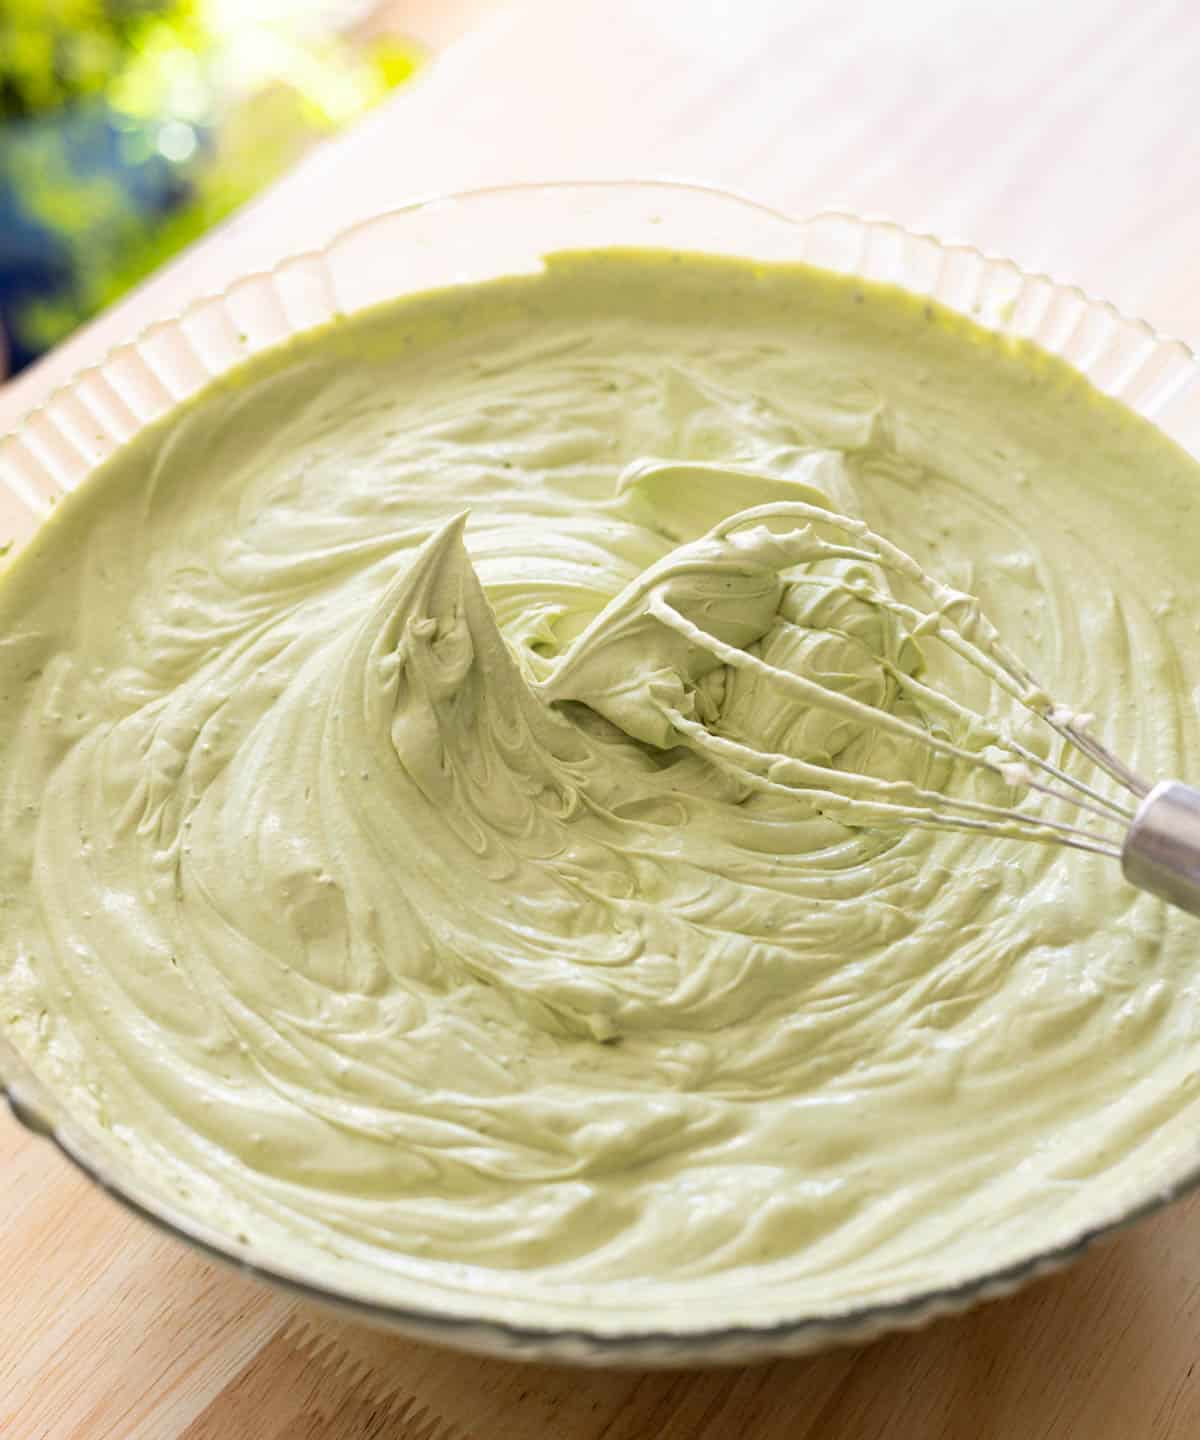
Step 6: Add in the vanilla extract. Turn the mixer to medium speed and slowly drizzle heavy cream while beating. Stop mixing once you reach stiff peaks: there should be visible track marks from the whisk and the cream should easily hold its shape.
Whisked too much and now your whipped cream is chunky?
No worries! Add a splash or two of heavy cream. Mix on low speed until it smooths back out!
Assemble the cake:
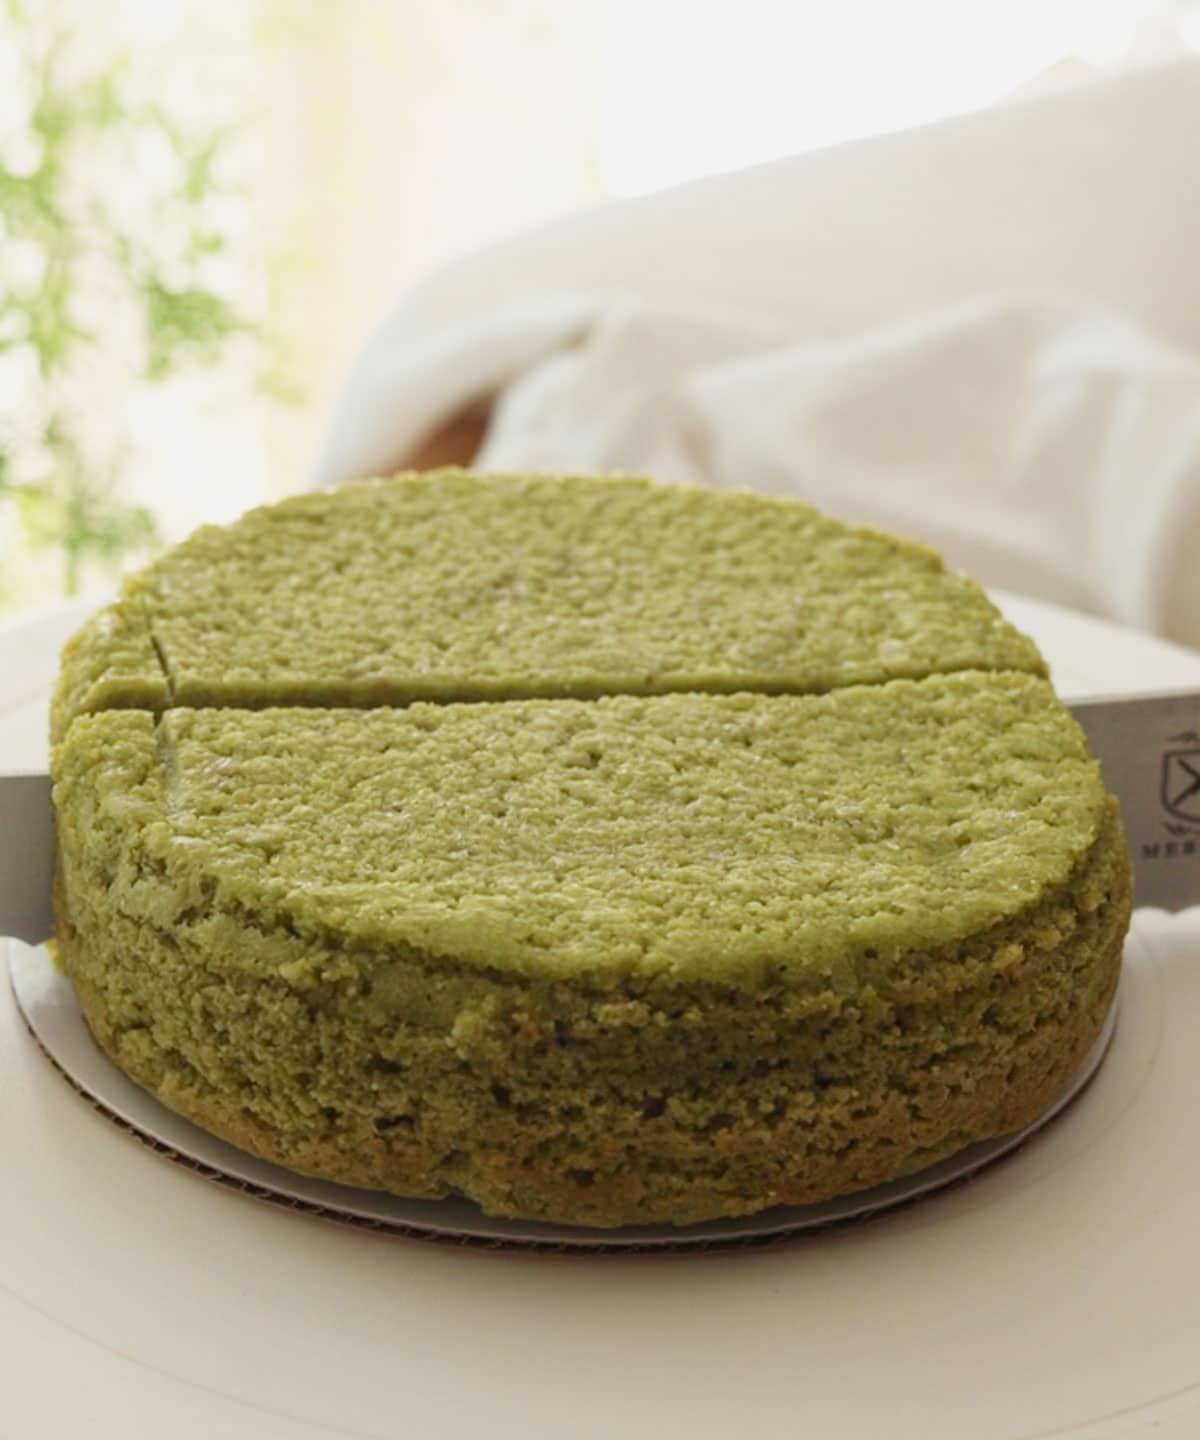
Step 7: Cut one cake layer down the middle to create two semicircles. Place one piece aside. Use an offset spatula to spread on a layer of whipped cream frosting on top.

Step 8: Top the frosted layer with your second semicircle.
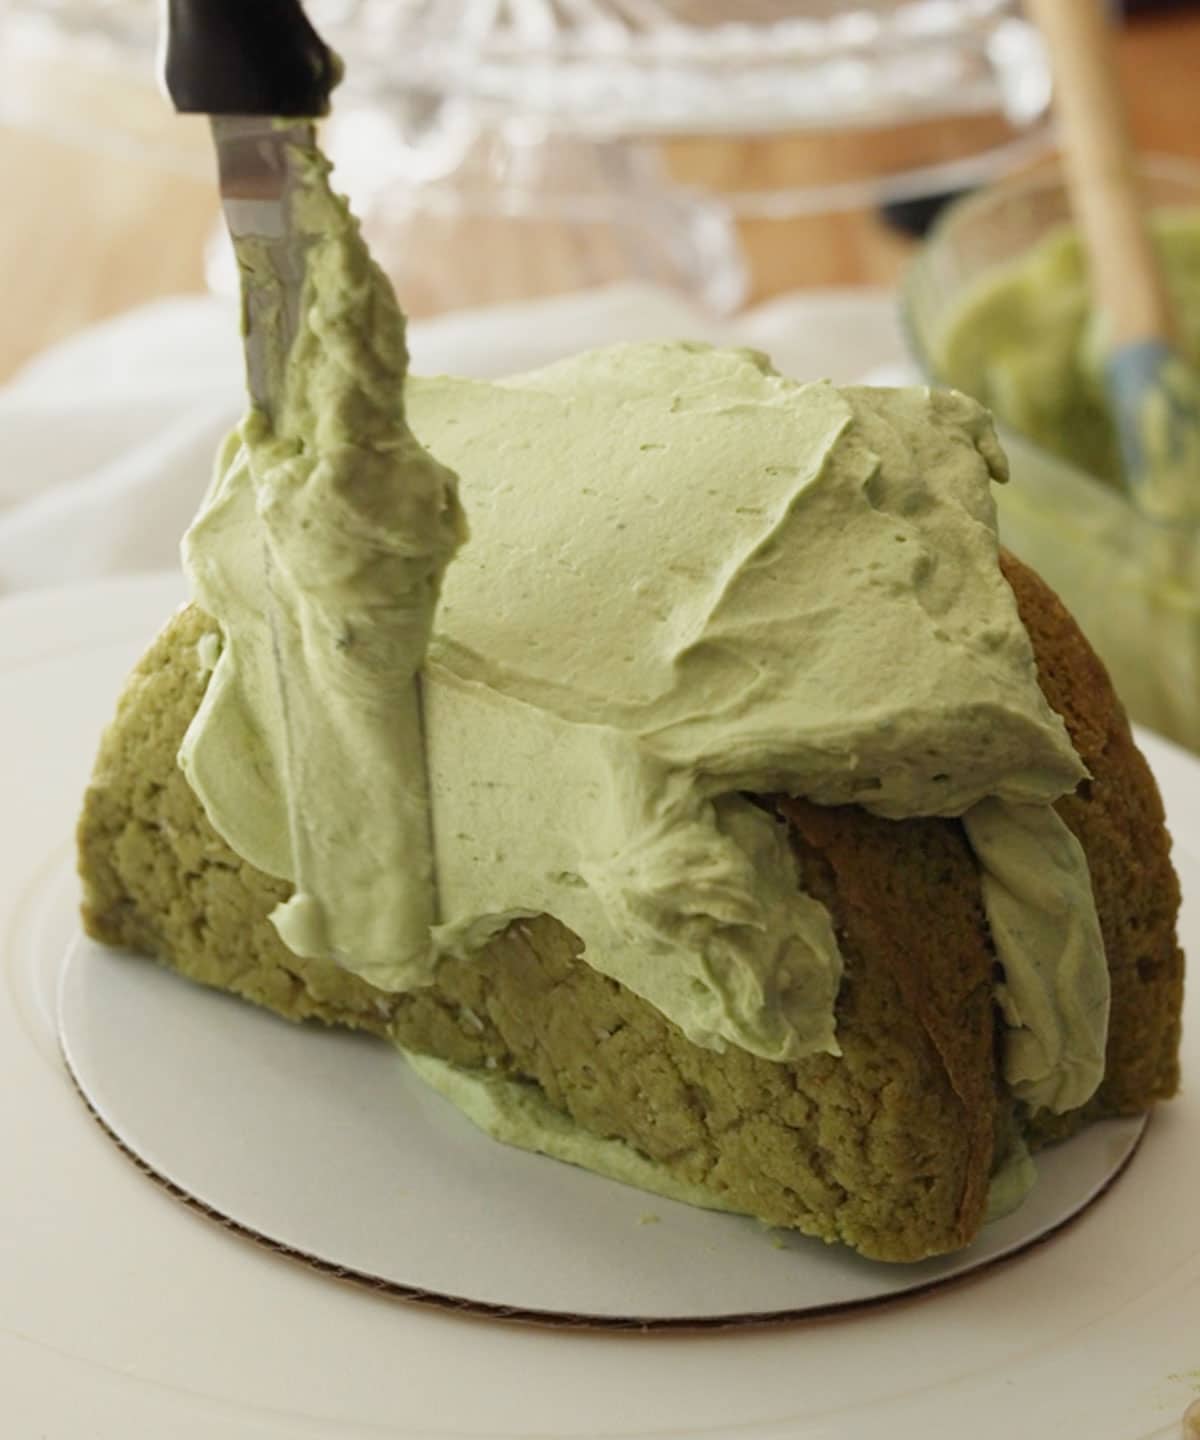
Step 9: Turn the entire cake on its side so the cut sides are completely touching the cake board. Use your offset spatula to frost the entire cake.
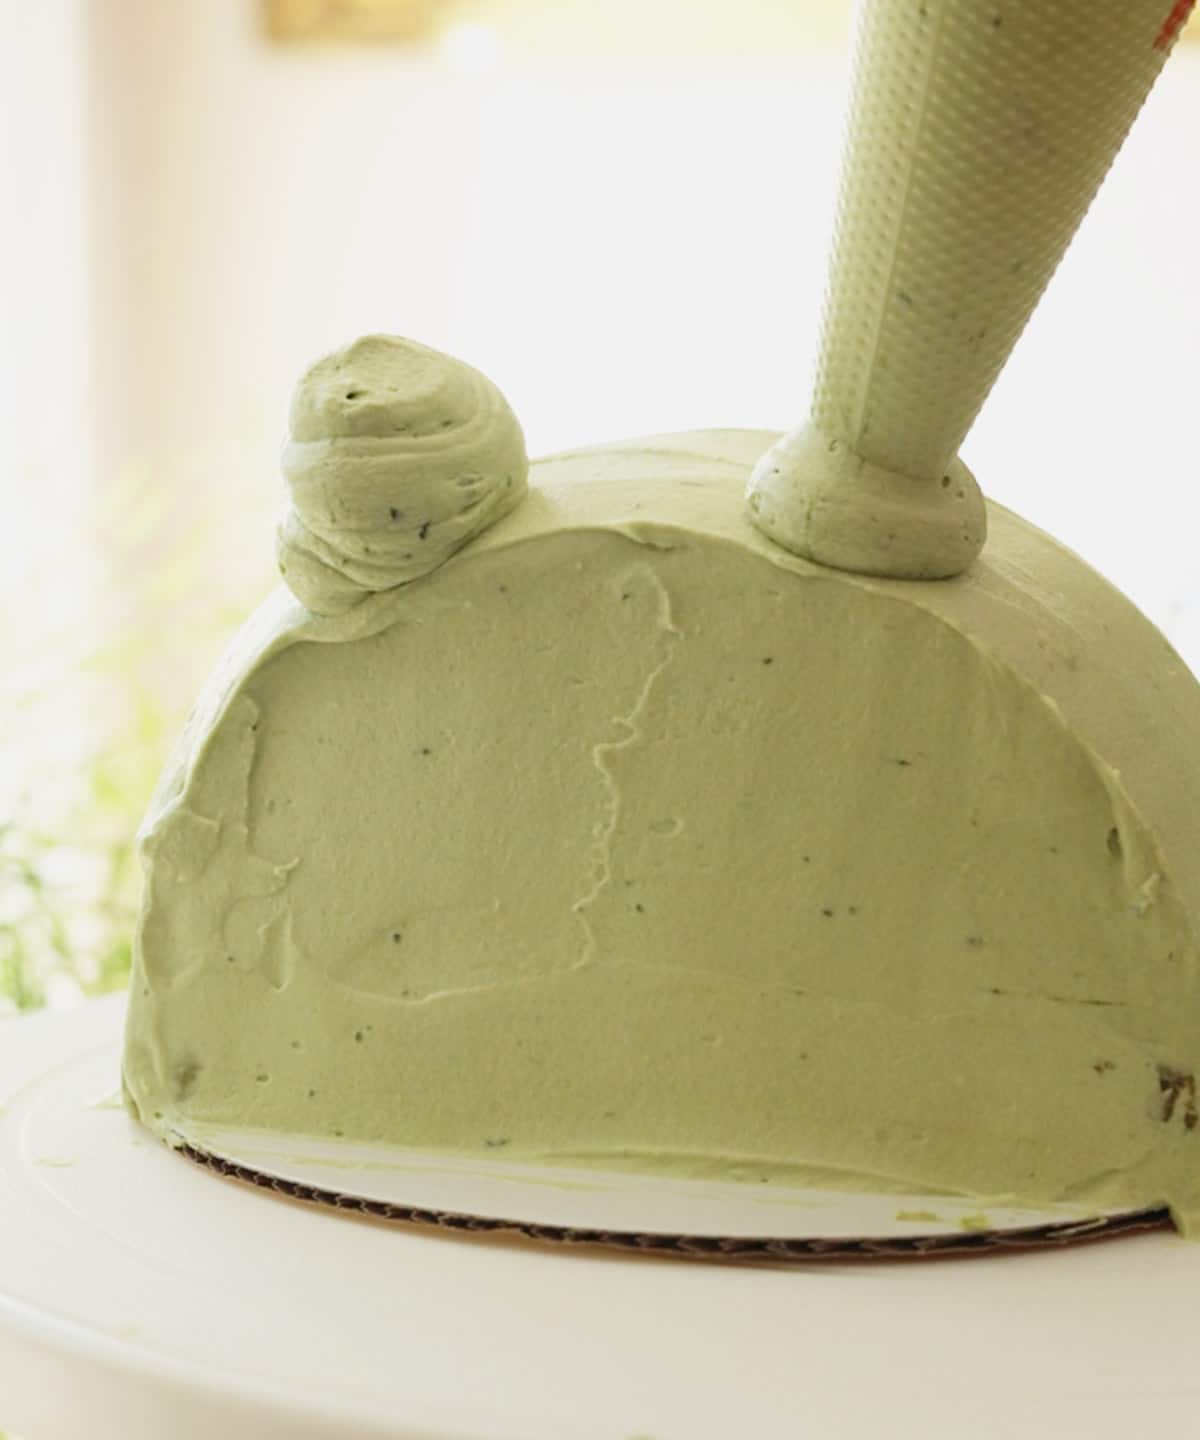
Step 10: Place some frosting in a piping bag and cut a large tip. Pipe frog eyes on top of the cake.
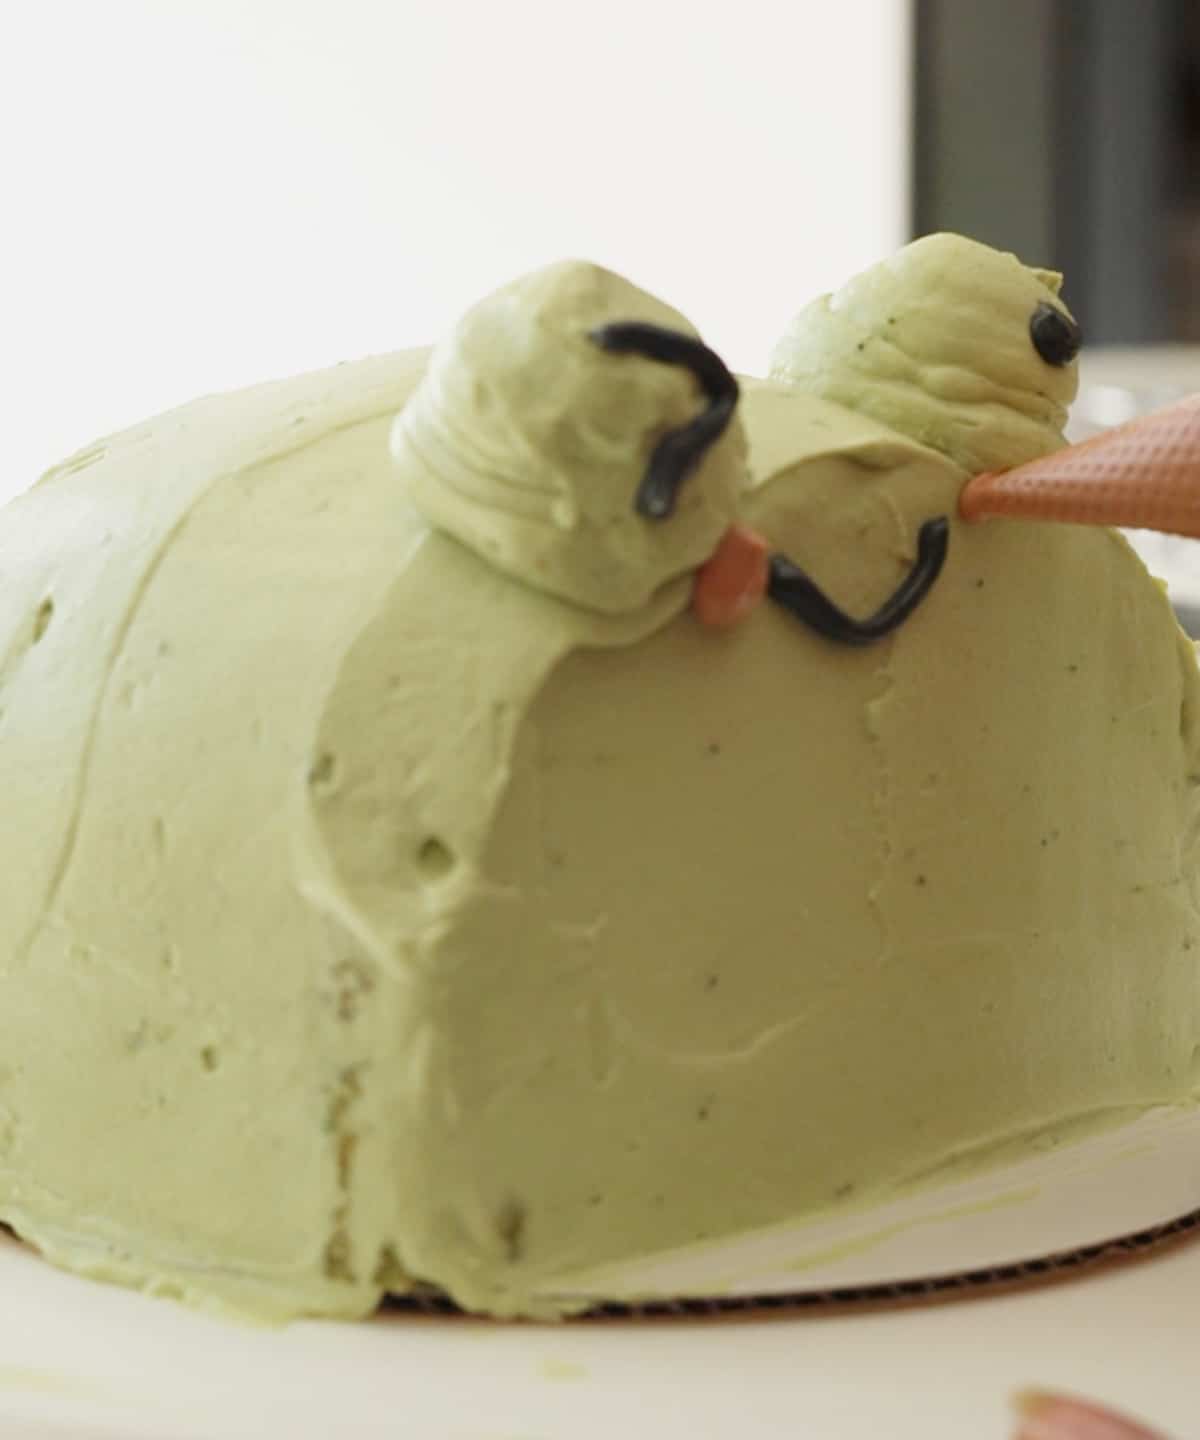
Step 11: Add frog facial details. I recommend using natural food coloring (black cocoa and freeze dried strawberry powder) to dye your whipped cream instead of artificial coloring. This is because whipped cream dyed with artificial coloring tends to bleed more quickly into other colors!
Step 12: Repeat cake assembly steps with your second cake layer and enjoy! 🐸🍰
For full instructions, see the recipe card below.
💡Baking Tip
- Weigh your ingredients! One of my favorite kitchen tools is a kitchen scale because it’s more accurate than measuring by volume. If you use cups, spoon the flour in gently, then level it with a knife or spatula.
Storage
I do not recommend making the cake in advance, mostly because of the facial decorations! Colored whipped cream frosting tends to bleed more easily than buttercream.
If you really need to make it advance, I recommend baking the cake layers ahead of time. Once cooled, you can plastic wrap them and keep them in the fridge for 1 day or freezer for up to 3 months. Then, decorate the cakes day of.
Store leftover cake in the fridge for up to 5 days. I recommend either refrigerating slices of cake in airtight containers, or lightly plastic wrapping the entire cake.
More Matcha Recipes
🎥 Cake Assembly Video
I really hope you enjoy this frog cake recipe! If you make it, I’d love to see. You can tag me at #bitesbybianca / @bitesbybianca on Instagram. Enjoy!
📖 Recipe
Matcha Frog Cake with Easy Whipped Cream Frosting
✉️ want to save this?
Equipment
- large bowl for dry ingredients
- 2 large mixing bowls for cake batter and whipped cream
- medium bowl to whip egg whites
- 2 small bowls for dying frosting
- serrated knife
Ingredients
Matcha Cake:
Wet ingredients:
- 1 cup (227 g) unsalted butter softened
- 1 ¾ cup (350 g) granulated sugar
- 1 tbsp (6 g) matcha
- 2 (2) egg yolks room temperature
- 2 (2) egg whites room temperature
- 1 tbsp (13 g) vanilla extract
- 1 cup (240 g) buttermilk room temperature
Dry ingredients:
- 1 ¾ cup (218.75 g) all-purpose flour
- 2 tbsp (16 g) cornstarch
- 1 tbsp (12 g) baking powder
- 1 tsp (6 g) fine sea salt
Matcha Whipped Cream:
- 4 oz (113.4 g) block cream cheese softened
- 1 – 1 ½ tbsp (6 g) matcha powder sifted, adjust to taste
- ¾ cup (90 g) powdered sugar
- 1 tbsp (13 g) vanilla extract
- 2 cups (476 g) heavy cream chilled
- 1-2 tsp (4 g) black cocoa powder for eyes + smile decorations
- 1 tsp (4 g) freeze dried strawberry powder for blush decoration
Instructions
Matcha cake layers:
- Grease and line two 6-inch springform pans (at least 3 inches tall). Preheat oven to 325°F/162°C.
- In a large bowl, stir together 1 ¾ cup (218.75 g) all-purpose flour, 2 tbsp (16 g) cornstarch, 1 tbsp (12 g) baking powder, and 1 tsp (6 g) fine sea salt. Set aside.
- In a large mixing bowl, use hand mixer to cream softened 1 cup (227 g) unsalted butter, 1 ¾ cup (350 g) granulated sugar, and 1 tbsp (6 g) matcha until light and fluffy, about 3-4 minutes. Make sure to scrape down the sides and bottom of bowl with silicone spatula.
- Add in 2 egg yolks and 1 tbsp (13 g) vanilla extract. Mix until smooth.
- Mix in half of the dry ingredients until just combined, and then mix in half of the buttermilk. Make sure to scrape the sides and bottom of the bowl.
- Repeat once more with remaining dry ingredients and buttermilk. The batter should be thick and fluffy. Do not overmix.
- In a medium mixing bowl, whip 2 egg whites until you get fluffy and thick stiff peaks. Make sure to use a clean bowl and beaters or else the egg whites will not whip correctly!Gently fold the fluffy egg whites into your cake mixture until just combined. There should be no more white streaks left in the batter.
- Evenly spread cake batter into prepared pans and bake for 35-45 minutes, checking at the 30-minute mark. (As a general rule of thumb, cake pan should be filled about two-thirds full with batter. If you have extra, make cupcakes!)To test if it is done, stick a toothpick in the center. If it comes out clean, it's done baking. You can also lightly press on the center of the cake with your finger—if it springs back, it's done baking.
- Let cakes cool in pan for 15 minutes before removing. Let cake layers fully cool on wire rack.
Matcha whipped cream:
- In a large mixing bowl, use hand mixer to whip 4 oz (113.4 g) block cream cheese and 1 – 1 ½ tbsp (6 g) matcha powder on medium speed until smooth, about 2-4 minutes.
- Turn the mixer to low and add ¾ cup (90 g) powdered sugar, one third at a time. Mix until just combined.
- Add 1 tbsp (13 g) vanilla extract. Turn the mixer to medium speed and slowly drizzle in 2 cups (476 g) heavy cream.Stop mixing as soon as you reach stiff peaks: there should be visible track marks from the whisk and the cream easily holds its shape.
- Add 1 tbsp frosting to each of your 2 small bowls. Mix in 1-2 tsp (4 g) black cocoa powder to one of them to create black frosting for the frog facial details. Mix in 1 tsp (4 g) freeze dried strawberry powder to the other bowl to make pink-ish frosting for the blush. Transfer to their own piping bags and set aside for later.
Assembly:
- Note: We will be creating one frog cake at a time. Each cake layer will be cut in half, combined, and turned into one frog. So, in the end we will have 2 frog cakes!
- Place cake board on top of a cake turntable.
- Place one cake layer down on your cake board. Cut the cake down the middle to create two semicircles. Keep one piece on the cake board, and place the other cake slice aside.
- Using an offset spatula, add a layer of matcha whipped cream. Place the second half of the cake on top.
- Turn the entire cake over so the cut sides are completely touching the cake board. Use your offset spatula to frost the entire cake.
- Fill your piping bag with some frosting. Cut a large tip and pipe on 2 big dollops on the top of the cake to create the eyes.
- Use black and pink frostings to create frog faces.
- Repeat assembly process with second cake layer! Enjoy!!
Notes
- This cake layer recipe was adapted from Divas Can Cook’s Moist Yellow Cake Recipe!
- No buttermilk? For every cup of buttermilk, use 1 cup whole milk + 1 tbsp vinegar or lemon juice. Stir and let sit for about 5 minutes before using.
- Storage: Lightly plastic wrap the entire cake or keep cake slices in an airtight container in the fridge for up to 5 days. Eat cake at room temperature.

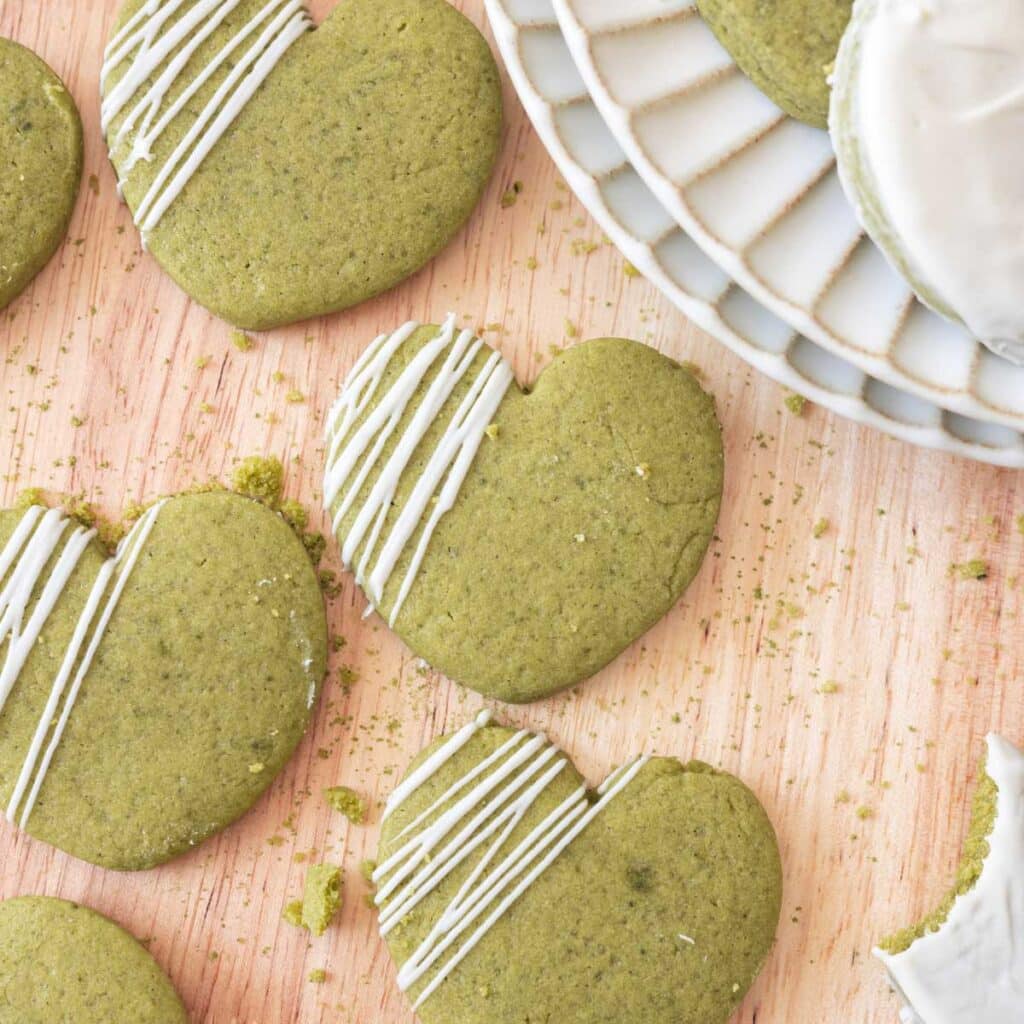
I loved this cake so much! I made little lily pads too with some extra cake.
Hi Ivy! That is so cute!! Thank you for your comment! Would love to see a pic if you have it, feel free to email me at bi****@***********ca.com! 🙂
i have had not too great experiences with baking/decorating cakes, but this is the first recipe that actually worked well!! not only is the cake adorable it’s delicious and fairly easy to make. the only thing to watch out for is that some of the ingredients listed aren’t stated in the directions. for example the directions don’t say when to add the salt, and the ingredients listed for the frosting don’t have powdered sugar or vanilla. it’s very simple to improvise those little things though and it wasn’t a problem for me! i loved this cake!!
Caroline!! Thank you so so much for an honest review, it really helps me out, especially as a beginner blogger. I really appreciate it and edited the recipe card. Glad you enjoyed this cake recipe <3 <3