
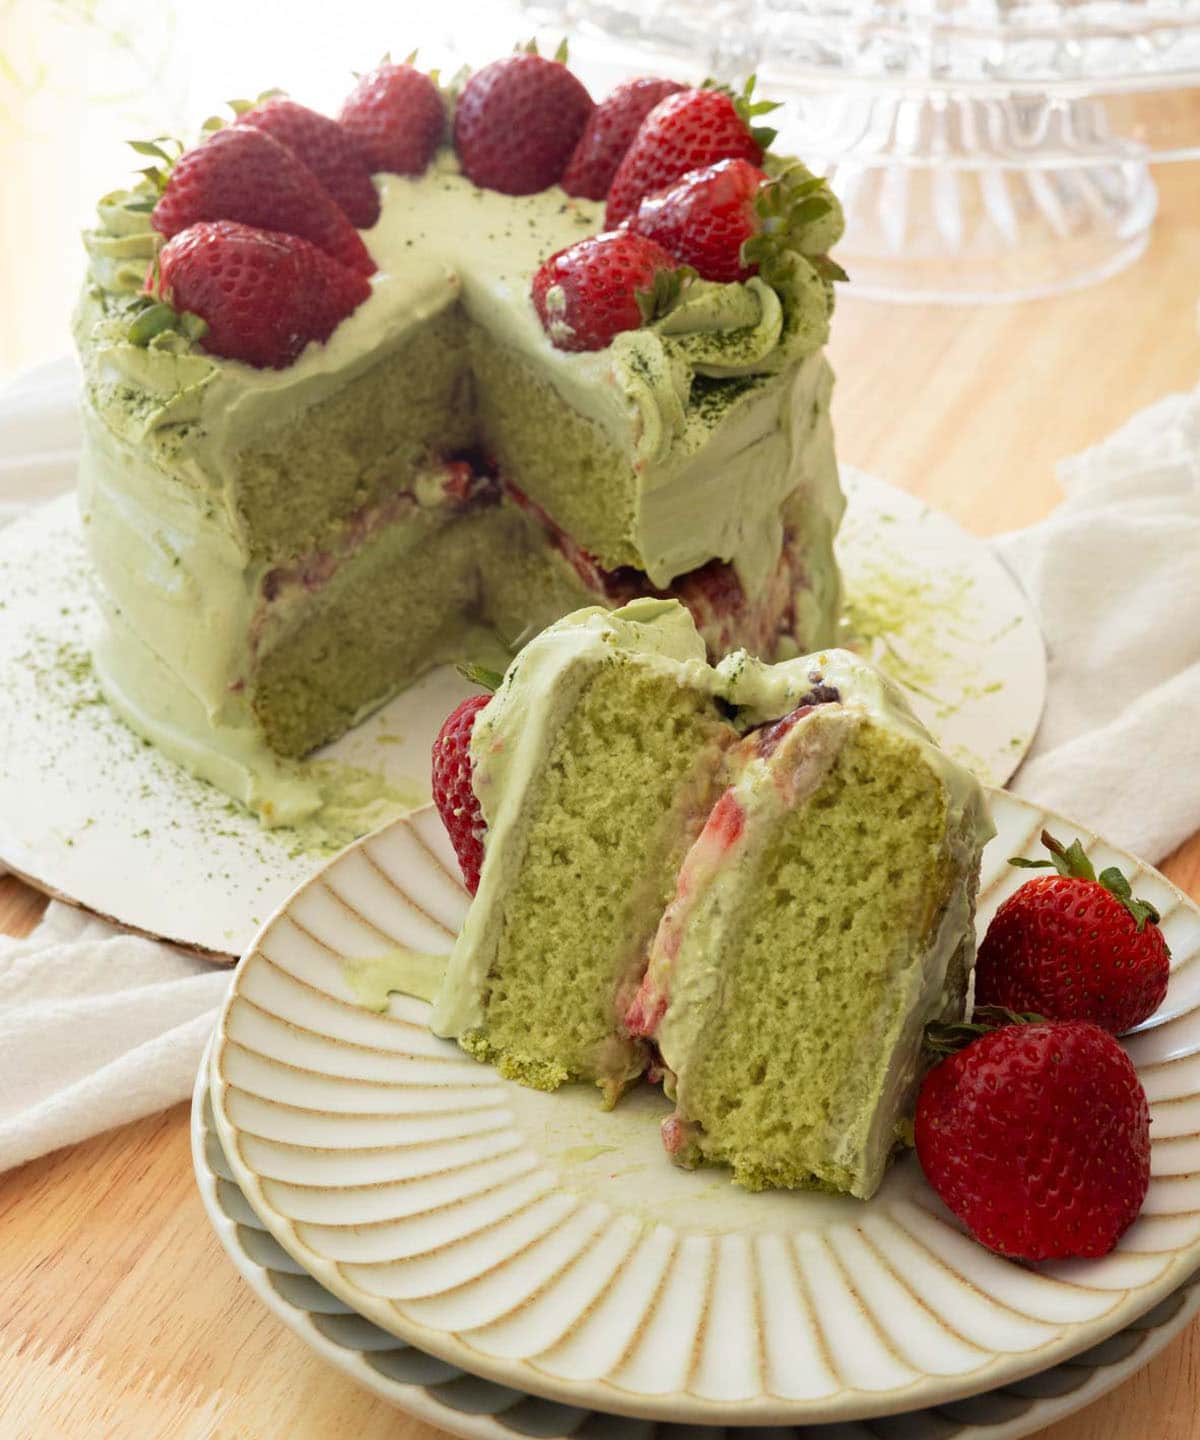
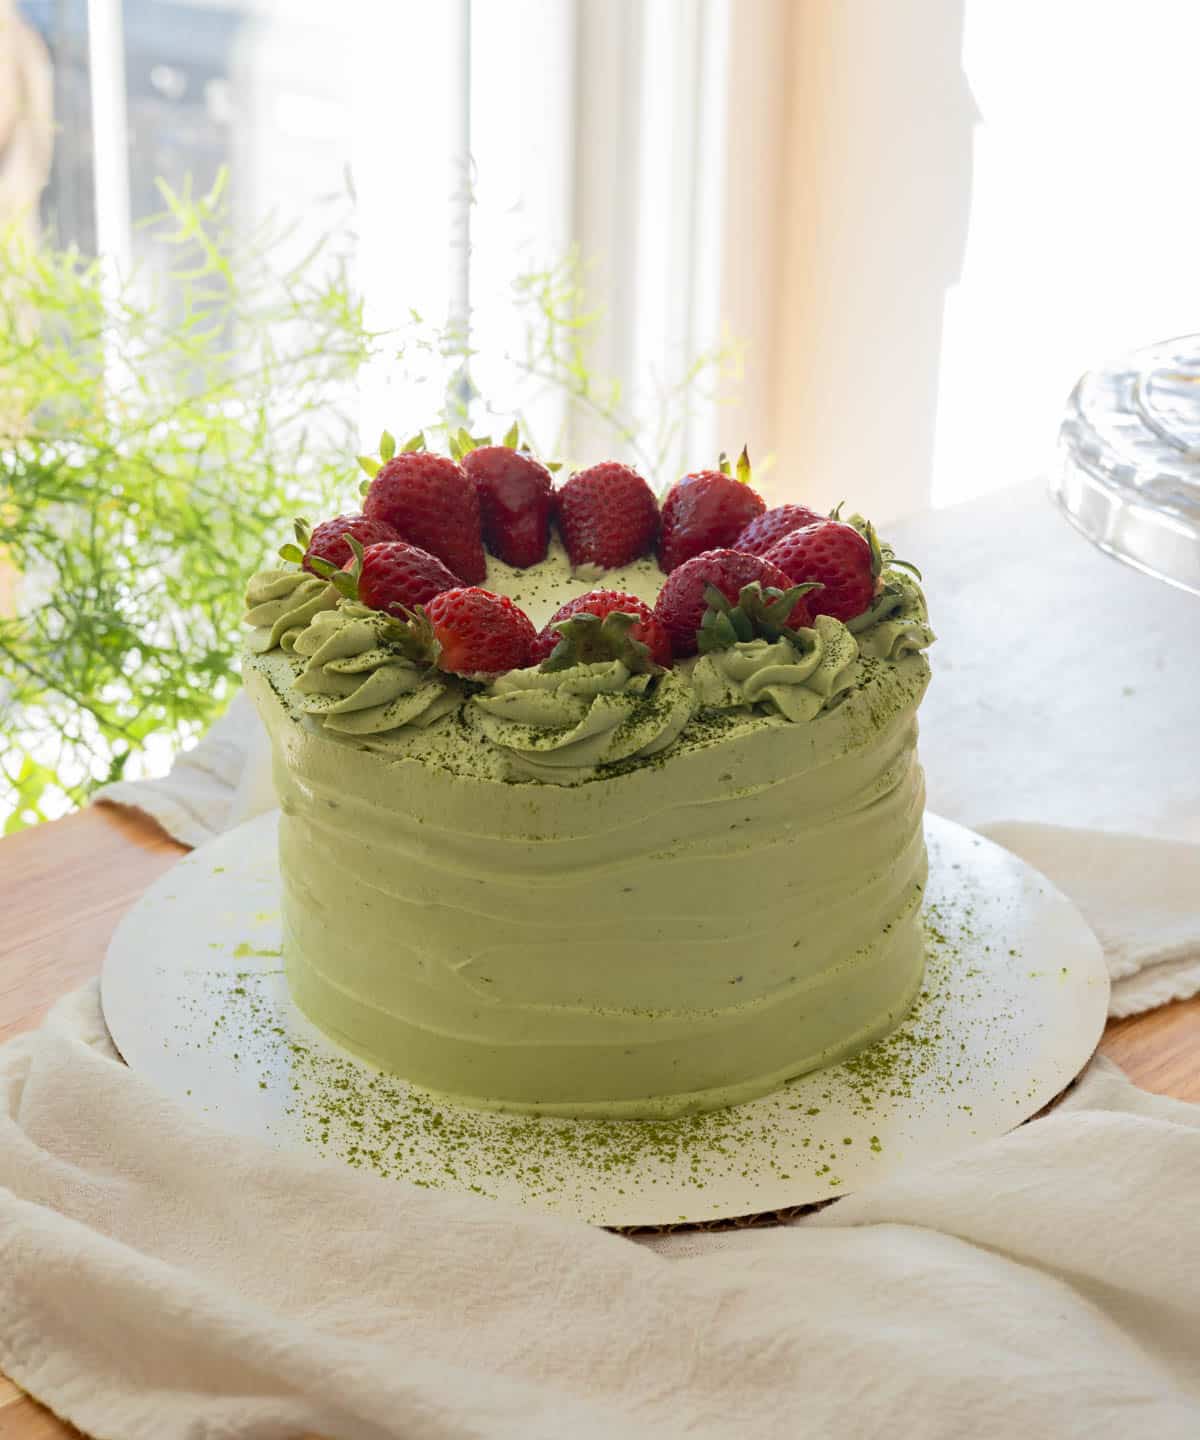
This strawberry matcha cake is a yummy, light, and refreshing dessert! It’s made using fluffy matcha cake layers, homemade matcha whipped cream, strawberry jam, and fresh strawberries.
The cake layers are an adapted recipe from Divas Can Cook’s tried and true Moist Yellow Cake Recipe, so you already know this cake will be absolutely divine!
✉️ want to save this?
Why You’ll Love This Recipe 🍰
- There’s matcha powder in both the cake layers and the frosting, so there’s a lot of matcha flavor! It’s absolutely perfect for any other matcha lovers out there.
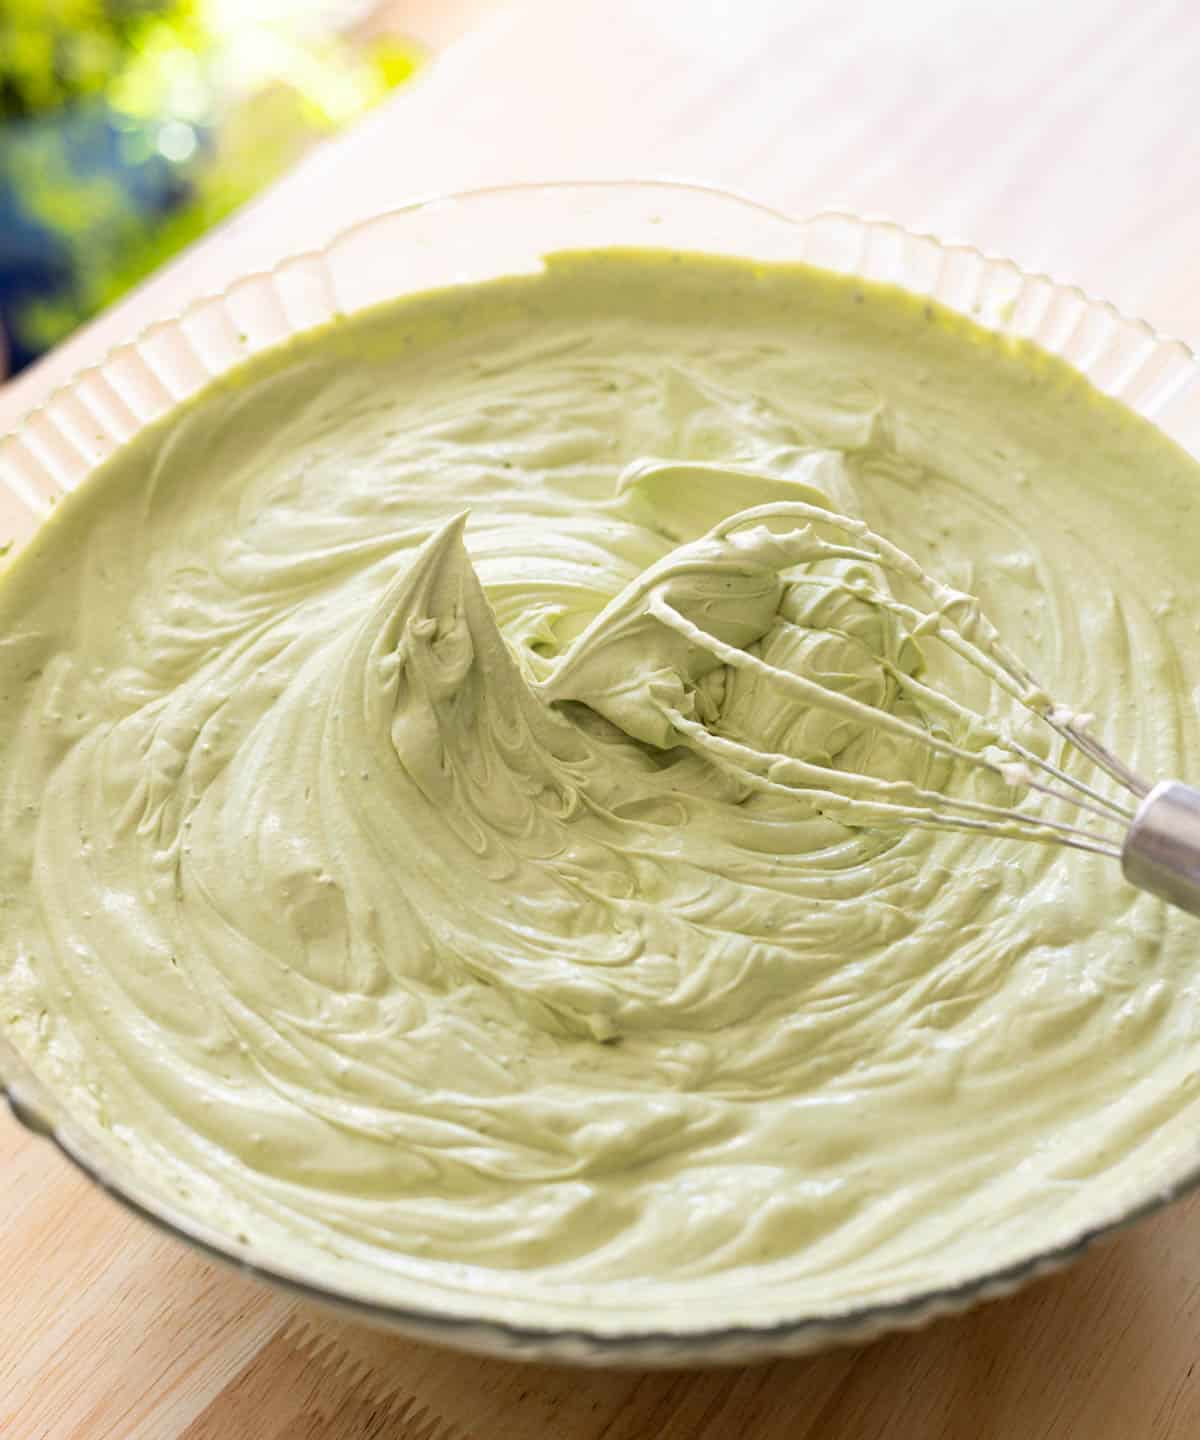
- The stabilized matcha whipped cream frosting is so light, airy, and not-too-sweet. For these reasons, I very much prefer this frosting over a traditional buttercream! It’s like eating a matcha cloud… so delish!
- I personally find decorating with whipped cream to be easier than other methods. I’m not a pro caker by any means. In fact, this is probably the fourth or fifth cake I’ve ever decorated in my life, and I was pleasantly surprised at how the cake came out. The whipped cream glides on so easily and smooths out like a dream.
- Strawberry + matcha = perfect match. There are just some flavor combos are meant to be together, and this is 100% one of them! The sweetness and tartness from the strawberries pair perfectly with the earthy, vegetal matcha powder, making this cake a delightful treat.
Ingredients
To make this matcha whipped cream cake, you’ll need the following ingredients:
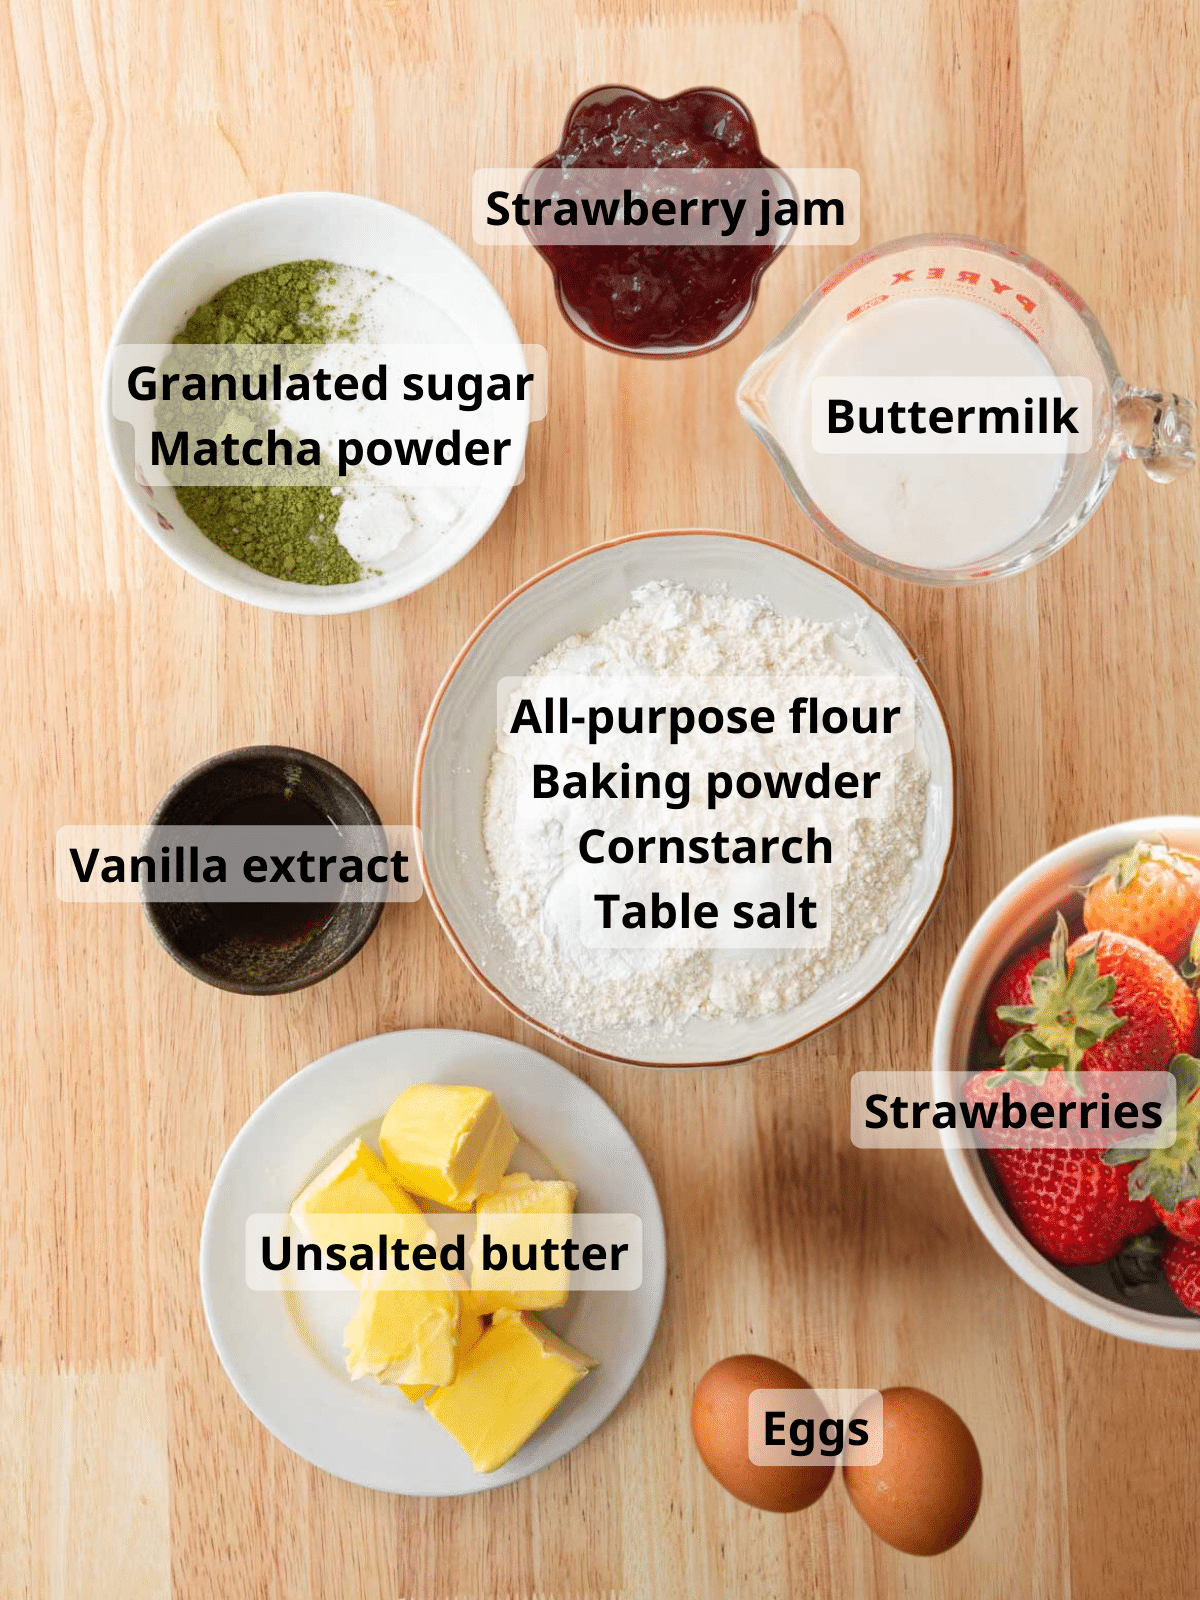
Ingredient Notes
For the cake layers:
- Unsalted butter is creamed together with granulated sugar and culinary matcha powder until light and fluffy.
- The eggs are separated into egg yolks and egg whites. The egg yolks are added to the creamed butter mixture and the egg whites are whipped into stiff peaks, then gently folded into the batter later on. This helps create a really fluffy cake!
- Since I couldn’t find cake flour, I used all-purpose flour + cornstarch. This pretty much mimics cake flour, creating more tender, softer cake layers.
- Buttermilk also helps create tender cake layers, in addition to adding moistness and tanginess.
- No buttermilk? For every cup of buttermilk, replace it with 1 cup whole milk + 1 tablespoon vinegar or lemon juice. Stir together and let it sit for at least 5 minutes before using.
For assembling the cake:
- The cake layers are sandwiched together with my homemade stabilized matcha whipped cream frosting, strawberry jam, and sliced strawberries.
- Feel free to decorate the cake ask you like! I did a thick outer layer of matcha whipped cream frosting and piped swirls using a large open star tip. After, I topped the cake with whole strawberries, which I lightly brushed with more strawberry jam to add a nice shine.
For the full list of ingredients and measurements, see the recipe card below.
Step-By-Step Instructions
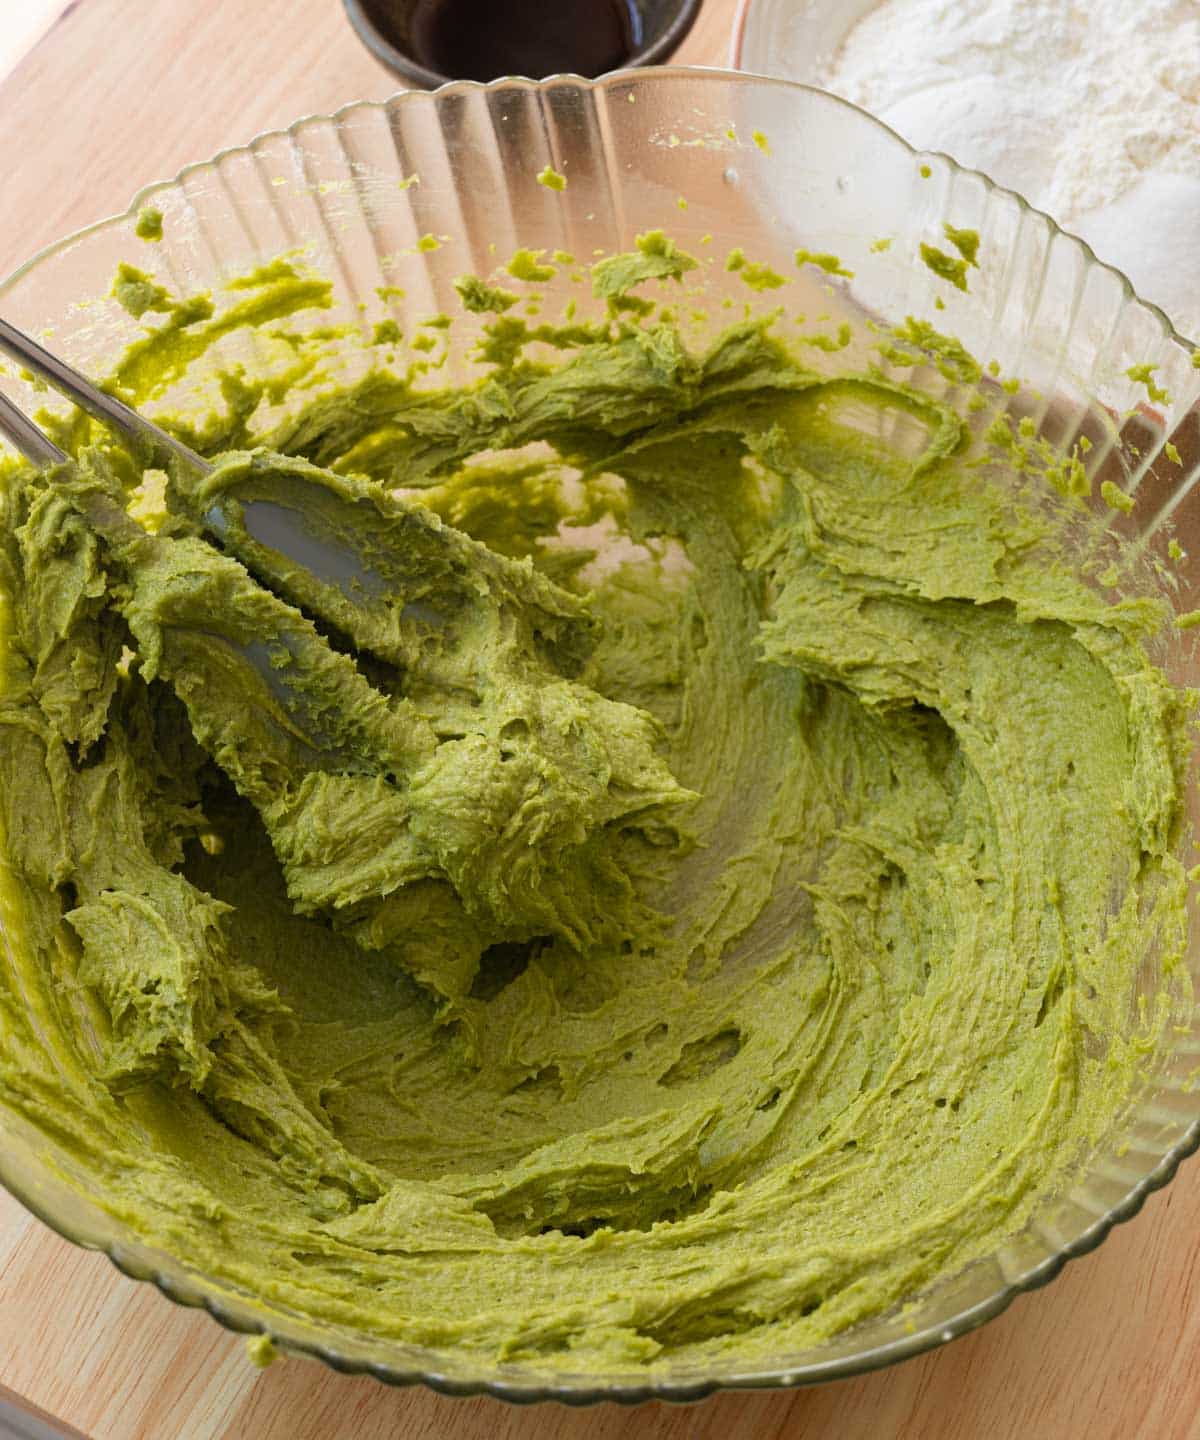
Step 1: Whip unsalted butter, sugar, and matcha powder until light and fluffy. Mix in egg yolks and vanilla extract.
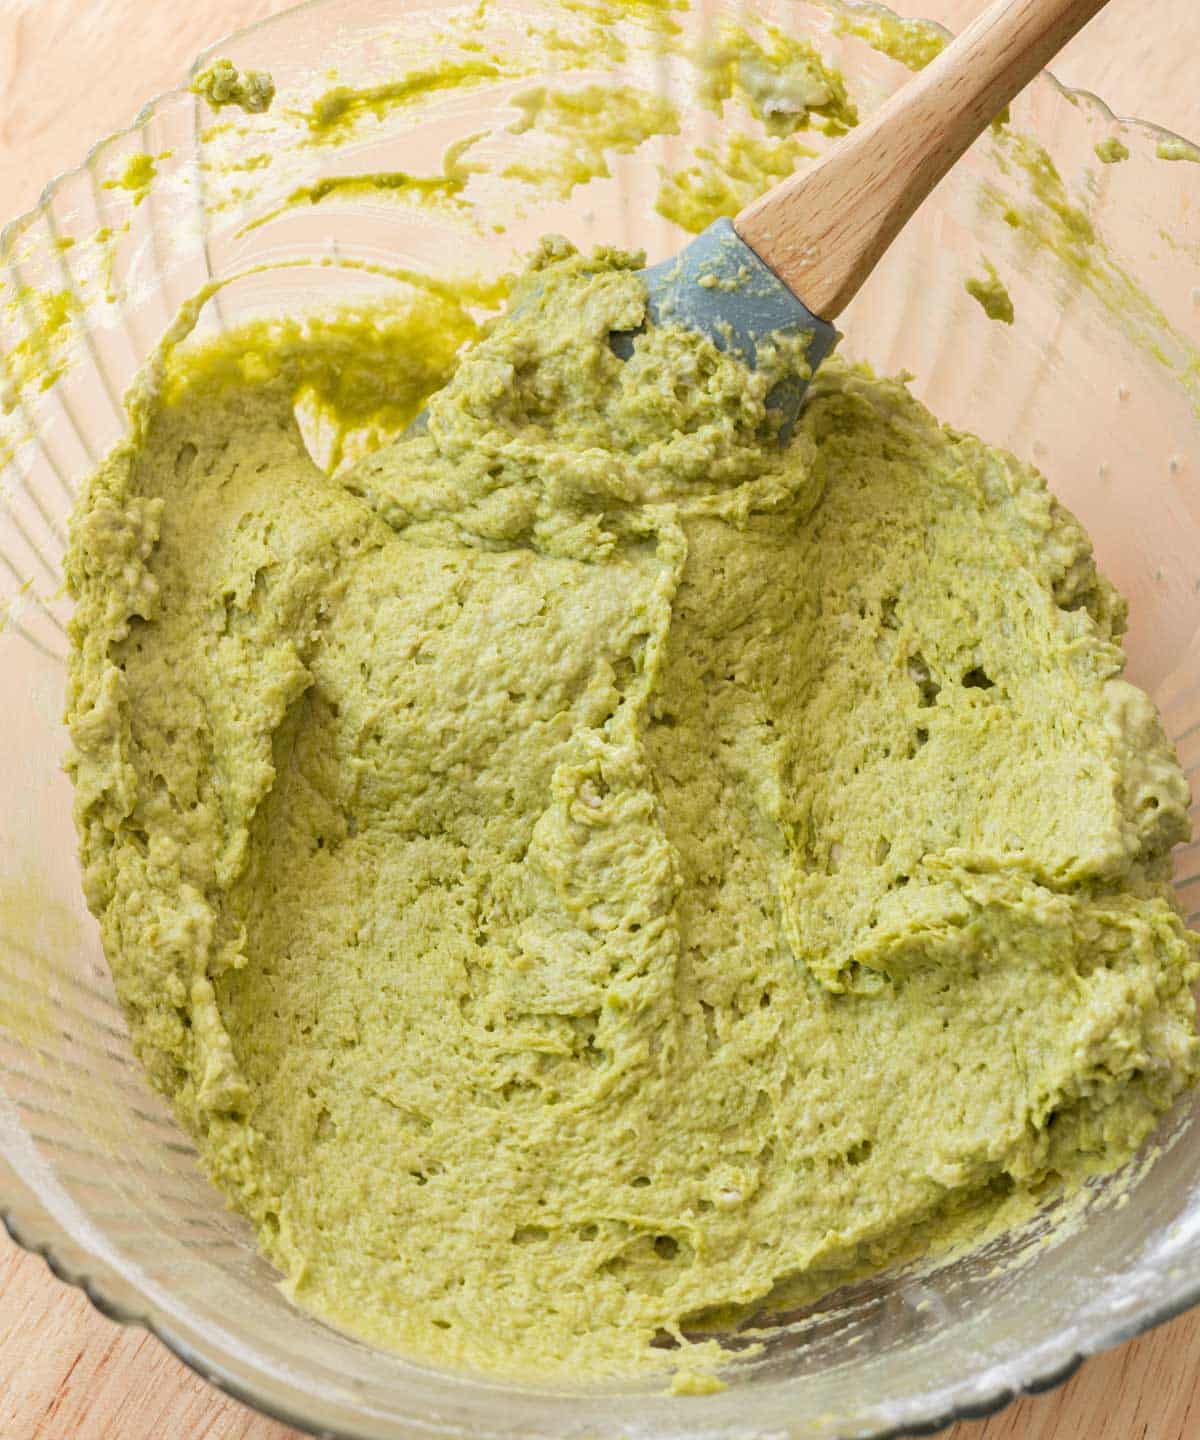
Step 2: Stir in half the dry ingredients until mostly combined, then stir in half of the buttermilk. Make sure to scrape the sides and bottom of bowl. Repeat once more. The mixture should be thick and fluffy—do not over mix.
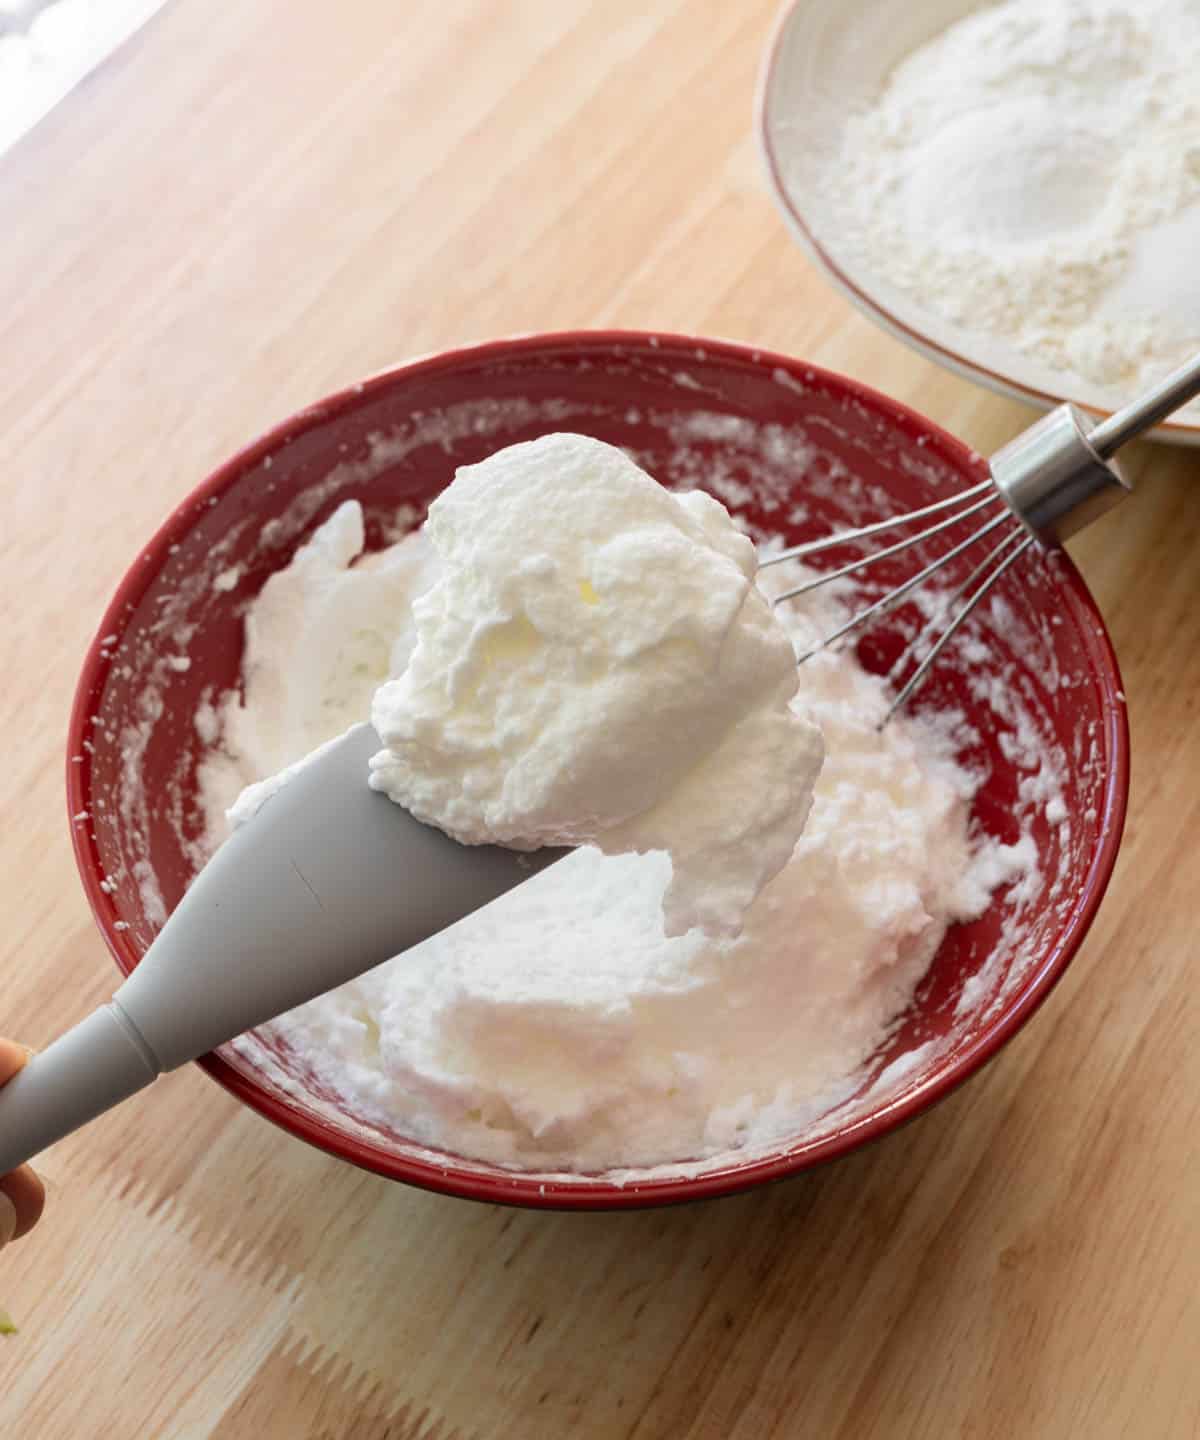
Step 3: In a separate bowl, whip egg whites until you get fluffy, thick stiff peaks. Gently fold this into your cake mixture.
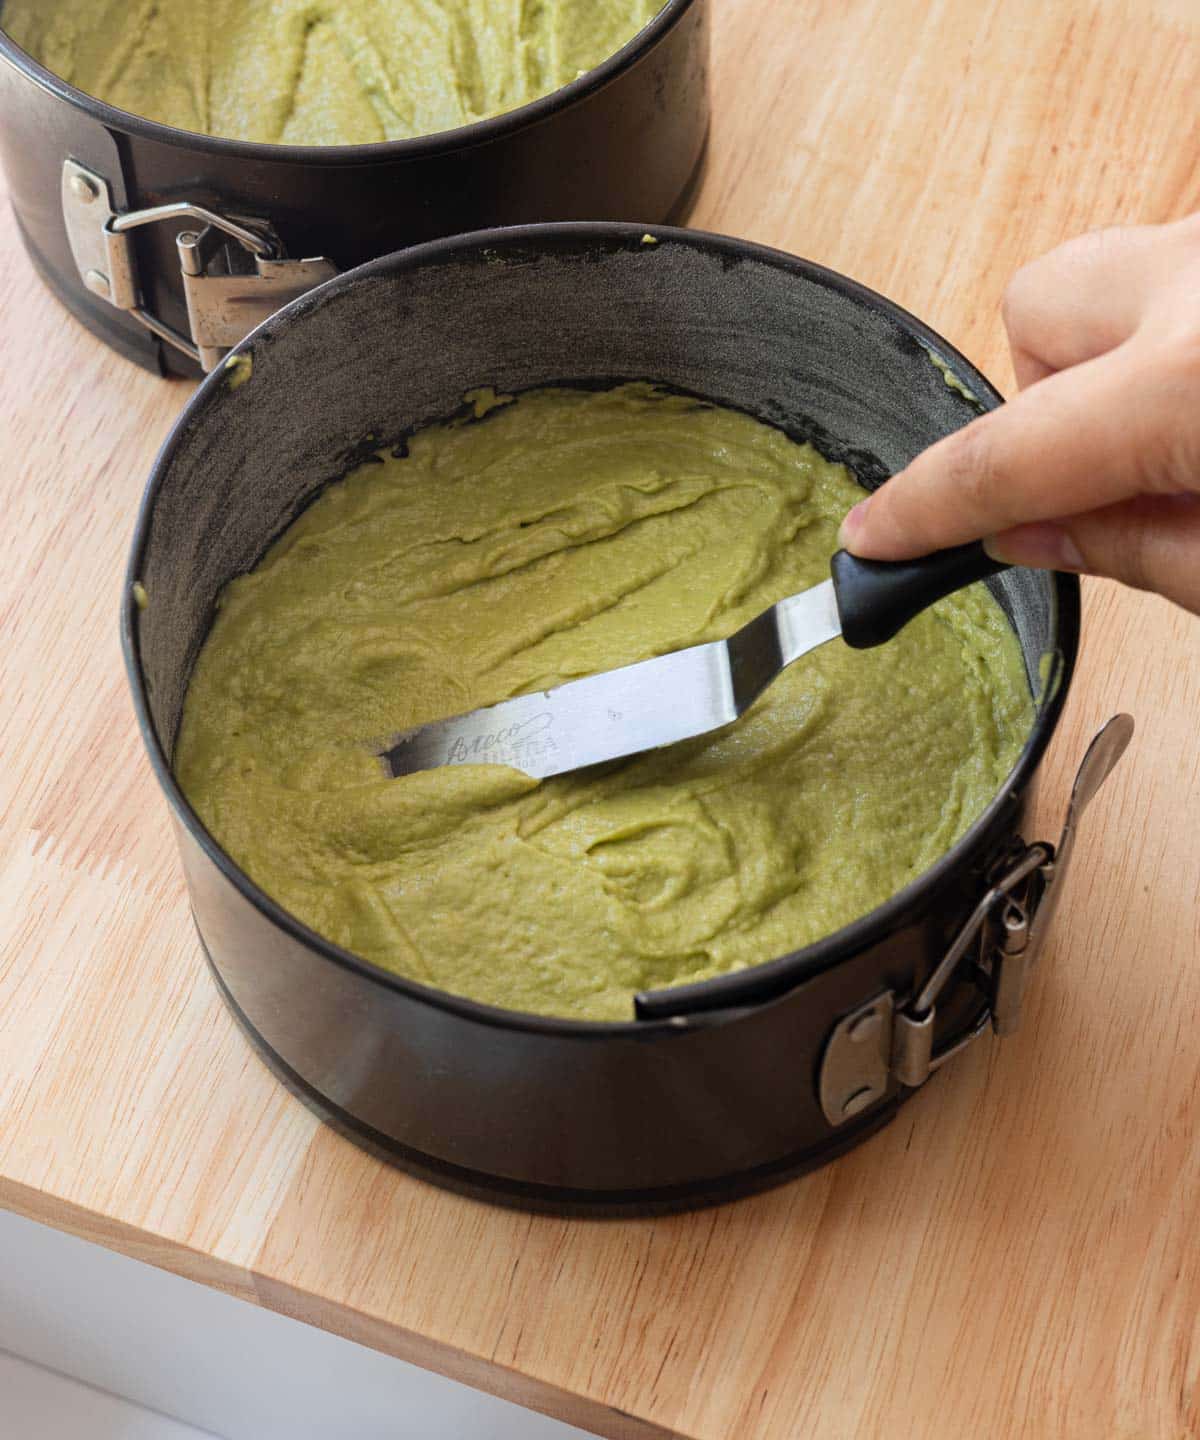
Step 4: Spread cake batter evenly into two greased and lined 6-inch springform pans (at least 3-inches tall). Bake at 325°F/162°C for 35-45 minutes, or until toothpick inserted in the center comes out clean. Let cake layers cool in pan for about 15 minutes. Remove cakes from pans to fully cool on wire racks before leveling and decorating.
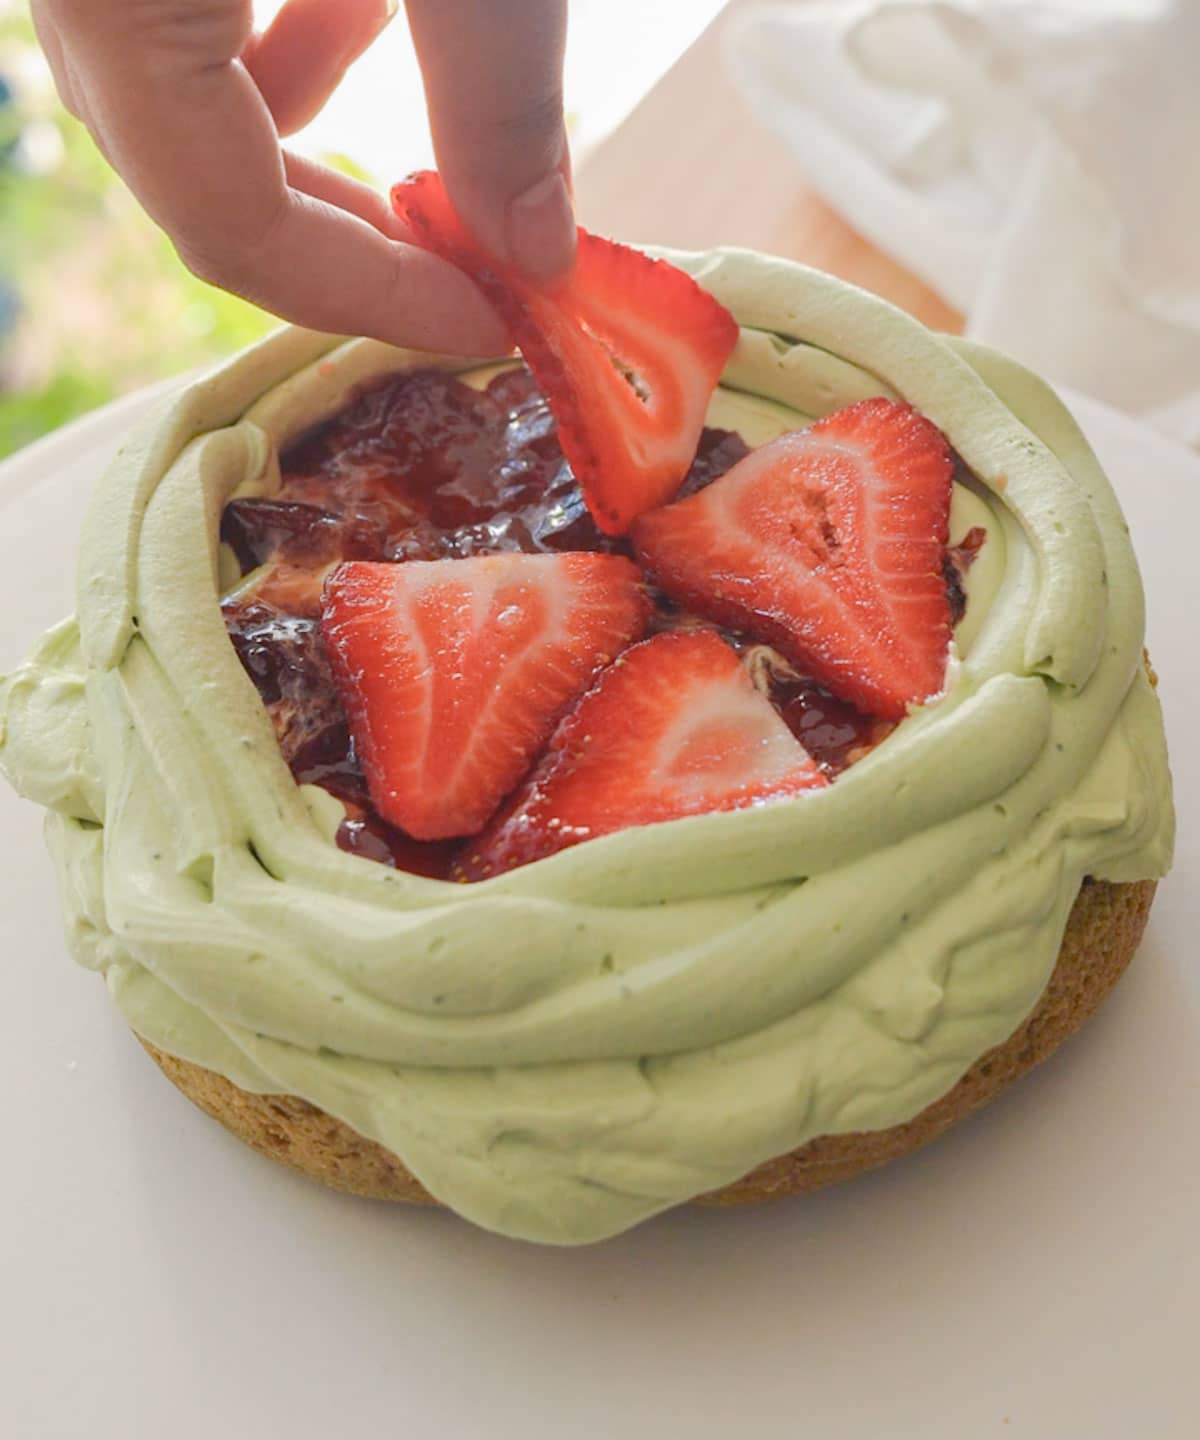
Step 5: Add a layer of matcha whipped cream to first cake layer, then pipe an ring on the outer edge. Add a thin layer of strawberry jam and top with thinly sliced strawberries.
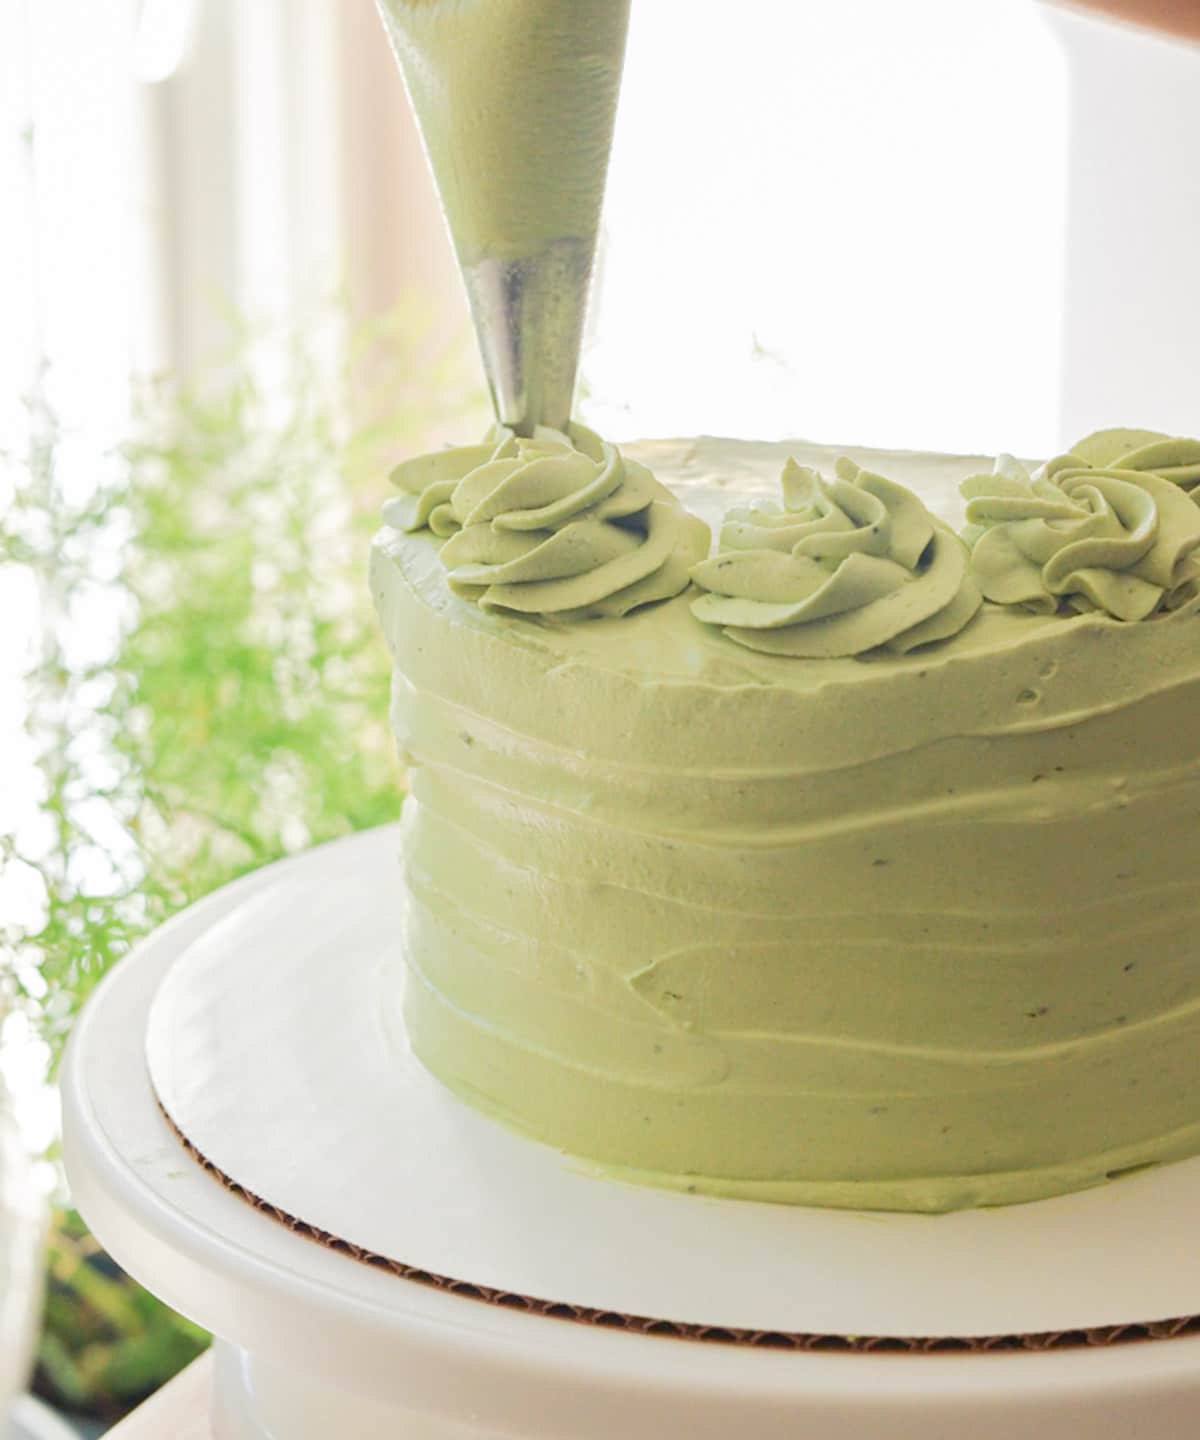
Step 6: Top with second cake layer and fully frost cake. Decorate to your liking. I used a large open star piping tip to pipe swirls and topped with whole strawberries.
For full instructions, see the recipe card below.
Baking Tips
- Weigh your ingredients! One of my favorite kitchen tools is a kitchen scale because it’s more accurate than measuring by volume. If you use cups, spoon the flour in gently, then level it with a knife or spatula.
- To prevent jam leakage, make sure to pipe a tall, sturdy frosting ring on the outer edge of the cake layer! I also recommend making sure the matcha whipped cream was mixed all the way to sturdy, stiff peaks.
- To add a little shine, lightly brush the whole strawberries on top of the cake with some jam!
Storage
Store leftover cake in the fridge for up to 5 days. I recommend either refrigerating slices of cake in airtight containers, or lightly plastic wrapping the entire cake.
🎥 Quick Video Tutorial
I really hope you enjoy this matcha whipped cream cake recipe! If you make it, I’d love to see! You can tag me at #bitesbybianca / @bitesbybianca on Instagram.
📖 Recipe
Strawberry Matcha Cake with Matcha Whipped Cream
✉️ want to save this?
Equipment
- 2 6-inch springform pans at least 3 inches tall
- offset spatula
- large bowl for dry ingredients
- large mixing bowl for cake batter
- medium bowl to whip egg whites
- serrated knife
Ingredients
Matcha Cake:
Wet ingredients:
- 1 cup (227 g) unsalted butter softened
- 1 ¾ cups (350 g) granulated sugar
- 1 tablespoon (6 g) matcha
- 2 (2) egg yolks room temperature
- 2 (2) egg whites room temperature
- 1 tablespoon (13 g) vanilla extract
- 1 cup (240 g) buttermilk room temperature
Dry ingredients:
- 1 ¾ cups (218.75 g) all-purpose flour
- 2 tablespoons (16 g) cornstarch
- 1 tablespoon (12 g) baking powder
- 1 teaspoon (6 g) table salt
Assembly:
- 1 batch (1 batch) stabilized matcha whipped cream frosting
- strawberry jam
- 4 (4) strawberries cut into thin slices and patted dry; plus whole strawberries for topping
Instructions
Matcha cake layers:
- Grease and line two 6-inch springform pans (at least 3 inches tall). Preheat oven to 325°F/162°C.
- In a large bowl, stir together 1 ¾ cups all-purpose flour, 2 tablespoons cornstarch, 1 tablespoon baking powder, and 1 teaspoon table salt. Set aside.
- In a large mixing bowl, cream softened 1 cup unsalted butter, 1 ¾ cups granulated sugar, and 1 tablespoon matcha until light and fluffy, about 3-4 minutes. Make sure to scrape down the sides and bottom of bowl.
- Add in 2 egg yolks and 1 tablespoon vanilla extract. Mix until smooth.
- Mix in half of the dry ingredients until just combined, and then mix in half of the buttermilk. Make sure to scrape the sides and bottom of the bowl.
- Repeat once more with remaining dry ingredients and buttermilk. The batter should be thick and fluffy. Do not overmix.
- In a medium mixing bowl, whip 2 egg whites until you get fluffy and thick stiff peaks. Make sure to use a clean bowl or the egg whites will not whip correctly! Gently fold the fluffy egg whites into your cake mixture until just combined. There should be no more white streaks left in the batter.
- Evenly spread cake batter into prepared pans and bake for 35-45 minutes, checking at the 30-minute mark. (As a general rule of thumb, cake pan should be filled about two-thirds full with batter. If you have extra, make cupcakes!)To test if it is done, stick a toothpick in the center. If it comes out clean, it's done baking. You can also lightly press on the center of the cake with your finger—if it springs back, it's done baking.
- Let cakes cool in pan for 15 minutes before removing. Let cake layers fully cool on wire rack.
Assembly:
- Use a serrated knife to level the tops of your cooled cake layers.
- Place cake board on top of a cake turntable. Add a dollop of matcha whipped cream frosting to your cake board, then place cake layer on top. This will help keep the cake in place.
- Spread a thin layer of strawberry jam in the middle. Lay sliced strawberries on top.
- Add second cake layer on top. Use your offset spatula to frost the entire cake. Decorate with frosting swirls and whole strawberries, and enjoy!
Notes
- This recipe was adapted from Divas Can Cook’s Moist Yellow Cake Recipe!
- No buttermilk? For every cup of buttermilk, use 1 cup whole milk + 1 tbsp vinegar or lemon juice. Stir and let sit for about 5 minutes before using.
- Storage: Lightly plastic wrap the entire cake or keep cake slices in an airtight container in the fridge for up to 5 days. Eat cake at room temperature.

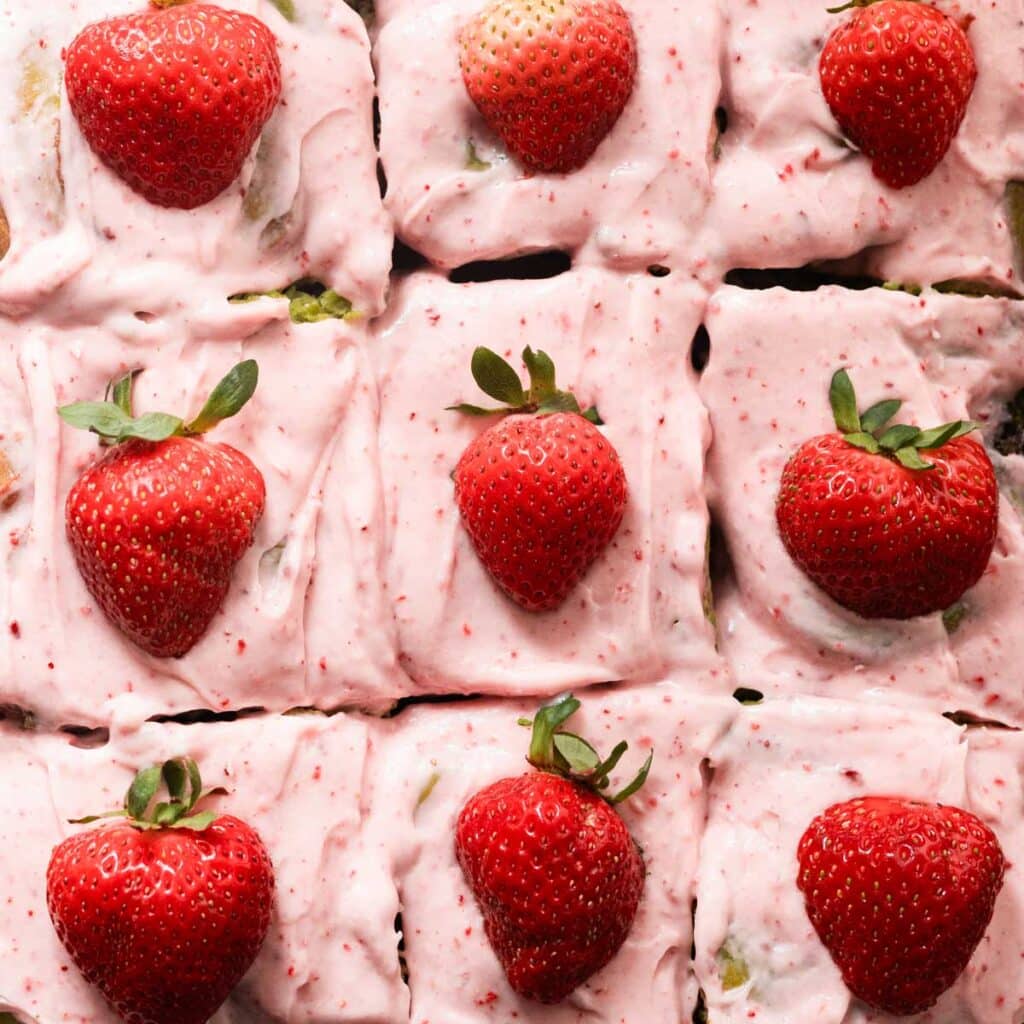
Cake fell apart when it came out of the pan, but that’s okay cause it was still delicious! We decided to lean into the imperfections and make a monster cake with strawberry eyes and teeth lol!
Hi Alex! Ahh, so sad to hear it fell apart out of the pan—any inkling on why that may have happened? Were the sides of the cake stuck to the pan?
I’m glad it was still delicious and you made something fun out of it! If you have a pic i’d love to see hahaha, feel free to email me at bi****@***********ca.com!