Looking to spruce up your sourdough? Try this 3D sourdough art technique where you mix flour, water, & salt, and then color it and create any design you want!
✉️ want to save this?
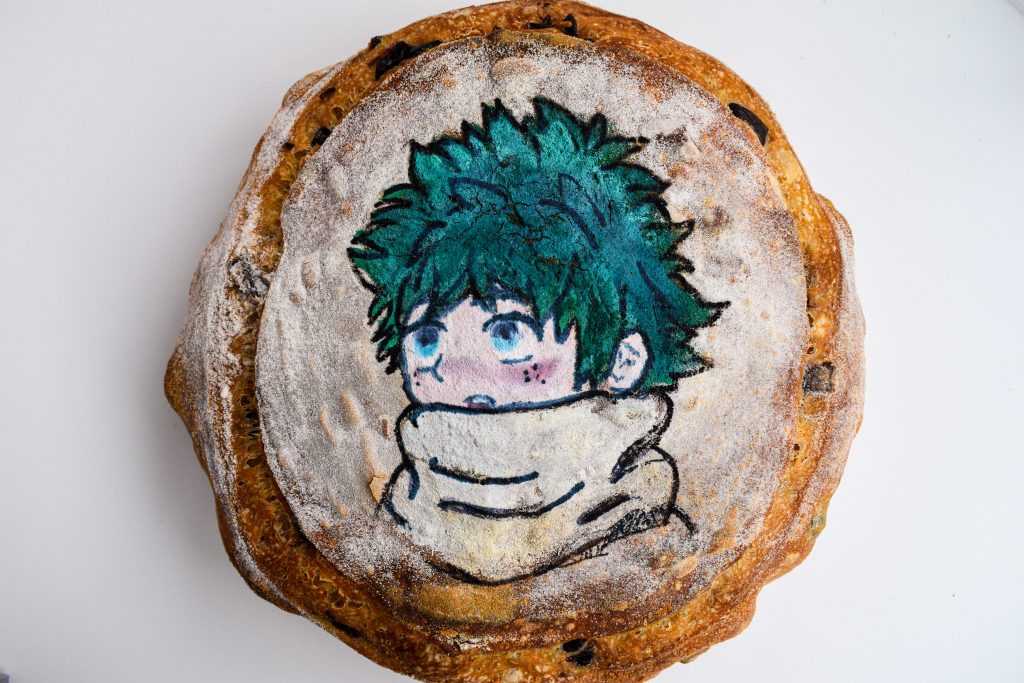
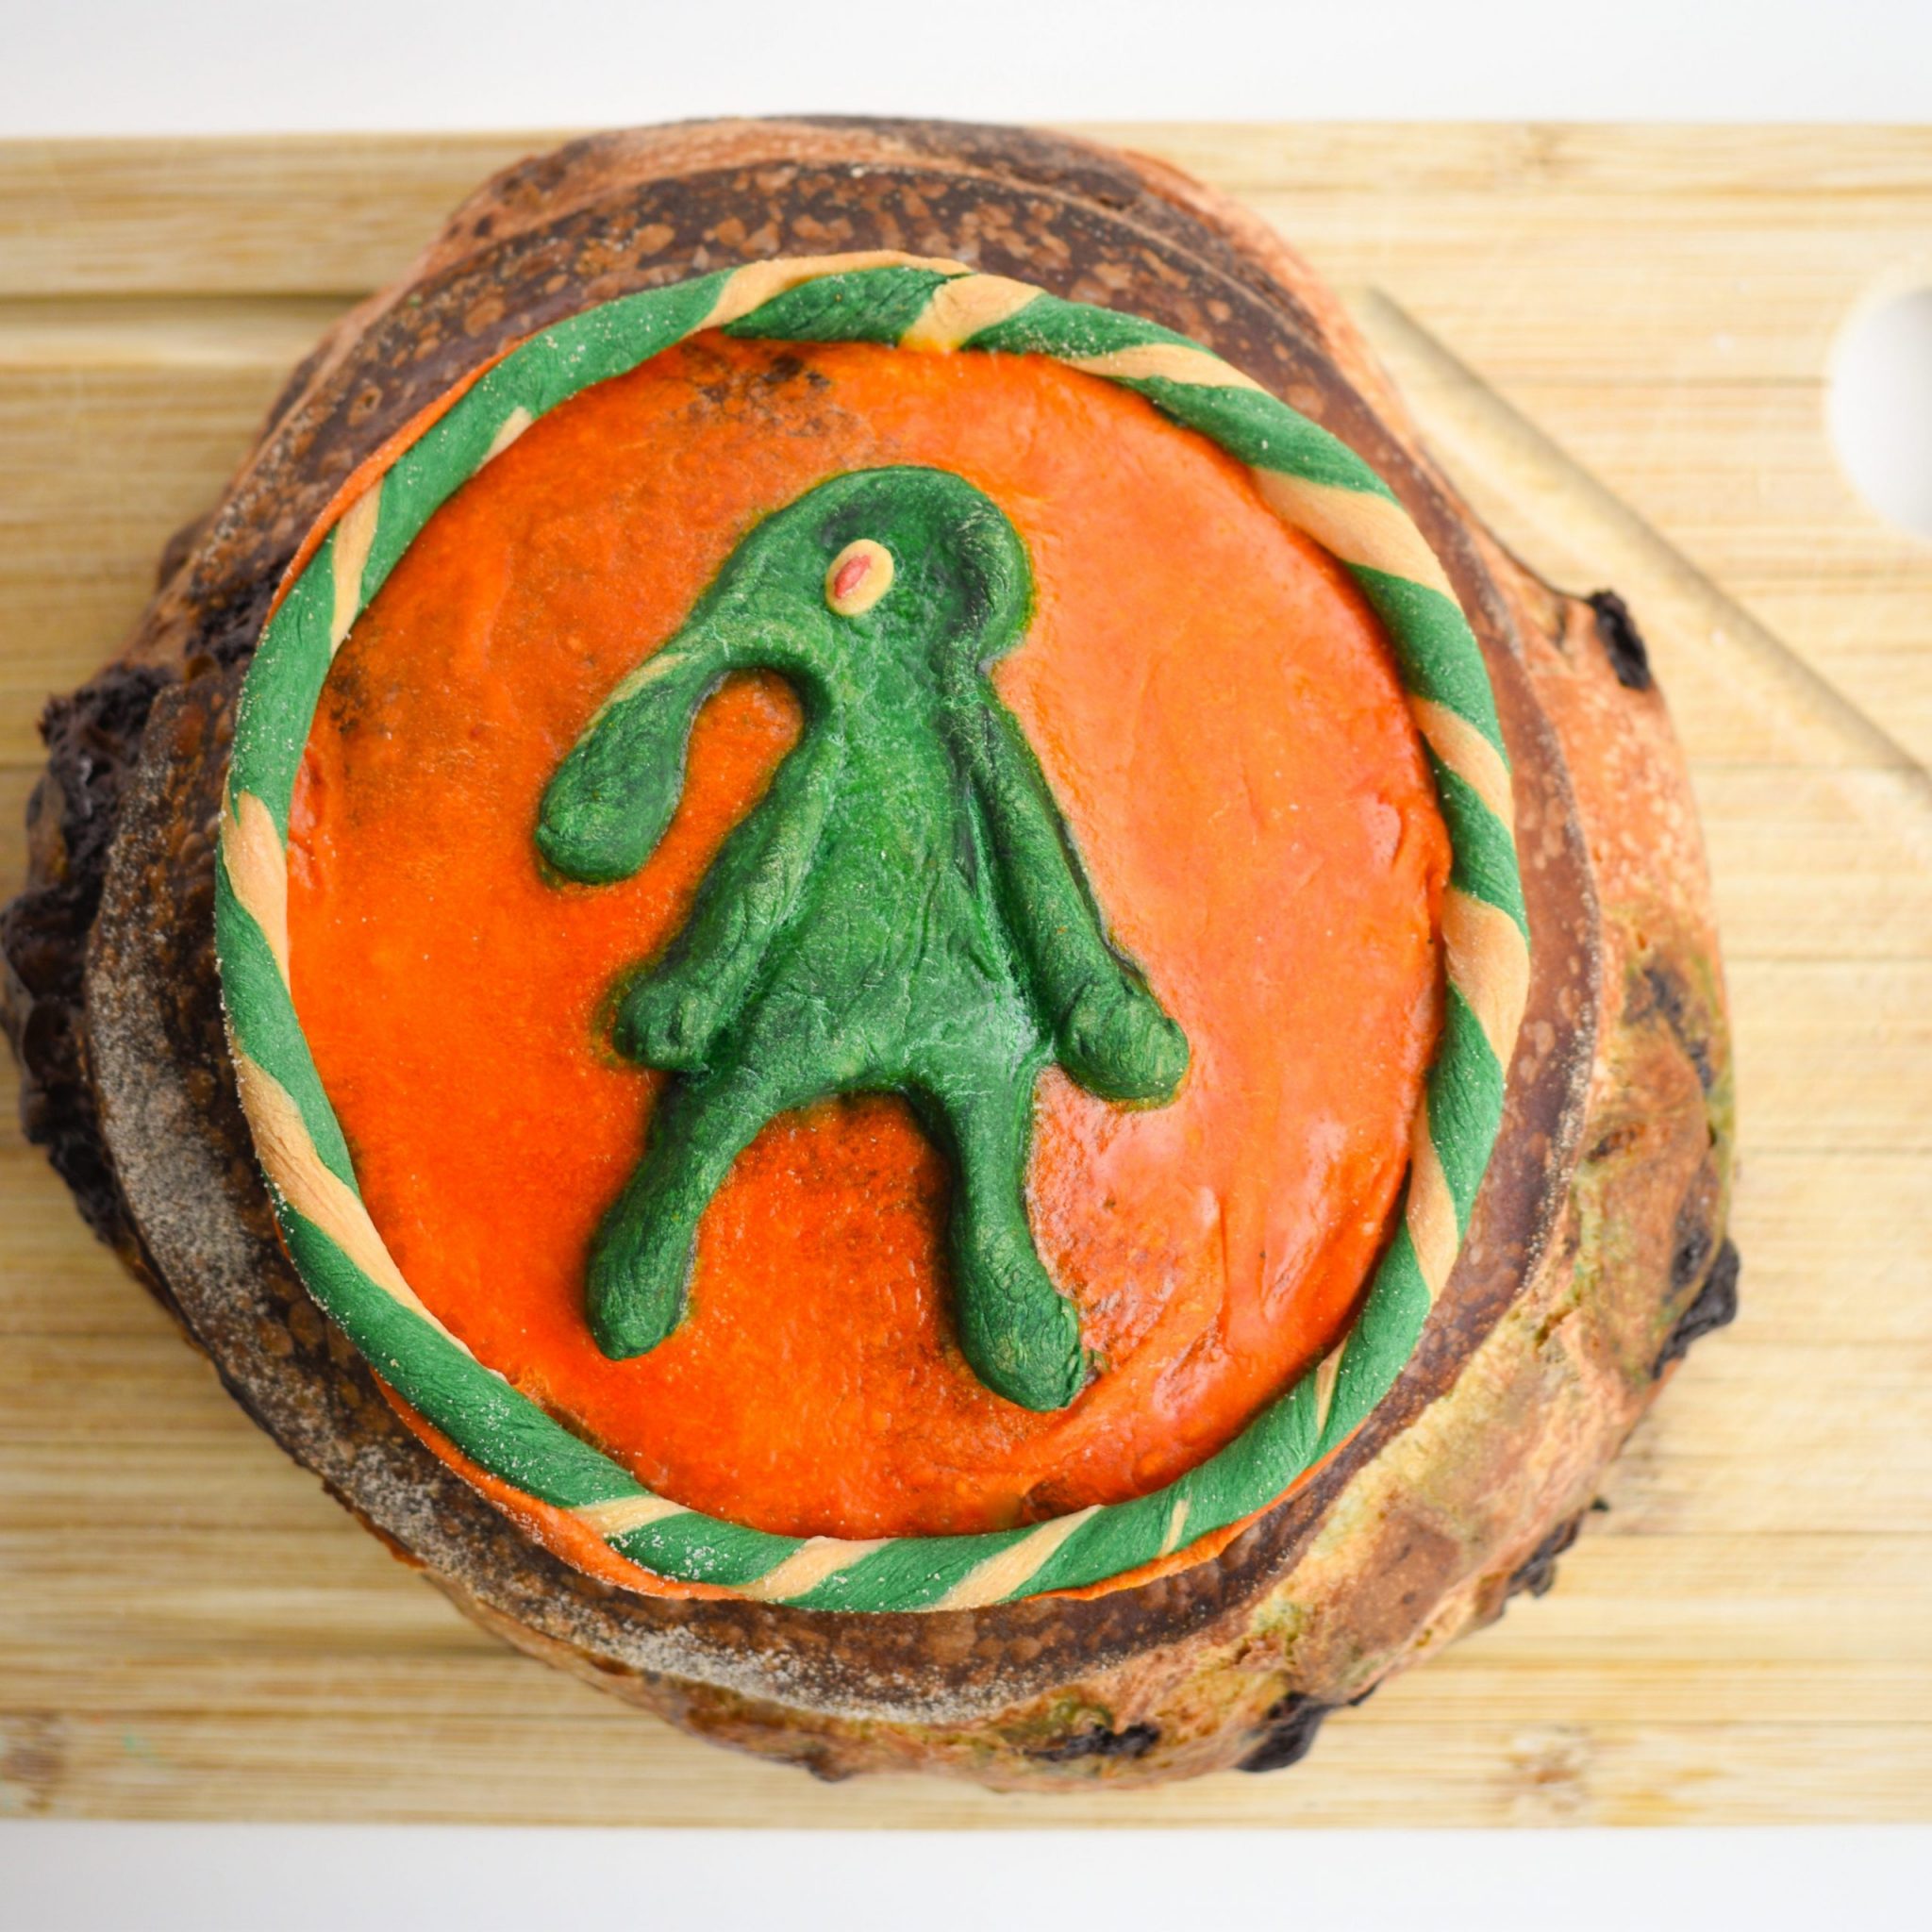
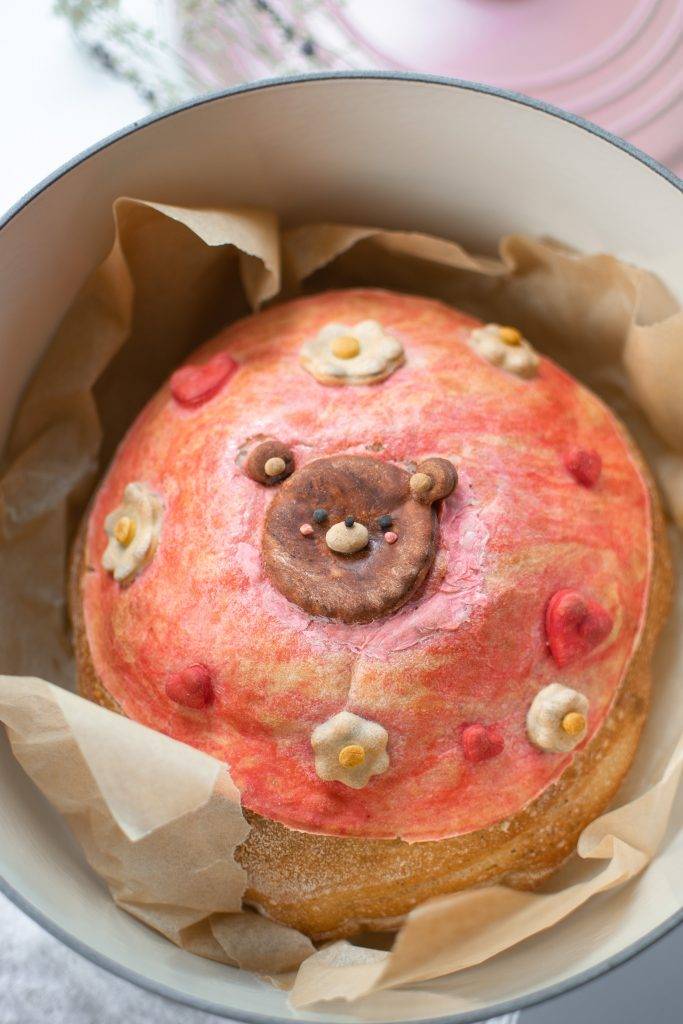
I always look forward to making bread because not only do I get to eat it, I get to try out different scoring patterns, paint different designs, and now, my latest obsession—make 3D sourdough art.
I first saw this technique by Penny Che, who shared pictures of her beautiful loaves with 3D flowers on them. She mixed flour and water until the dough became clay-like, then colored it using different powders.
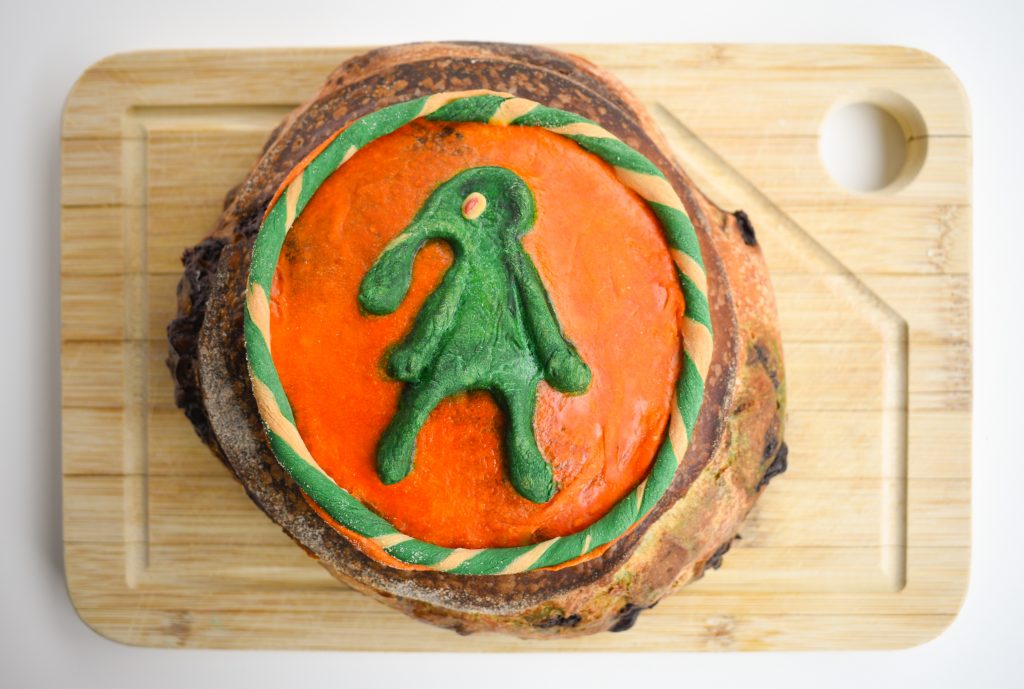
After seeing Penny’s posts, I knew I wanted to apply this technique to my own bread. Naturally, I decided to make one of my first loaves Spongebob-themed, hence the “Bold and Brash” art (pictured above).
So, if you’d like to learn how to add 3D designs onto your bread, keep on reading!
❤️ Why You’ll Love This Tutorial
- It’s only 3 ingredients, and then any food coloring you want! Feel free to use natural food coloring, like beet powder, matcha, or cocoa. Or, opt-in for some gel food coloring.
- You won’t need any special equipment. Simply knead and shape everything by hand.
- You can create any design you want! Not feeling the Spongebob design? I don’t blame you. LOL. With free will… you can create anything—flowers, hearts, landscapes, or other memes.
What You’ll Need
To make 3D sourdough art, you’ll need the following:

- Your favorite sourdough recipe. The sourdough should be towards the very end of its second rise. I like to create the 3D art while my baking vessel and oven preheat.
- For the 3D sourdough art, all you’ll need is flour, water, salt, and food coloring.
For the full list of ingredients and measurements, see the recipe card below.
💡 Baking Tip
- Wear gloves! Kneading in food coloring into dough can easily dye your fingers. Wearing food-safe gloves help prevent that.
“What is this abomination” – my Instagram followers
3D Sourdough Art FAQs
I’m sure this would work on many other types of breads, like sandwich loaves, rolls, and other artisanal breads! I haven’t tried it yet, but let me know in the comments if you have. 🙂
I used gel food coloring to get super vibrant colors.
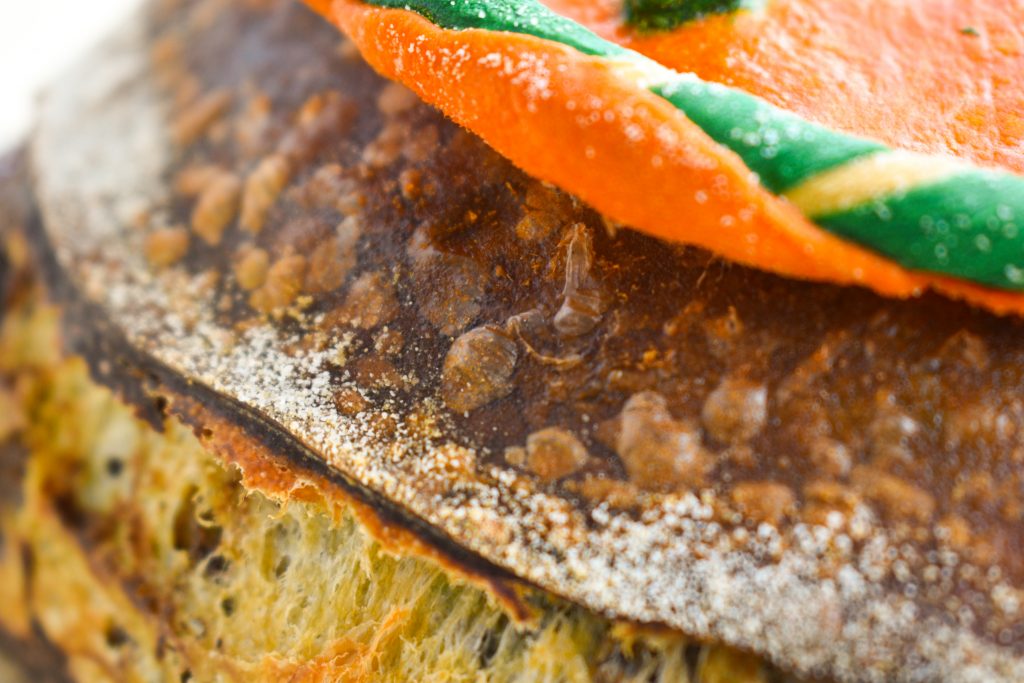
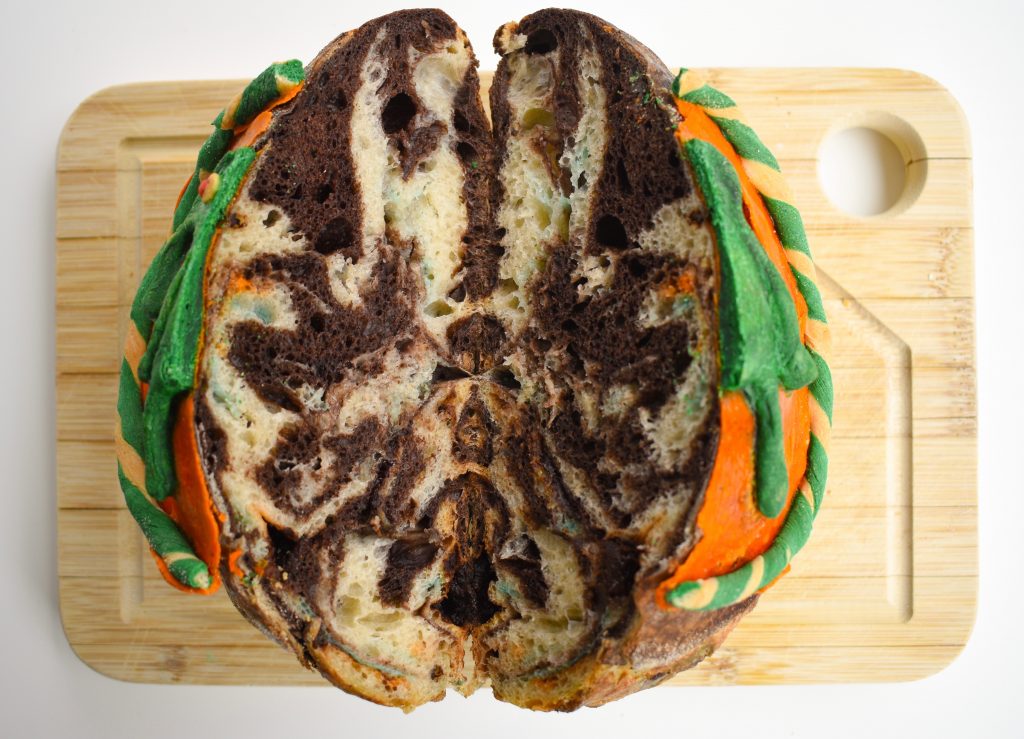
It’s also important to note that if your 3D art is exposed to high temperatures over time, they will brown and fade. When I bake my 3D sourdough art, I keep the lid on my Dutch oven on the entire time. I haven’t noticed this affecting the texture at all—I still get super crusty bread.
Storage
Store your finished 3D bread art how you’d normally store your freshly baked bread! I personally like to pre-slice all of my sourdough and keep it in the freezer.
😋 More Recipes You’ll Love


Did you try this recipe?
Please leave a review & share it with me on Instagram, Facebook, Tiktok, or Pinterest!
Thank you so much! -Bianca ❤️
📖 Tutorial
How to Make 3D Sourdough Art
✉️ want to save this?
Equipment
- baking vessel dutch oven, baking steel, or whatever you usually bake sourdough with!
Ingredients
- 1 sourdough loaf at the tail-end of its second proof
- 100 g all-purpose flour
- 60 g water
- 2 g fine sea salt or table salt
- gel food coloring or natural food dyes
- water will be used as glue
Instructions
Prepare:
- Preheat your baking vessel and oven, following your bread recipe instructions.
- In a medium mixing bowl, mix together 100 g all-purpose flour, 60 g water, and 2 g fine sea salt until shaggy. Knead together until dough is smooth. Add 5-10 g more water at a time to get the consistency you like.
- Split the dough into as many colors you want. Keep doughs lightly covered with plastic wrap to avoid them from drying out.
- Knead in gel food coloring to each dough ball.
Create your design:
- Transfer your sourdough to parchment paper.
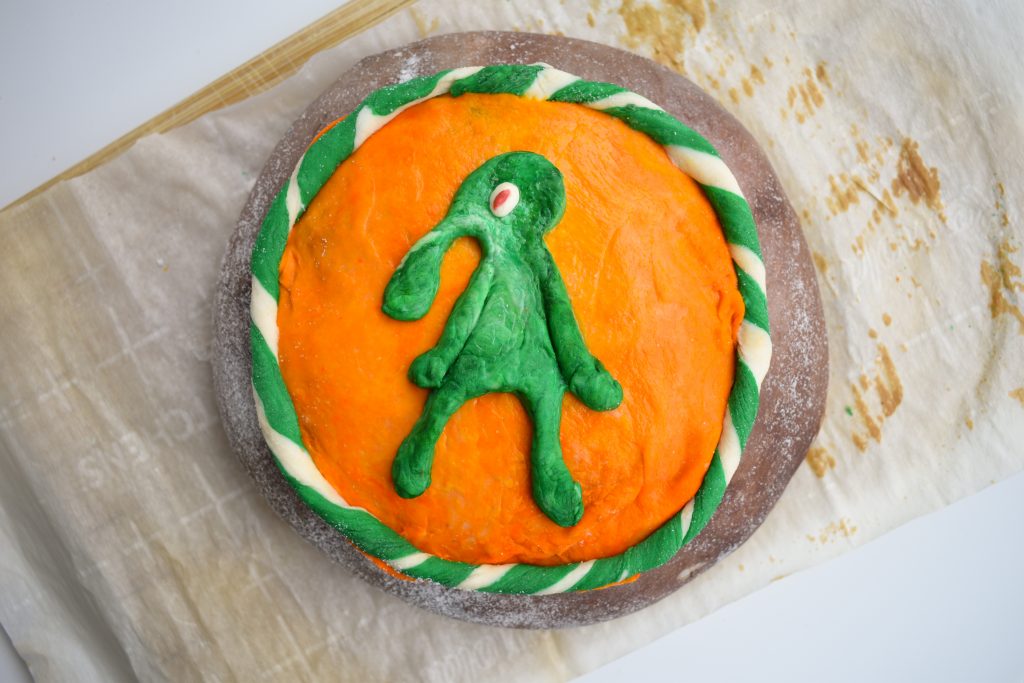
- Begin adding your 3D sourdough art design, using water as glue. Make sure to not make the designs too thick, or else they'll take longer to bake + weigh on the sourdough loaf in the oven.
Bake
- Bake your sourdough according to your recipe.Note: Keep in mind that if you remove the lid towards the end of your baking, the colors may fade and brown. I've actually baked my sourdoughs with the lid on the entire time and still got nice bakes with bubbly, crusty exteriors!If you bake on a baking steel/stone, I highly recommend covering the 3D art with aluminum foil the entire time.
- Enjoy!
Notes
Update: Here’s another loaf I did mid-2022.
Thanks for reading and I hope you try making 3D sourdough art sometime soon!