
This step-by-step tutorial will teach you how to easily paint sourdough using food coloring! Here, you’ll find pictures, videos, and tips on how to apply this method to your own designs.
✉️ want to save this?
When decorating cakes, cookies, or macarons, it’s common for bakers to use food coloring diluted with vodka to paint their designs. Vodka is used instead of water because the alcohol evaporates faster, limiting any texture changes in the food. Only the color is left behind and the flavor of the dessert is unaffected. After decorating my own macarons with this technique, I thought I’d apply it to my sourdough loaves.
In this post, I’ll share my go-to recipe, equipment, and the baking experiments I did to find out what works better: omitting vs using rice flour, water vs vodka, and when to add finer details. I hope you find these tips helpful and this technique to be a fun addition to your sourdough designs!
My Go-To Recipe
I LOVE this simple sourdough recipe by Alexandra. It’s one of the first recipes I ever tried and has always yielded great results! I highly recommend reading her post, especially if you are a beginner sourdough baker.
Sometimes, I like to change it up by altering the hydration level (370-385g of water), substituting 20% of the bread flour with different types of wheat (einkorn, red fife, etc.), or laminating in other ingredients such as cheese, peppers, or olives.
Everything You’ll Need
- Sourdough loaf: Unbaked, already proved loaf in its proofing basket.
- Rice flour
- Toothpick: You can use this to lightly outline your drawing.
- Food-safe paint brushes: Keep a variety of sizes on hand, especially a fine detail brush.
- Food coloring: My favorite brand is ChefMaster Liqua-Gel Food Coloring. Another popular brand is Americolor!
- Water or Vodka: A lot of bakers use Everclear vodka.
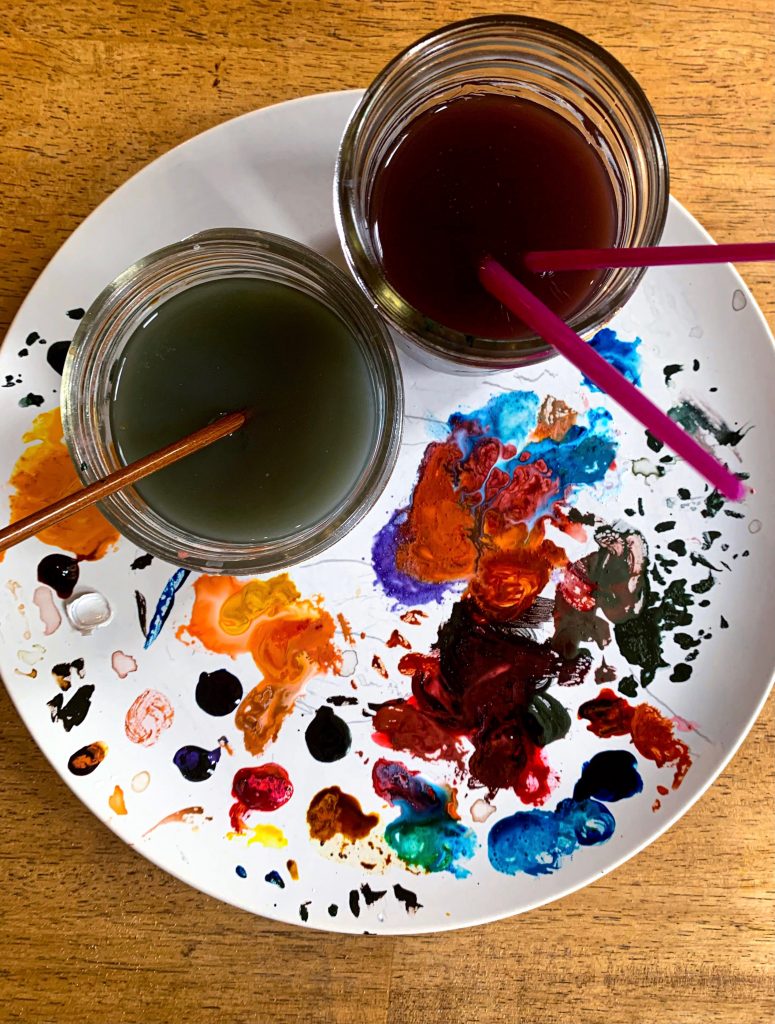
- Paint palette: I don’t have a fancy palette—I just use a large plate!
- Lame: I use this lame by Wiremonkey.
- Edible food markers: For extra details post-bake. Slightly easier to use than a paintbrush, but limited in colors/shades.
💡 Baking Tip
If I think a certain design will take me a long time to paint and I’m worried about the dough overproofing, I freeze the loaf in its proofing basket for about 30 minutes.
After the 30 minutes, I’ll start preheating my oven with the dutch oven inside, gather all of my tools, and turn the loaf out onto a parchment-lined tray or large plate. If it’s just a quick design, I’ll skip the freezer method and will go ahead and paint.
How to paint sourdough
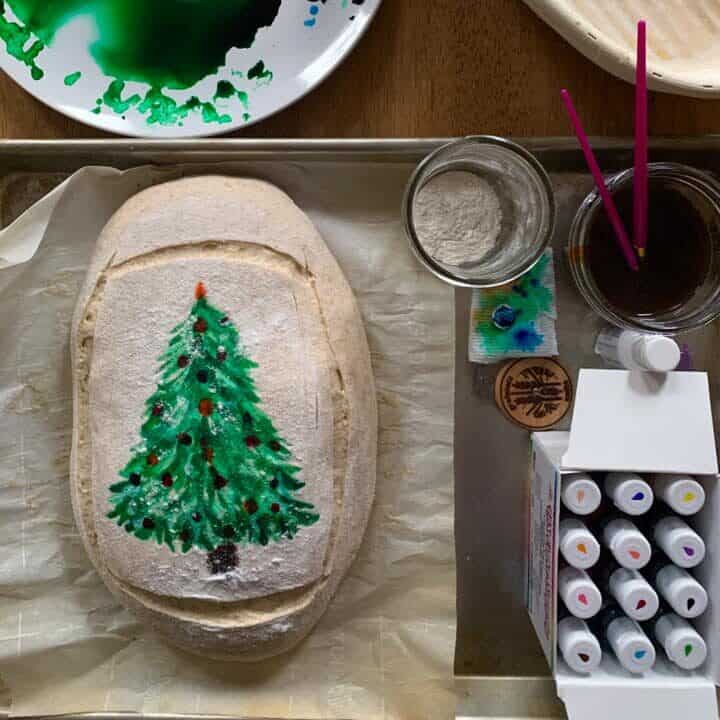
- Gather all your materials. Make sure your sourdough is proofed and ready to bake, and that you have all your materials ready to go. I like to already have my sourdough flipped over on parchment paper, so that after painting, I can just lift it up and slide it into my Dutch oven. Note: If you think a design may take a bit long, stick it in the freezer for about 30 minutes so it doesn’t overproof while painting.
- Lightly coat sourdough in rice flour. Add a thin layer of rice flour to surface. This will help the painted colors stick.
- Sketch out your design. I like to use a toothpick to lightly draw out where I’ll apply paint. This helps me keep everything proportional.
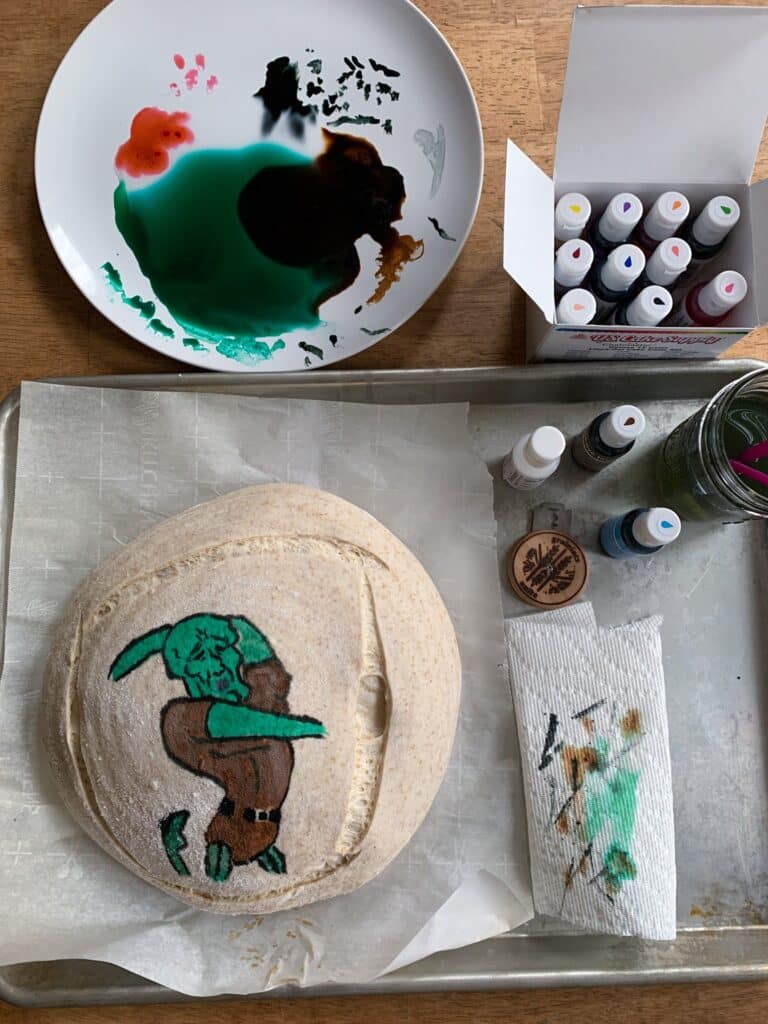
- Dilute your food coloring: On your plate, add a drop of food coloring and mix in a small amount of vodka or water until you get a thinner paint consistency. Don’t make it too thin, or the colors will bleed into the loaf and painting will be difficult.
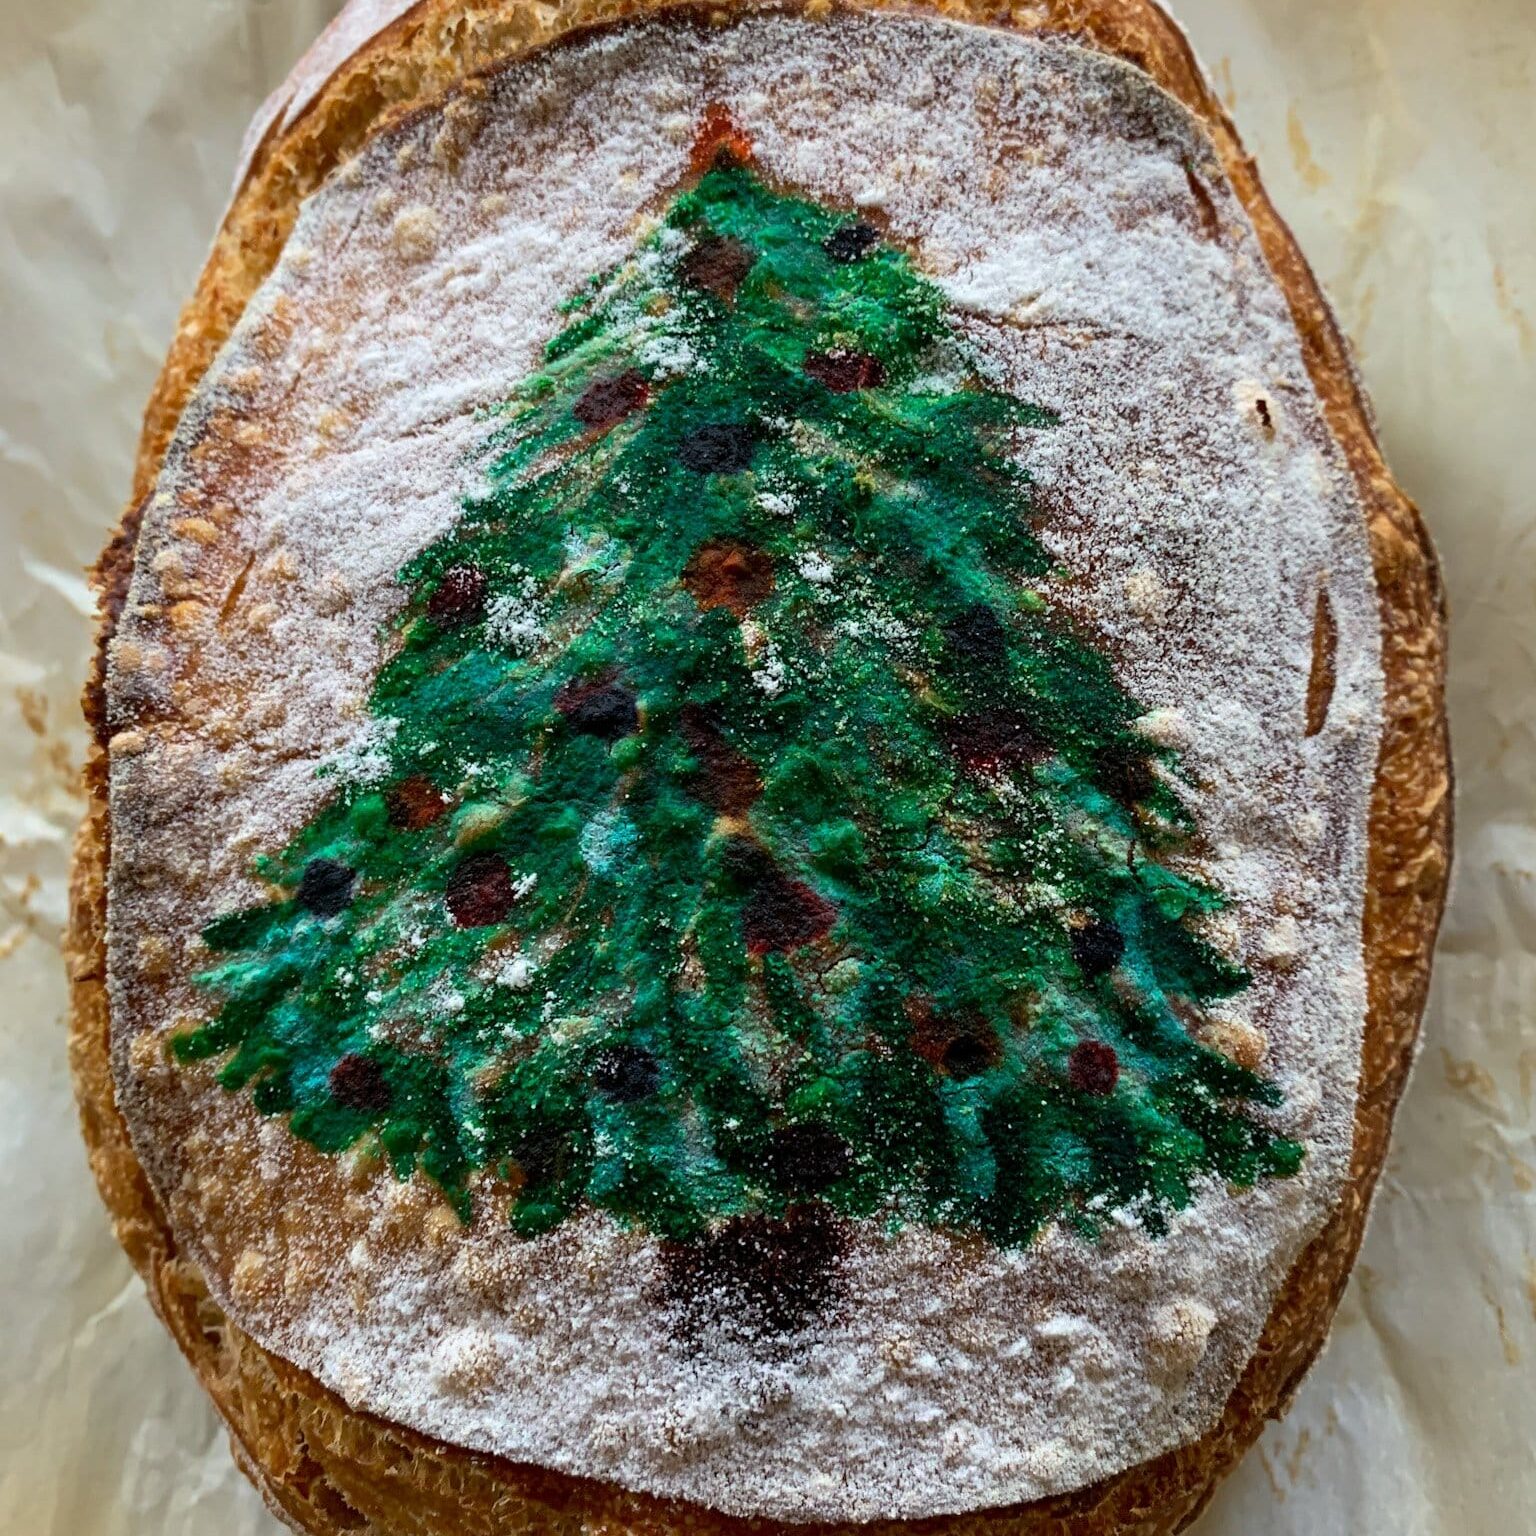
- Paint the main shapes of your design: I recommend painting the larger shapes, and adding final details post-bake. This helps make the design really pop.
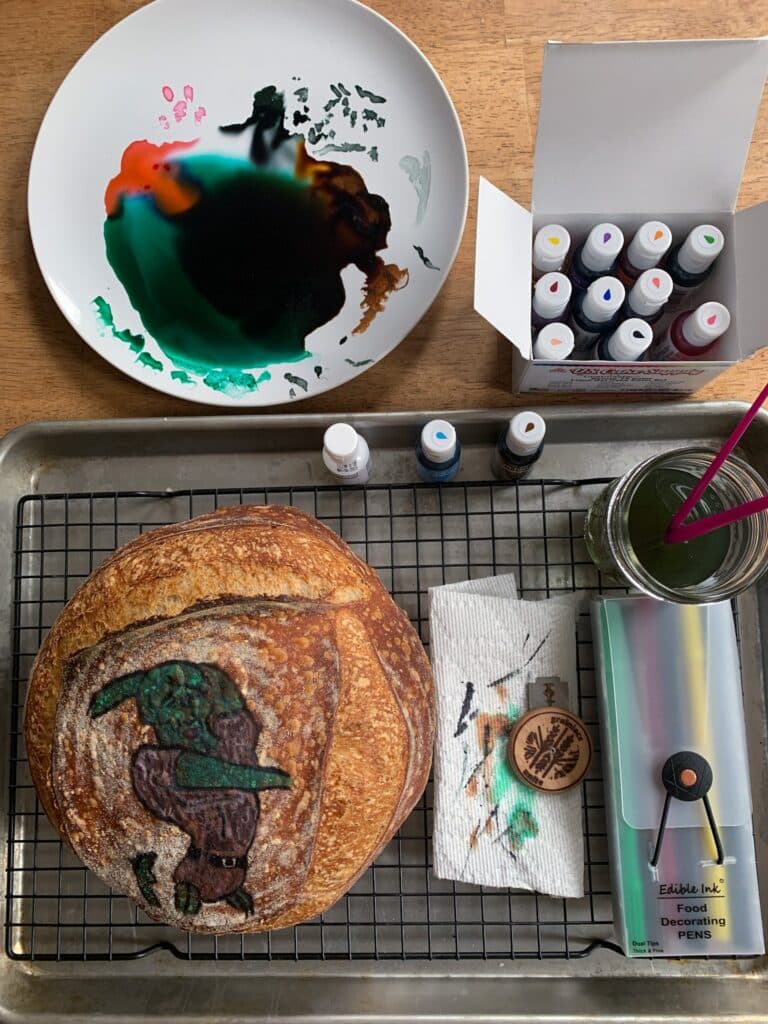
- Transfer sourdough to Dutch oven and bake: Bake as usual, following your typical sourdough recipe.
- Add final details: For this step, you can either paint while the bread is still warm or fully cooled—doesn’t matter! I recommend using vodka to dilute the food coloring instead of water. This is because the alcohol evaporates quickly from the baked bread and doesn’t make it soggy. You can also use edible markers to decorate, which I find much easier when writing any words.
how to fix painting mistakes
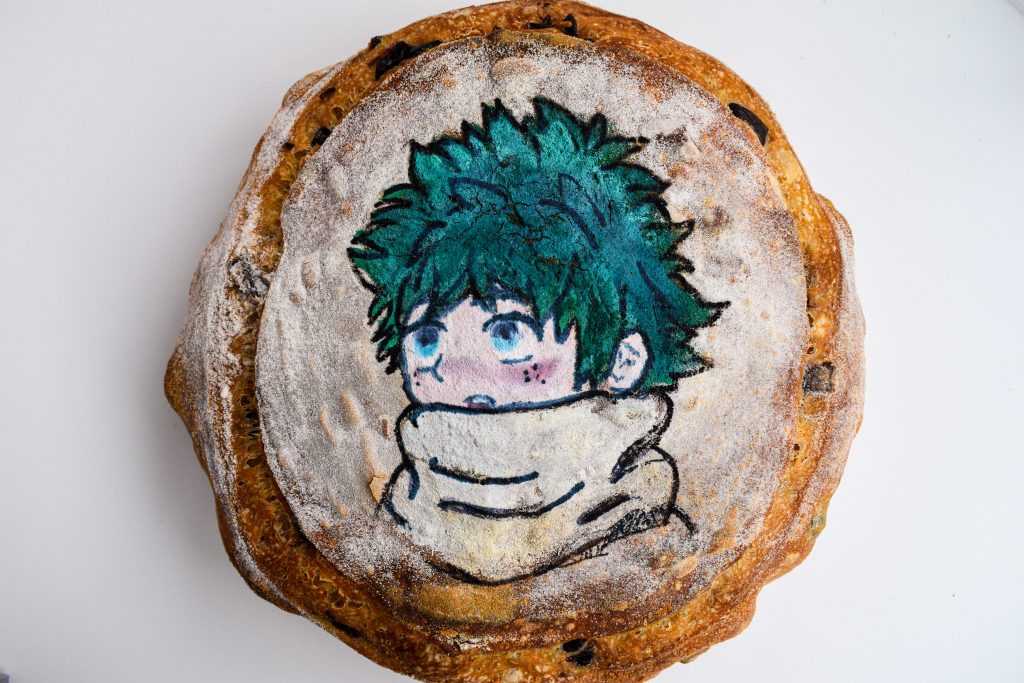
In the video below, I tried adding small details to the character on the left before baking. I messed up his eye, which wasn’t proportionate to the rest of his face! Then, the outline of his eye started bleeding through the other colors on his skin and I ended up having to kind of smudge it out.
I decided to leave the smudged eye alone and bake the loaf. When it came out of the oven, I painted over the smudge and used a fine detail paintbrush to redo his eye (I painted this off-camera). I did a lot of touch-ups to this loaf post-bake.
In this next video, you can see how I painted the main shapes before baking, saving the outlines/details for later. You can also watch the bread proofing as I’m painting it—there was a huge bubble on part of the orange bench before I put it in the oven. I ended up adding a few slashes in that area to get rid of the bubble, in case the dough split there while baking.
Sourdough Painting FAQs
If you want the colors to remain relatively the same from pre-bake to post-bake, then YES!
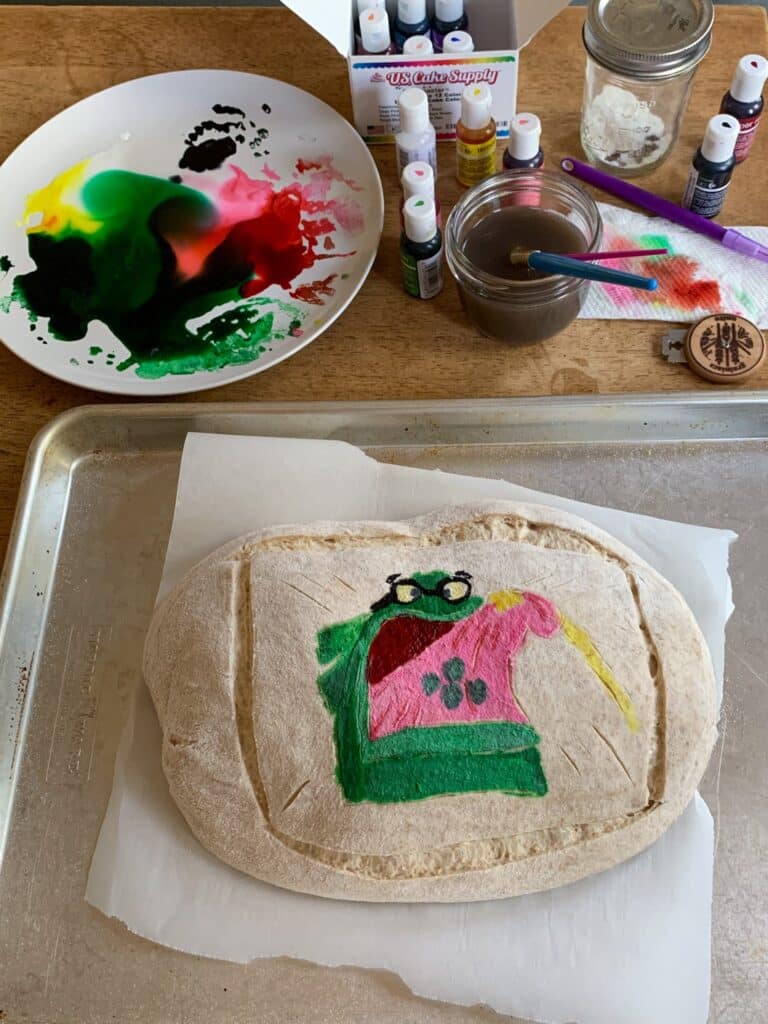
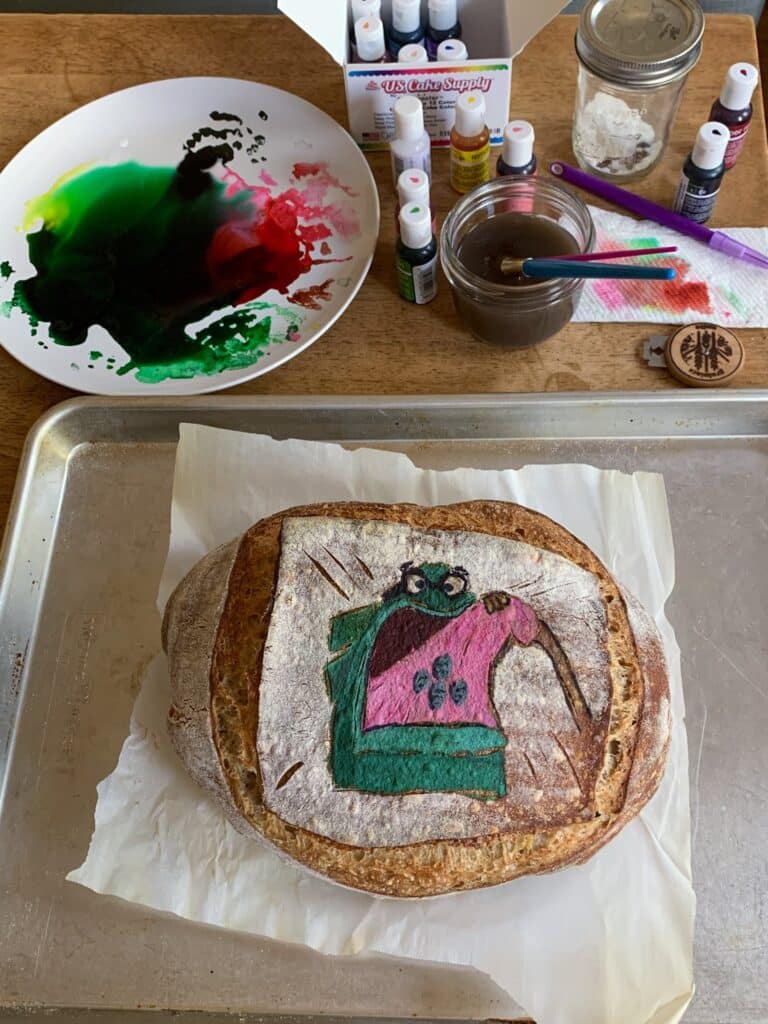
Dusting your loaf with rice flour stops the colors from drastically darkening. In the loaf above, you can see how much the colors changed in my Handsome Squidward painting post-bake because I didn’t use rice flour.
Pre-bake, you can use either. I personally use water because it’ll evaporate quickly while the bread is baking from the heat… and I don’t want to waste vodka, even if it’s cheap LOL.
Post-bake, I use vodka to add finer details, write words, and fix any mistakes. This is because the alcohol will evaporate MUCH faster than water, and the latter may lead to soggy spots of crust. Edible markers work great here, too!
Yes. Always score the perimeter of your painting. If you forget to score your bread, the dough will split wherever it wants while baking. Additionally, sneak in some light scores within your painting to help relieve extra pressure buildup, which would otherwise lead to other cracks/splits in the dough. You can try adding very surface-level slashes into parts of the background or use these light scores as decorative elements
I’ve seen other bakers separate rice flour into small bowls, and mix in a drop of food coloring of choice into each. Then, they mixed it until the color was uniform. Here is a great example from TikTok. Once you have the colors ready, you can lightly dampen the dough, and apply the colored rice flour wherever you want!
Another method is using pre-made wafer paper designs, and using water as glue. I haven’t tried this method, but it seems like a really easy and great way to decorate sourdough! There are so many wafer paper designs, like flowers, butterflies, etc., that you can find on Etsy.
Lastly, you can try out this 3D sourdough art technique.

Did you try this recipe?
Please leave a review & share it with me on Instagram, Facebook, Tiktok, or Pinterest!
Thank you so much! -Bianca ❤️
📖 tutorial

How to Paint Sourdough
✉️ want to save this?
Equipment
- Dutch Oven
Ingredients
- Parchment Paper
- Sourdough loaf
- Rice flour
- toothpick
- Food-safe paint brushes
- Gel food coloring
- Edible food markers
- Paint palette I used a large plate
- Water or vodka
- Lame
Instructions
Preparation:
- Set up your work station: a) Pour your water/vodka into a cup, and place your paintbrushes in it. Keep your paint palette/plate and gel food coloring nearby.b) Preheat your oven + dutch oven/baking steel according to your recipe.
- Prepare your bread:a) If you are worried about how long you will take to paint and don't want your dough to overproof, you can freeze your dough in its basket for ~30 minutes. Proceed with the following steps. b) Place parchment paper on top of a large plate or tray. Turn out your sourdough onto the plate/tray.c) Lightly dust the surface of your sourdough with rice flour. d) If needed, I lightly outline my drawing using a cookie scribe/toothpick.
Paint:
- Squeeze your choice of gel food coloring onto the plate. Using your wet paintbrush, mix in a little of the water or vodka into the paint. Mix different colors to create shades of your choice. Go ahead and paint! Note: Do not focus on outlining anything in this step. It is easier for the food coloring to bleed into the unbaked dough, so focus your time on painting the main shapes of your design. After baking, you can go in with fine detail brush or edible food marker to outline, write words, etc.
Score your loaf:
- Using your lame, score the perimeter of your painting. This will cause the bread to burst at the edges of your painting, allowing your design to stay in tact. Also sneak in some VERY light scores into the painting to prevent extra splits in the dough.
Bake:
- Place your scored loaf into your dutch oven/baking steel. Bake according to your recipe. Let cool on wire rack for a few minutes.
Touch up your design:
- Depending on the brand and how much you diluted your gel food coloring, the colors may fade in the oven. If so, you can repaint parts of the loaf. You can also add any finer details at this point. It is preferable to use vodka instead of water because the alcohol will evaporate much quicker. If using water, it may lead to soggy spots in the crust. You can also use edible markers.

Beautiful!! You answered all the questions I had ❤️
This looks awesome! If you freeze the loaf to stop it over proofing, how long do you have to paint the design in the top?
This is wonderful! Thank you so much for posting it!