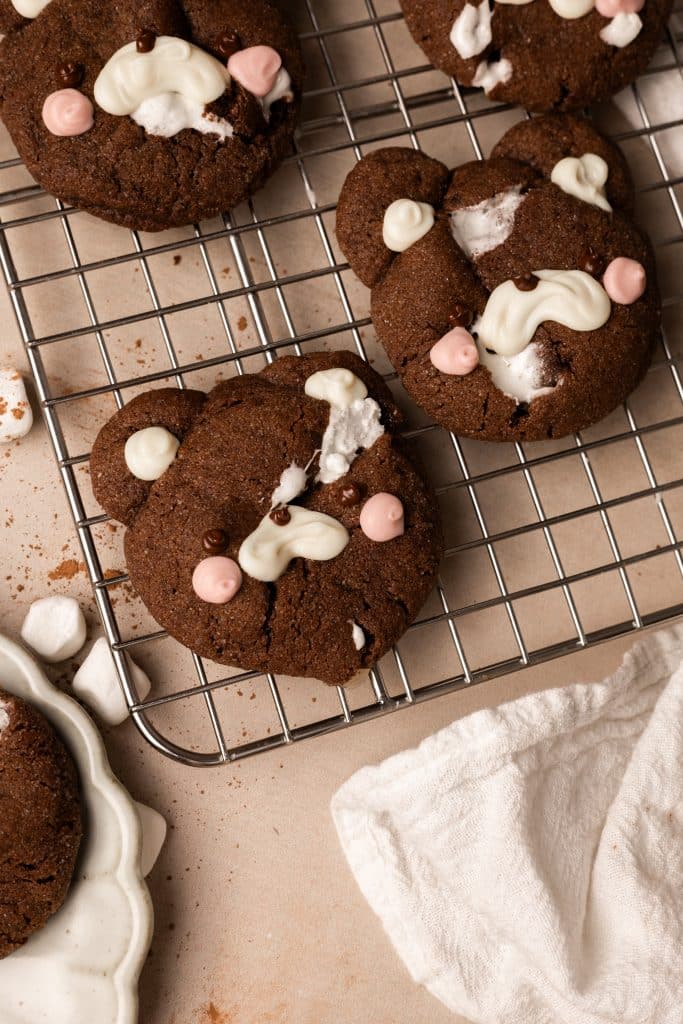
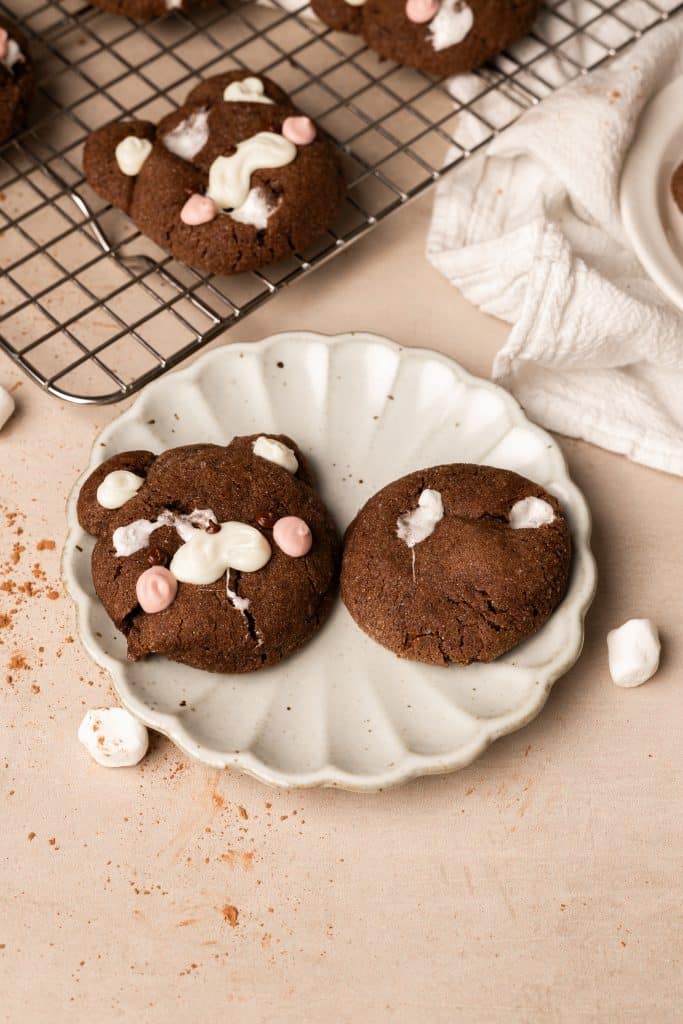
Get cozy this winter with these easy hot cocoa cookies made with Milo powder! They’re soft, chewy, and filled with gooey, stretchy marshmallows stuffed right in the middle. And since this is a one-bowl cookie recipe, it makes baking and cleaning up an absolute breeze. <3
Disclaimer: This post contains affiliate links! Clicking the links are no cost to you at all, but they help me earn commission as part of my income. All of my affiliate links are for products that I truly love using, and wouldn’t share otherwise. Any clicks are really appreciated! <3

✉️ want to save this?
About these easy, delicious hot cocoa cookies!
First, a little backstory…
A few weeks ago, Niko from Kollective Hustle (& also the beatboxer of The Filharmonic, omg!) reached out to me on Instagram.
Niko is familiar with my past career struggles and knew that for years, I was torn between STEM, baking, and blogging. Now that I’m a full-time blogger—and absolutely loving it—he wanted to interview me to get my story out there, which would hopefully help others debating their own career paths.
So if you’re in a similar boat that I was in, feel free to check out the full interview here. And if you’d ever like to personally chat about my path or yours, you can always message me via Instagram DM or email (bi****@***********ca.com). <3
Niko and I thought it would be fun if I created a voiceover reel of me making Filipino-inspired cookies, where I briefly talk about my career change. I’ve been meaning to bake something with Milo powder for the longest time, so it felt like the perfect fit! And with the winter months pretty much at our doorstep (and Milo hot chocolate as a constant in my diet…), I was inspired to make Milo hot chocolate cookies. Thus, this hot cocoa cookie recipe was born. And it’s absolutely DELISH.

Okay, now tell me about the Milo cookies!
These chocolate marshmallow cookies are chewy, soft, not too sweet, and full of chocolate flavor. It’s basically a Milo- and cocoa-infused sugar cookie dough, but stuffed with mini marshmallows. The dough balls are rolled in sugar, then optionally decorated with melted chocolates. Super simple, easy, and cozy af.
In this post, you’ll learn about the equipment + ingredients I used, more detailed steps on how I made these Milo cookies, variations, tips, and FAQs. Don’t worry, I gotchu with all the deets.
So, keep scrolling if you’d like to make these chocolate marshmallow cookies!
Equipment
- Small mixing bowl
- Medium mixing bowl
- Large mixing bowl or bowl of stand mixer
- Hand whisk, electric whisk, or stand mixer fitted with paddle attachment: I personally used a hand whisk because I was too lazy to get out my mixer, haha! Feel free to use whichever you have on hand.
- Sifter: This will help get rid of any clumps in your cocoa powder.
- Rubber spatula: A rubber spatula helps you scrape the sides and bottom of your mixing bowl, ensuring sure all dry ingredients are incorporated.
- Medium cookie scoop: Each cookie dough ball was about 2 1/2 tbsp.
- Cookie sheets
- Parchment paper or silicone mats
- Wire rack: For cooling the Milo cookies.
- Optional for bear design: piping bags, but you can use Ziploc bags with the end snipped off instead!
Ingredients
The full recipe card with measurements & instructions are located at the bottom of this post!
- Butter: Room temperature is best. I love using Vital Farms butter!
- Granulated sugar
- Egg: Room temperature is also preferred, or else your mixture may come out chunky when combined with the butter + sugar. But that’s totally okay because it’ll come back together once the dry ingredients are incorporated.
- Vanilla extract
- Milo powder: The star of the show, a yummy chocolate powder used to make chocolate milk/hot cocoa! It was first developed in Australia, but many countries enjoy this brand, like the Philippines. My parents grew up using it, so I did too. 🙂
- Cocoa powder: You can use any type of cocoa powder, but I would stray away from black cocoa because it may make the Milo cookies too bitter. But if you’d like to use it, swap out 1 tbsp of regular cocoa powder for 1 tbsp black cocoa.
- Espresso powder*: This enhances the chocolate flavor in the Milo cookies. Not 100% needed if you don’t have it on hand, but it makes a difference!
- All-purpose flour
- Baking soda
- Baking powder
- Table salt: I use Morton’s.
- Mini marshmallows*: These will be stuffed in the middle of each cookie.
- Optional for bear design: white chocolate, milk chocolate, oil-based food coloring*
*: See FAQ for more info.
How to Make Hot Cocoa Cookies
- Mise en place: aka “put in place”. This French saying simply means measure out all of the ingredients and prep your equipment beforehand. This helps you stay more organized and move more seamlessly in the kitchen.
- Mix butter and sugar: In your large mixing bowl or bowl of stand mixer, cream the butter and sugar together until smooth.
- Add egg and vanilla extract: Mix in the egg and vanilla extract until combined.
- Stir in dry ingredients: Stir in the espresso powder, Milo powder, and cocoa powder. Then, mix in the flour, baking powder, baking soda, and salt until no dry spots remain.
- Shape hot cocoa cookies: Gather a 2 1/2 tbsp ball of dough and split it in half. Slightly flatten one piece and stuff 3-5 mini marshmallows, then cover with remaining half of dough. Shape into a ball, making sure that the marshmallows are fully enclosed. If making a bear design like I did, roll out 1/2 tsp balls of dough for each ear. Repeat with remaining dough.
- Freeze: Freeze all balls of dough for 1-2 hours, or until completely firm. This helps prevent the marshmallows from completely melting out of the cookies when baked.
- Bake: Roll Milo cookies in sugar and place on lined baking sheet, 3-4 inches apart. Bake cookies at 350°F/177°C until edges are set. Let cool on tray for about 5 minutes, then transfer to wire rack.
- Decorate (optional): If decorating as bears, use melted chocolate to draw on the faces.
- Store: You can store the hot cocoa cookies in an airtight container at room temperature for up to 1 week.
Chocolate Cookie Variations
I think it would be fun to try out different flavored marshmallows. But if you’d like a simpler chocolate sugar cookie recipe, simply omit the marshmallows!
For a “dressed up” chocolate cookie, you can add in some fun mix-ins. You could fold in some chocolate chips, crushed pretzels, crushed peppermints, etc. into the batter. Have fun with it!
Tips
- Use a kitchen scale: I LOVE using a kitchen scale because it always yields consistent, accurate results when measuring ingredients. However, if you’re measuring your dry ingredients with cups, make sure you follow this tip: gently spoon in the flour into the cup until it’s full, then scrape the excess off using the back of a knife or offset spatula.
- Make sure the marshmallows are fully enclosed in dough… and FREEZE!: This helps prevent the marshmallows from leaking out of the cookie and onto the baking pan.

FAQs
Milo is a chocolate powder used to make chocolate milk or hot chocolate! It’s similar to Nesquik powder.
No, you do not need to use espresso powder if you do not have it on hand. However, King Arthur says espresso powder intensifies chocolate flavor in baking, and they’re right. It makes a difference!
Yes, you can use regular marshmallows instead of mini marshmallows! I recommend cutting the regular marshmallow in half and using one half per cookie.
Make sure the marshmallows are fully enclosed in the very middle of the dough ball and are fully frozen before baking. This helps the marshmallows stop from melting quickly, like if they were at room temperature.
For the white chocolate, you’ll want to use oil-based food coloring or the chocolate will seize up and become lumpy. However, if you don’t have oil-based food coloring, you can try mixing in a tsp of neutral oil (canola, vegetable) at a time! The chocolate should come back together. Maaagic.
Storing the Hot Chocolate Cookies
If you’d like to freeze the raw dough balls, keep them in a Ziploc bag or airtight container in the freezer for up to 3 months, and bake as usual.
For freshly baked hot cocoa cookies, you can store them in an airtight container at room temperature for up to one week!
More Filipino-inspired Recipes
I have a bunch of fun Filipino cookie recipes on my website, like my ube marshmallow cookies and chunky ube cookies! Also check out my mom’s Filipino leche flan, shaped as a bear. 🙂
I really hope you enjoy this Filipino cookie recipe. If you make these hot chocolate cookies, I’d love to see them. You can tag me at #bitesbybianca / @bitesbybianca on Instagram. Enjoy! :~)
📖 Recipe
Hot Cocoa Cookies with Milo Powder
✉️ want to save this?
Equipment
- small bowl
- medium bowl
- large mixing bowl or bowl of stand mixer
- Whisk (hand, electric, or stand)
- rubber spatula
- 1-2 Cookie sheets
- parchment paper or silicone mats
- 3 piping bags, Ziploc bags, 1 toothpick, or 1 cookie scribe
Ingredients
Dry ingredients:
- 1 ⅓ cups (166.67 g) all-purpose flour
- ½ teaspoon (2 g) baking powder
- ½ teaspoon (2 g) baking soda
- ¾ teaspoon (4.5 g) table salt or 1 tsp kosher salt
Wet ingredients:
- ½ cup (113.5 g) unsalted butter softened
- ½ cup (100 g) granulated sugar
- 1 (1) egg room temp
- 1 teaspoon (4 g) vanilla extract
- 4 tablespoons (20 g) cocoa powder sifted
- 4 tablespoons (59.15 g) Milo powder sifted
- 1 teaspoon (1 g) espresso powder
For rolling:
- 4 tablespoons (48 g) granulated sugar
Decoration for face:
- 4 tablespoons (59.15 g) white chocolate melted
- 1 tablespoon (15 g) milk or dark chocolate melted
- oil-based red or pink food coloring see steps
Instructions
Make the hot cocoa cookie dough:
- In a medium bowl, whisk together all of the dry ingredients: 1 ⅓ cup all-purpose flour, ½ tsp baking powder, ½ tsp baking soda, and ¾ tsp salt.
- In a stand mixer using the paddle attachment (can alternatively use an electric mixer or whisk), cream the ½ cup softened butter and ½ cup sugar on medium speed until smooth, about 1-2 minutes. Scrape bottom of bowl using rubber spatula.
- Add 1 tsp vanilla extract + egg. Mix until smooth.
- Stir in 4 tbsp cocoa powder, 4 tbsp Milo powder, and 1 tsp espresso powder until thoroughly combined.
- Dump in all of the dry ingredients and mix until no dry spots remain.
Shape the hot cocoa cookies:
- Make sure there is enough room in your freezer to freeze a tray of dough balls for 1-2 hours. Line 1 cookie sheet with parchment paper or silicone mats.
- Use a medium cookie scoop to gather dough into a 2 ½ tbsp ball.
- Split the ball in half. Slightly flatten one half, then add 3-5 mini marshmallows (or ½ regular sized marshmallow) in the middle. Top with other half of cookie dough and seal the sides, making sure the marshmallows are fully enclosed. This step is important so the marshmallows do not melt out of the cookies.Shape into a ball, then place on lined baking sheet.
- If you'd like to make bear-shaped cookies, make ½ tsp balls for each ear, then place on lined baking sheet.
- Repeat with remaining cookie dough. Shape the dough into regular cookies, bear cookies, or a mix of both! *Since you are just freezing them, you can keep the cookies close together. You only need to space them out when you bake them.
- Place tray of cookie dough balls in freezer for 1-2 hours, or until dough balls are completely firm. This step will also minimize the marshmallows not completely melt out of the cookies when baking.
Bake the cookies:
- Preheat oven to 350°F/177°C and line two baking trays with parchment paper or silicone mats. Add ¼ cup granulated sugar to a small bowl.
- Roll each cookie dough ball into granulated sugar and place on lined baking sheet, about 3-4 inches apart. If making bears, roll the ears in sugar and place two ears on top of each cookie ball.
- Bake for 9-11 minutes, or until edges are set.
- Let cool on pan for about 5 minutes, then transfer to wire rack. Let cool completely.
For the bear faces:
- You can use a piping bag, toothpick, or cookie scribe to add on the details.
- Use melted white chocolate to create the snouts and ears. Save remaining white chocolate.
- Pipe milk chocolate for the nose and eyes.
- Add oil-based red or pink food coloring to the melted white chocolate. If you don't have oil-based food coloring, then the chocolate will seize/become lumpy. To counter this, stir in a tsp of neutral oil (canola, vegetable) at a time, until it becomes smooth again.Use this for the blush.
- Enjoy!
Notes
- Store cookies in an airtight container at room temperature for up to a week.
- See blog post for the links for the equipment I used!


These were so delicious and as Bianca points out, they were not too sweet which were PERFECT!! 🤩 I think I could have squeezed one more marshmallow into each cookie (the mini ones I had were a smidge longer than the ones in the states) but they were nonetheless tasty 😋 They freeze very well (I prepped the cookies the day before) and bake perfectly. They’re also nice and chewy the day after and maintain well at room temp! A very yummy hot cocoa flavor cookie 🥰