✉️ want to save this?
One word many bakers use to describe French macarons is finicky. It’s true—I just browsed five macaron recipes and they all had that word in their blog! Their stubbornness, in addition to the time it takes to make one batch, is exactly why a single macaron can range from $2.00-$5.00 at a bakery.
Many of my first macaron batches came out cracked, hollow, or stuck to the baking mat. Over the years, I’ve tried and adapted different recipes/techniques (ingredient ratios; French vs Italian vs Swiss meringues) and watched way too many macaronage (how to fold the batter) videos. With everything I’ve learned from other blogs and my own troubleshooting, I’m excited to share my recipe + tips in achieving full, chewy macaron shells with every bake.
This recipe will be one of the more detailed posts on my blog because of how important each step is. The truth is, it’s all in the technique. Whether your powdered sugar:almond ratio is 2:1 or 1:1, your macarons can still come out great if you: (1) whip up a glossy, stable meringue, (2) fold the macaron batter until it flows off your spatula into thick ribbons, (3) allow your shells to fully dry before baking, and (4) make sure you’re actually baking at the right temperature by using an oven thermometer.
Below, I describe the ingredients, necessary tools, and steps. I highly recommend checking out this macaron troubleshooting guide by Mimi. It is extremely helpful when trying to figure out what went wrong or what to avoid when baking. Hopefully, with all of this information, your first few tries will be way better than mine. If you have further questions, I’m always happy to help via email or Instagram!
I hope to post more macaron recipes with different fillings and designs, so keep an eye out for more. 🙂
Ingredients
- Egg whites: They don’t have to be aged, but they should be at room temperature to whip up a light, airy meringue. I have not had success using egg whites from a carton—only from regular eggs.
- Granulated sugar + cream of tartar: As you beat the egg whites, gradually adding these ingredients help stabilize the meringue.
- Almond flour: Use almond flour instead of almond meal. Almond meal is lumpier and harder to sift. I usually store the almond lumps that didn’t pass through the sieve in a container. When it’s full, I food process it into a finer flour. I like to buy mine in bulk from nuts.com. You can also try other flours—I’ve made macarons using pumpkin flour, hazelnut flour, and pistachio flour, which can be found on that same website.
- Powdered sugar: This recipe uses slightly less powdered sugar than others, but still yields full shells. Again, it’s all in the technique!
- Powdered or gel food coloring: Using liquid/water-based food coloring changes the moisture level of the batter, which is why I use powders or gels. I like to use the brands Chefmaster Liqua-Gel or Sugar Art.
Tools
- Kitchen scale: One of the most important tools in cooking/baking. This will help you achieve consistent results.
- Fine mesh sieve: This helps get rid of any lumps and makes smooth macaron shells.
- Stand mixer: I use a Kitchenaid mixer. I use my phone stopwatch to time how long I whip my egg whites at certain speeds and when to add granulated sugar + cream of tartar.
- Rubber spatula
- Piping bags
- Large round piping tip (optional): I like to use the brand Ateco, sizes 7-9.
- Oven thermometer: When I first made macarons, they kept coming out cracked. I decided to buy an oven thermometer and learned that my oven ran way too hot—at 325°F, my oven was really 400°F! An oven thermometer will save you from baking a lot of broken or hollow macarons.
- Two-three baking sheets: On the middle rack of the oven, I put one baking sheet upside down and then the second baking sheet on top, right side up. This method helps the macarons bake more evenly by increasing air circulation.
- Two silicone baking mats or parchment paper: I prefer using silicone mats because of less waste. They also help me achieve perfect circles by limiting how much the macarons spread after piping.
- Macaron template: I attached two macaron template PDFs (1.25 inch and 1.5 inch diameter)

Step-by-step Instructions:
1. Set up your work station
Print out your macaron template (1.25 inch diameter, 1.5 inch diameter) and place it on a baking sheet. Place silicone mat or parchment paper on top.
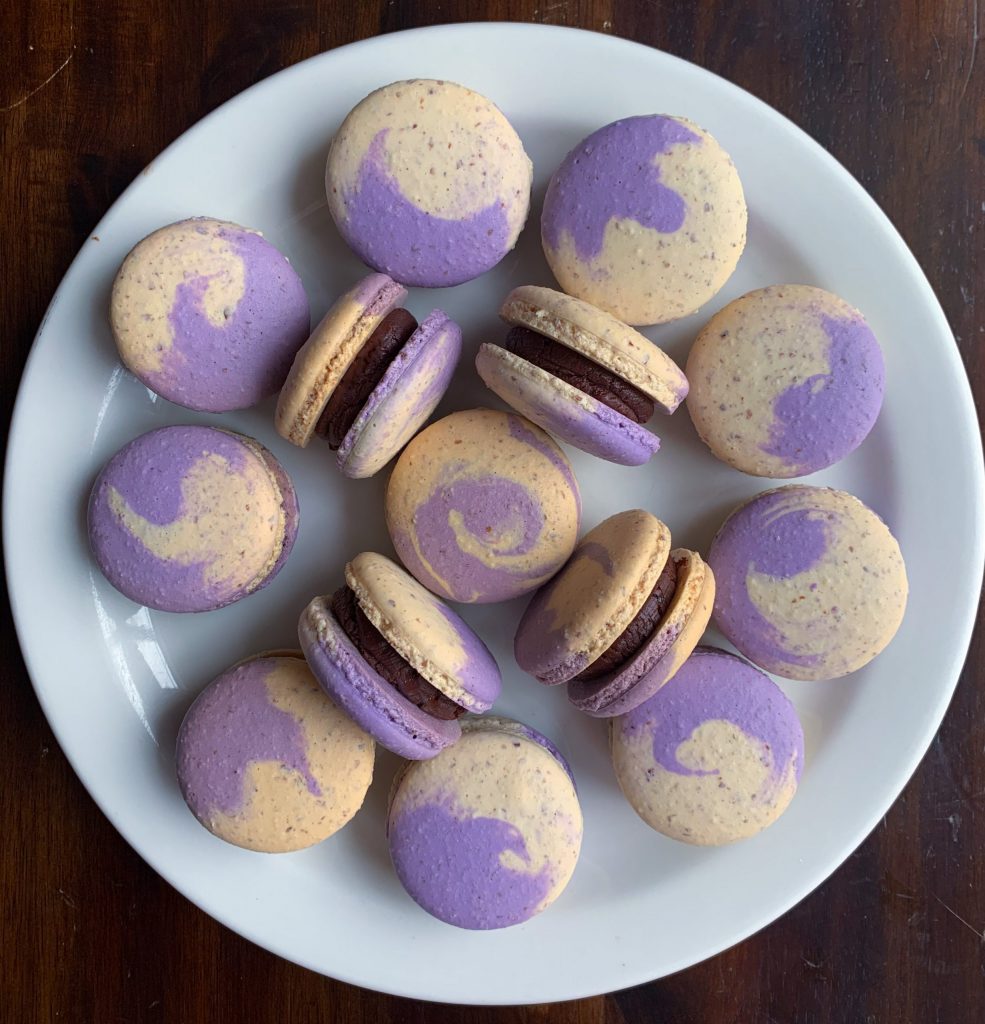
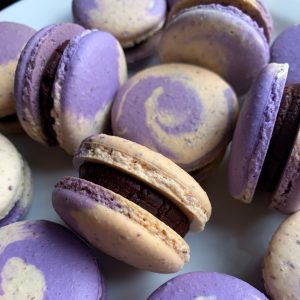
To set up my piping bags, I like to put them in tall glasses/mugs. This lets you easily pour the batter into them without the bags falling over. If you are only doing one color, you only need one large piping bag. If you are making swirl macarons like the ones in my photos, you need two small-medium piping bags and one large piping bag. The two colors will go into each small-medium bag, then you will cut the tips and place them into the large piping bag. If this is confusing, don’t worry, there are pictures below!
2. Measure out your ingredients
Measuring everything out before starting to bake allows you to work quickly. I don’t like to leave my meringue sitting out too long, which is why I measure the powdered sugar and almond flour first. This lets me add it to the meringue ASAP.
3. Make the meringue
I like to use my phone stopwatch to help give me consistent results when making my meringue. In my recipe, I list the times and speeds I whip the egg whites at. The final result should have the egg whites balled up onto the whisk, holding stiff peaks when it is held at different angles.
Note: I doubled this recipe when I made these macarons, so don’t be alarmed if your meringue isn’t the same size as these photos!
4. Macaronage
Using a rubber spatula, fold all of the powdered sugar, almond flour, and meringue together. While folding, often scrape down the sides and bottom of the bowl to get rid of any unmixed batter. Keep mixing until everything is just incorporated and there are no dry parts.
If you are only doing one color macarons, keep folding until it reaches the consistently below. If you are doing two colors to make swirl macarons, split the batter into two. Add your desired food coloring gel/powders to each, folding until they reach the consistency below.

The batter is done being folded when it falls off the spatula into thick, continuous ribbons, like in the GIF (GIF is in real-time). The ribbons should mostly melt back into the rest of batter in about 30 seconds:
[Best_Wordpress_Gallery id=”12″ gal_title=”French Macaron Batter”]Transfer your batter into your piping bag. Since I was making swirl macarons, I added each color into small-medium piping bags. I then cut the tips of each and placed them into a large piping bag fitted with a round tip.

5. Pipe the macarons and bake

Keeping your piping bag at 90° to your work surface, pipe the batter onto your silicone mat/parchment paper. After piping, gently tap the baking tray on your counter to get rid of any air bubbles. You can also use a toothpick or cookie scribe to pop any bubbles.
Note: The GIF above is not in real-time, it is slightly sped up. I pipe the batter much slower than this. 🙂
Allow the macarons to dry for at least one hour. They should appear dull and feel completely dry to the touch.

Place an empty baking sheet upside down on the middle rack of your oven. Preheat the oven to 325°F/162°C. Since I only have two baking trays, I carefully slide the silicone mats/parchment paper with the piped shells off of one tray and leave that empty tray in the oven.
Put your tray of macarons on top of the other baking sheet, right side up, like in the photo above. Bake for 18-20 minutes, rotating the tray halfway through. You can check to see if they are done by poking the side of a macaron shell. If it wiggles, then the macarons need to be baked longer.
Slide the silicone mat/parchment paper onto a wire rack and let them fully cool before peeling them off, or else they will stick. I gently slide the remaining unbaked macarons shells onto this tray and bake them.
6. Make the ganache
Add all of the ganache ingredients into a microwave-safe bowl. Microwave for 45 seconds and mix. If the chocolate is not fully melted, microwave at 10 second intervals, mixing in between each time. Refrigerate the ganache for ~20 minutes, stirring every 5 minutes, until it is piping consistency.
7. Assemble and let macarons mature

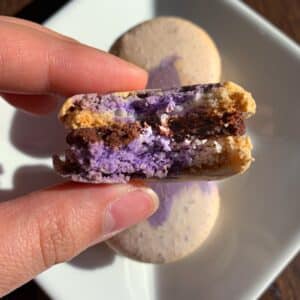
Match the macaron shells into pairs. Pipe dollops of ganache onto the bottom shells and sandwich with the top shells. Keep in an airtight container in the fridge and let them mature for about 24 hours before eating. I know, waiting is probably the hardest part, but it is worth it! Maturation makes them softer, chewier, and even more delicious because the shells start to absorb the filling.
You can store the macarons in an airtight container in the fridge for up to 5 days, or in the freezer them for up to one month. Just allow them to completely thaw to room temperature before eating.
I’d love to see your creations—tag me at #bitesbybianca / @bitesbybianca on Instagram! Enjoy! 🙂
Swirl French Macarons (with Chocolate Coffee Ganache)
✉️ want to save this?
Ingredients
For the French macaron shells:
- 50 g egg whites, room temperature ($0.24)
- 40 g granulated sugar ($0.08)
- ⅛ tsp cream of tartar ($0.04)
- 60 g almond flour, sifted ($1.13)
- 50 g powdered sugar, sifted ($0.22)
For the chocolate coffee ganache:
- 50 g milk chocolate ($0.51)
- 50 g heavy cream ($0.45)
- ½ tsp instant coffee ($0.04)
- pinch of salt ($0.01)
Instructions
Preparation:
- Put printed macaron template on baking trays. Place silicone baking mats or parchment paper on top of templates.
- Set up two small-medium piping bags without tips. Each bag will be for one color. Set up one large piping bag with a large round tip. If you do not have a round tip, you can just snip the end of the bag before piping.
For the French macaron shells:
- In a medium bowl, mix the sifted almond flour and powdered sugar.
- In a small bowl, combine granulated sugar and cream of tartar.
- Pour the egg whites into the bowl of a stand mixer. Set up a stopwatch to time how long to whip the meringue. 0:00 – 4:00 minutes: Mix on medium-low for 4 minutes (Kitchenaid speed 4) until egg whites are foamy and white.4:00 – 9:30 minutes: Turn the mixer to medium speed (Kitchenaid speed 6). Add a third of the granulated sugar and cream of tartar mixture. After 30 seconds, add another third. After another 30 seconds, add the last of the granulated sugar and cream of tartar mixture. Keep mixing at medium speed until you have reached a total of 9:30 minutes. The meringue should transform from white and foamy -> white soft peaks -> white, glossy stiff peaks that balls up onto the whisk. If not, keep mixing at 20-second intervals at Kitchenaid speed 8 until it is.
- Add all of the powdered sugar and almond flour to the meringue. Gently fold the macaron batter, often scraping the sides and bottom of the bowl. Once it is all just combined (no powder remaining), equally separate the batter into two bowls.
- Keeping the other bowl covered, add your gel/powder food coloring of choice to the batter you will first mix. Fold the batter until it reaches a thick, glossy consistency and flows off the rubber spatula into ribbons. To test if it is ready, allow the batter to flow off the spatula and into the batter. If the ribbons do not melt into the rest of the batter after 30 seconds, continue folding. Be careful not to over mix. When it passes this test, transfer the batter to the small/medium piping bag.
- Repeat the last step with the remaining batter.
- Cut the tips of each piping bag and place them into the large piping bag fitted with a round tip. Pipe the macarons onto your silicone mats/parchment paper, using your template as a guide.
- After piping the macarons, tap the trays against the counter a few times. If there are bubbles on the surface, you can use a toothpick or cookie scribe to pop them. Popping the air bubbles helps stop them from cracking when being baked. Remove templates.
- Allow the macarons to sit out at room temperature to dry for at least one hour. They will be ready to bake once the surface of the macaron is matte and dry to the touch. If it is a really humid day, it can sometimes take 2 hours for them to dry.
- Preheat the oven to 325F. Place an empty baking sheet upside-down on the middle rack.
- Place the baking sheet with the macarons on top of the upside-down baking sheet. Bake for 15-20 minutes, rotating halfway through. To test if they are done baking, gently push the side of one shell. If it wiggles on the sheet, they need to be baked longer.
- Remove the macarons and place on a wire rack. Bake the remaining macaron shells.
- Allow macarons to fully cool before peeling them off the parchment paper or silicone mats.
For the ganache:
- Add milk chocolate and heavy cream to a microwave-safe bowl.
- Microwave for 45 seconds, then mix. If the chocolate is not fully melted, microwave at 10-second intervals and mix until it is smooth.
- While the ganache is hot, stir in the instant coffee and dash of salt.
- Place bowl into the fridge and stir it every 5 minutes until the ganache is thick enough to pipe, about 15-20 minutes. Transfer ganache to a piping bag.
Assembly:
- Match the macaron shells. Pipe a dollop of the ganache on the bottom shell, then add the other shell on top.
- Leave macarons in an airtight container in the fridge for at least 24 hours before eating. This allows them to mature, making them softer, chewier, and more flavorful. Eat at room temperature.


Looks delicious!
Thanks, Jessica! 🙂