
Adorable ube sugar cookies without any dairy!
Disclaimer: This post contains affiliate links.

✉️ want to save this?
About these ube sugar cookies
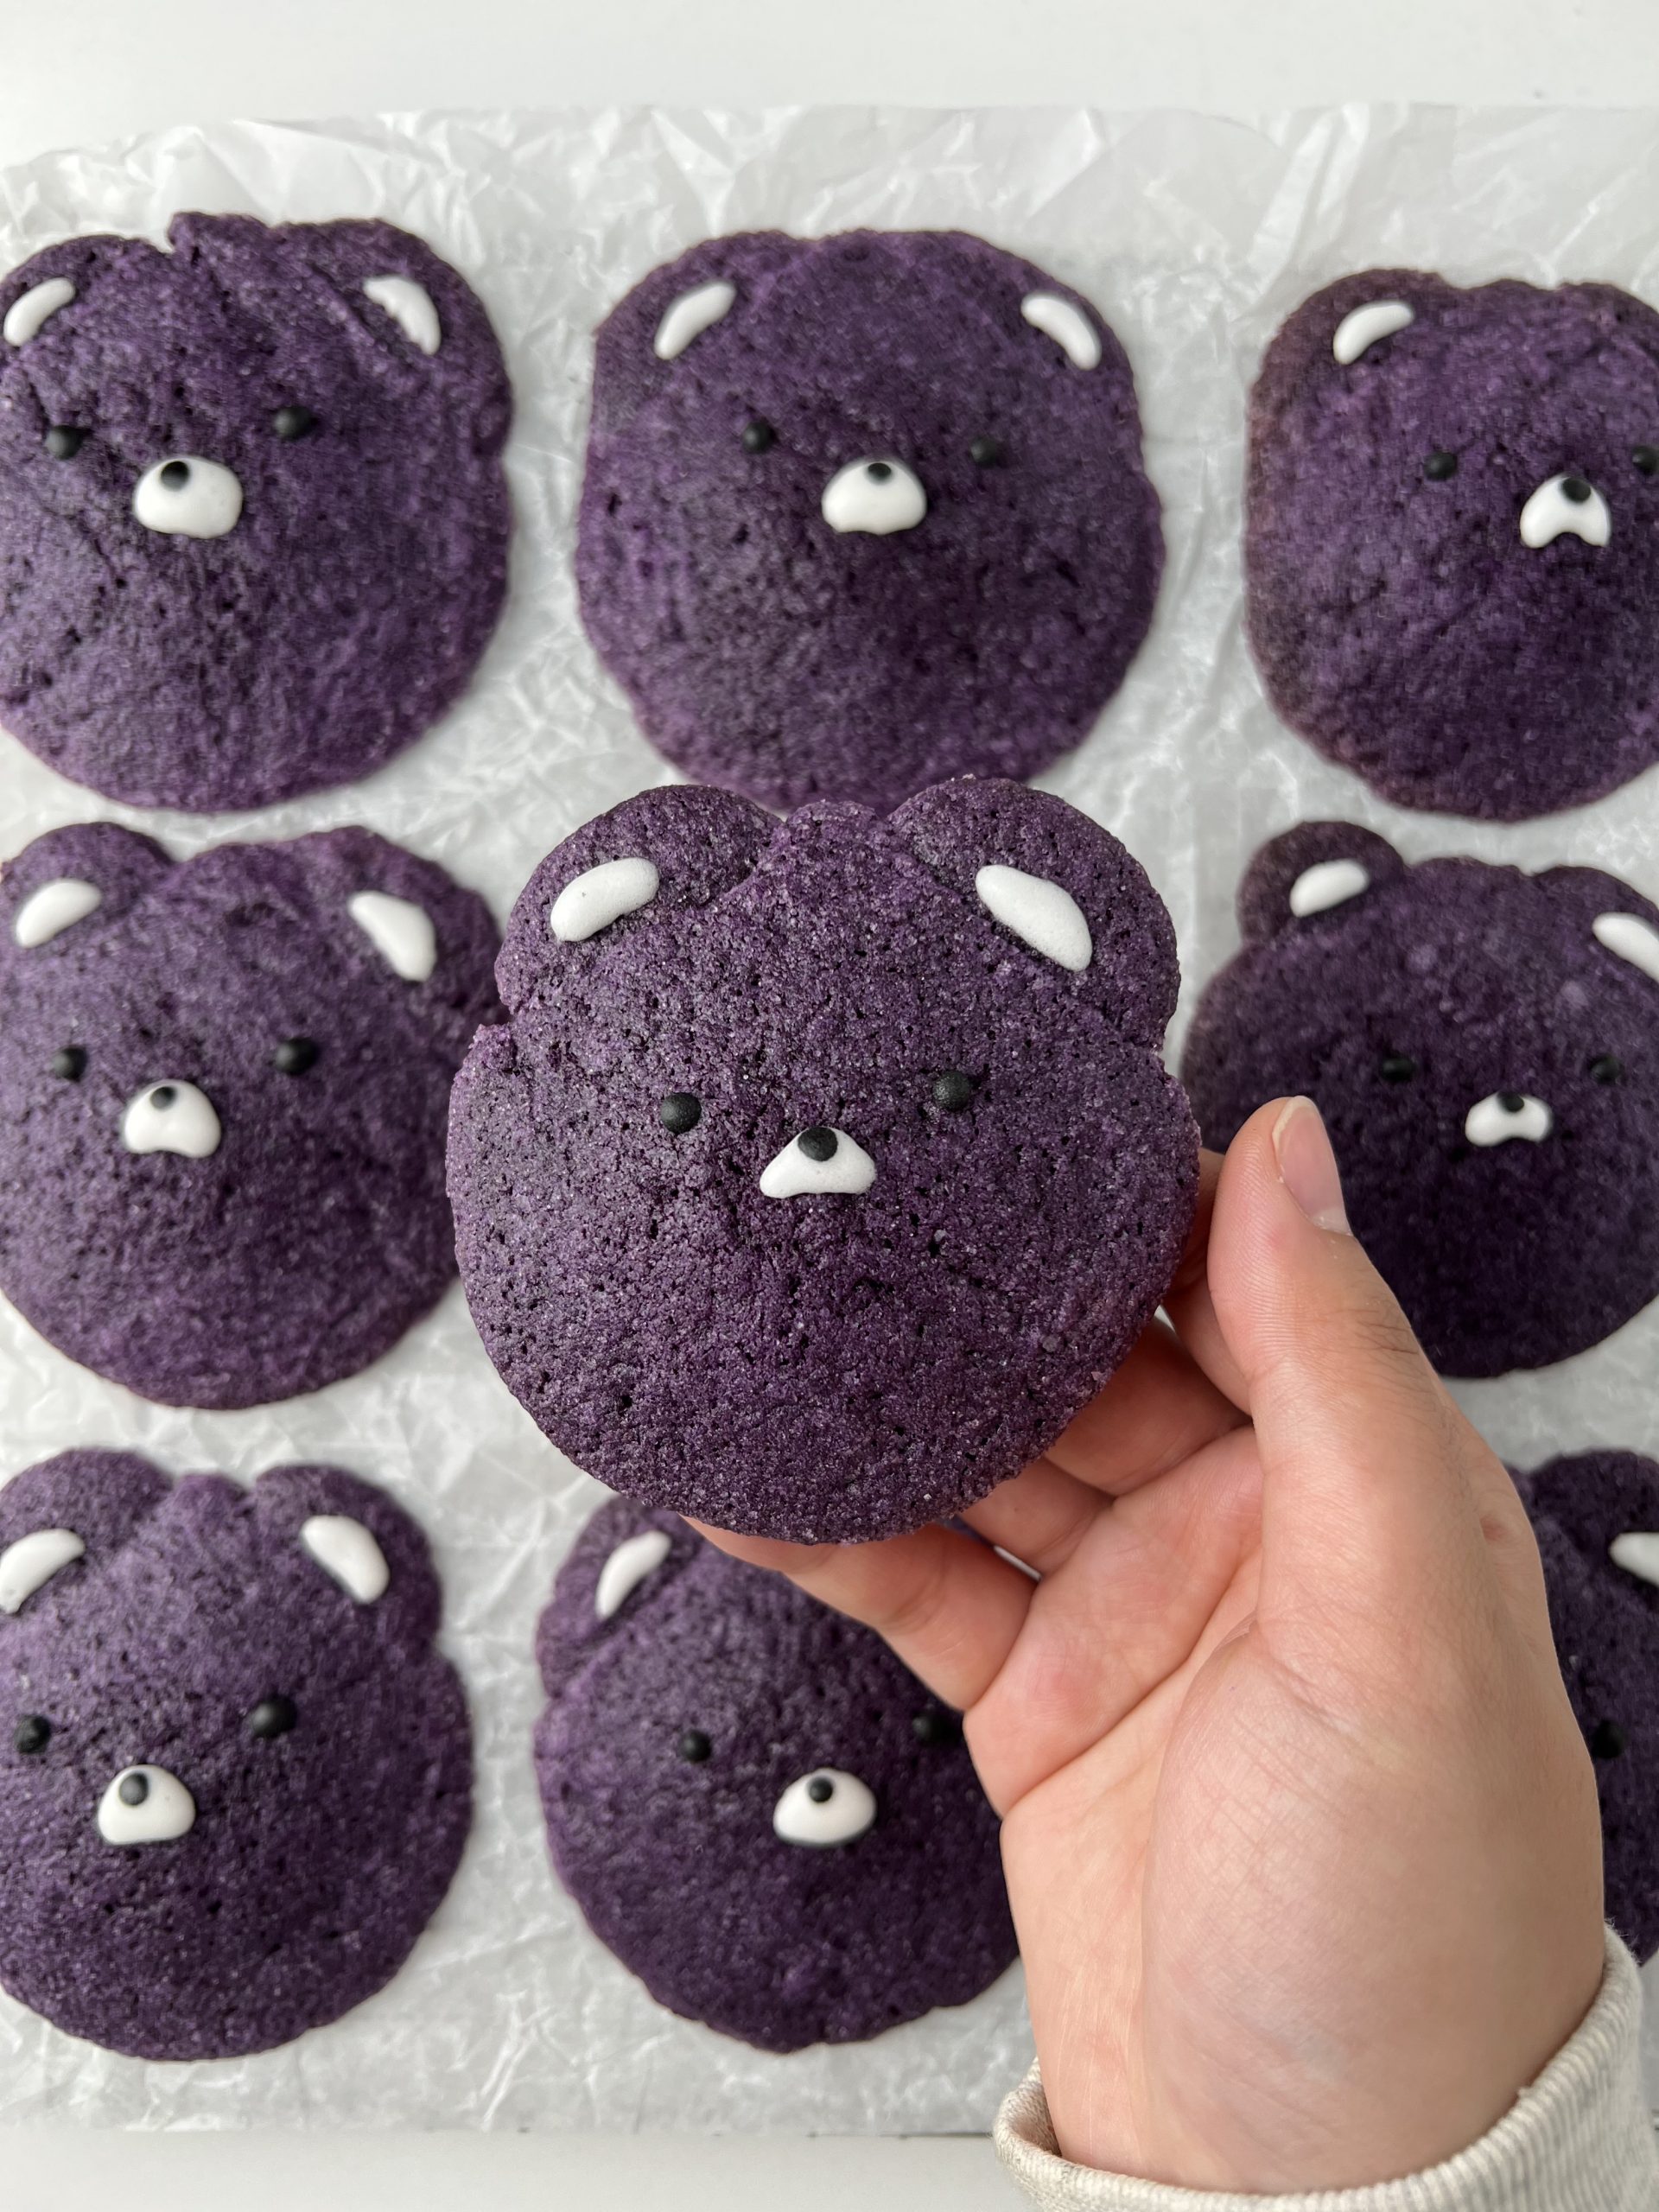
Can you believe that it’s been more than 3 months since my last recipe?! I’m so glad to be back with these adorable ube sugar cookie bears. They’re softer and not as sweet as the traditional sugar cookie, which I quite like. I made these dairy-free for a friend, but feel free to swap in regular butter + royal icing/chocolate if you don’t have any dietary restrictions.
What is ube?
If you’re not familiar with ube (pronunciation: oo-beh), it is a purple yam native to the Philippines. Ube is sometimes confused with another vegetable called taro, which has an earthier flavor and is used in both savory + sweet dishes.
On the other hand, ube is sweeter and often described as having vanilla and nutty notes. It’s commonly used in desserts, such as ice cream, cake, or jam. You could just use ube extract in this recipe, but I used ube extract and rehydrated ube halaya. You can find these ingredients in some Asian markets, especially Filipino ones, but if all else fails, you can buy ube extract/halaya or powdered ube online!
Shaping the dough
First, shoutout to my Instagram friend, @mochibymel, for explaining how she made her strawberry cookie bears! Making bear-shaped cookies is pretty simple, and you can use this technique with any cookie dough that spreads while baking.
To make the head, roll 1 & 1/2 tablespoon of dough into a ball, coat with granulated sugar, and place it onto a lined baking tray. For each of the ears, roll 1/4 teaspoon of dough into a ball, coat with granulated sugar, and place it on top of the upper left or right side of the head. As they bake, the dough will spread and you will get these cute bear-shaped cookies. Once they are cooled, you can decorate them with (vegan) royal icing or melted (vegan) white + milk/dark chocolate.

How to store these ube cookies
I really hope you enjoy this recipe. If you make these ube cookies, I’d love to see them. You can tag me at #bitesbybianca / @bitesbybianca on Instagram. Enjoy! 🙂
Check out my other ube recipes: Thin & Chewy White Chocolate Coconut Ube Cookies, Levain-Style White Chocolate Coconut Ube Cookies (Small Batch Recipe), Small Batch Baked Ube Coconut Mochi Donuts (Gluten-Free)
Soft, Less Sweet Ube Sugar Cookie Bears (Dairy-Free!)
✉️ want to save this?
Ingredients
Dry ingredients:
- 1 ⅓ cup all-purpose flour (160g, $0.39)
- 1 tsp cornstarch ($0.01)
- ¼ tsp baking soda ($0.01)
- ¼ tsp salt ($0.01)
Wet ingredients:
- ½ cup dairy-free unsalted butter, softened (1 stick butter/8 tbsp, $1.25)
- ½ cup granulated sugar (100g, $0.19)
- 1 egg ($0.17)
- 2 tsp ube extract ($0.29)
For rolling:
- ¼ cup granulated sugar (50g, $0.10)
Decoration for face:
- melted vegan white and milk/dark chocolate, or vegan royal icing, see recipe notes below
Instructions
- Preheat oven to 350°F/177°C and line two baking trays with parchment paper or silicone mats.
- In a medium bowl, whisk together all of the dry ingredients: all-purpose flour, cornstarch, baking soda, and salt.
- Using a hand mixer or stand mixer with the paddle attachment, cream the butter and sugar on medium speed until smooth, about 2 minutes.
- Add egg and ube extract to the bowl. Mix, scraping bowl as needed, until mixture is combined and smooth.
- Add all of the dry ingredients to the stand mixer and mix until dough is combined.
- Use small cookie dough scoop to form dough into balls (about 1 ½ tablespoon each). Roll dough into granulated sugar, shape into ball, then place onto lined baking tray. This will be the bear's head.Take ¼ tsp of dough, roll into granulated sugar, shape into ball, and place on the upper left or right side of the head to make one of the ears. Repeat for the other ear. Place bears about 4 inches apart. They will spread while baking!
- Bake for 8-10 minutes or until tops are set. They will not brown in the oven because of how purple they are.
- Let cool on pan for about 5 minutes, then transfer to wire rack. Let cool completely.
- To add the faces, use colored vegan royal icing (recipe in notes below) or melted vegan white and milk/dark chocolate. Place into small piping bags and cut a small tip. First, use the white to add the noses and ears, then the darker color for the eyes and nose.
- Enjoy!
Notes
- I used this recipe for the vegan royal icing and I skipped the optional vegetable glycerin. It actually makes a lot of royal icing, so I already had a bunch of it stored in my freezer! It only takes about 10 minutes for it to thaw.
- Store cookies in an airtight container at room temperature for up to a week.

This was a great recipe! The cookies I baked had a crinkle-like texture, probably because I substituted unsalted butter with 6 tablespoons of coconut oil and 1.5 tablespoons of salted butter. I baked it at around 12 minutes, too. As for the sugar, I used brown sugar.
More healthy and less sugary recipes please! I like using oat flour and Greek yogurt.
Hi DG! So glad to hear, thank you so much. I’m glad you enjoyed the cookies. I’ll definitely work on some lower sugar recipes (: I’ve been wanting to make some yogurt/cottage cheese & other grain desserts!
As of recently I’ve been obsessed with Ube! And the fact that this recipe is so incredibly simple and fun to make is amazing!! I did replace all purpose flour with whole wheat flour and the cookie tasted just as amazing as I would hope 🙂 I’ll be making more super super soon!
Hi Nicole! Thanks so much for the review, I’m super glad you had fun making them. Really great to know about whole wheat flour, yum! I’ll have to try that out myself too! 🙂