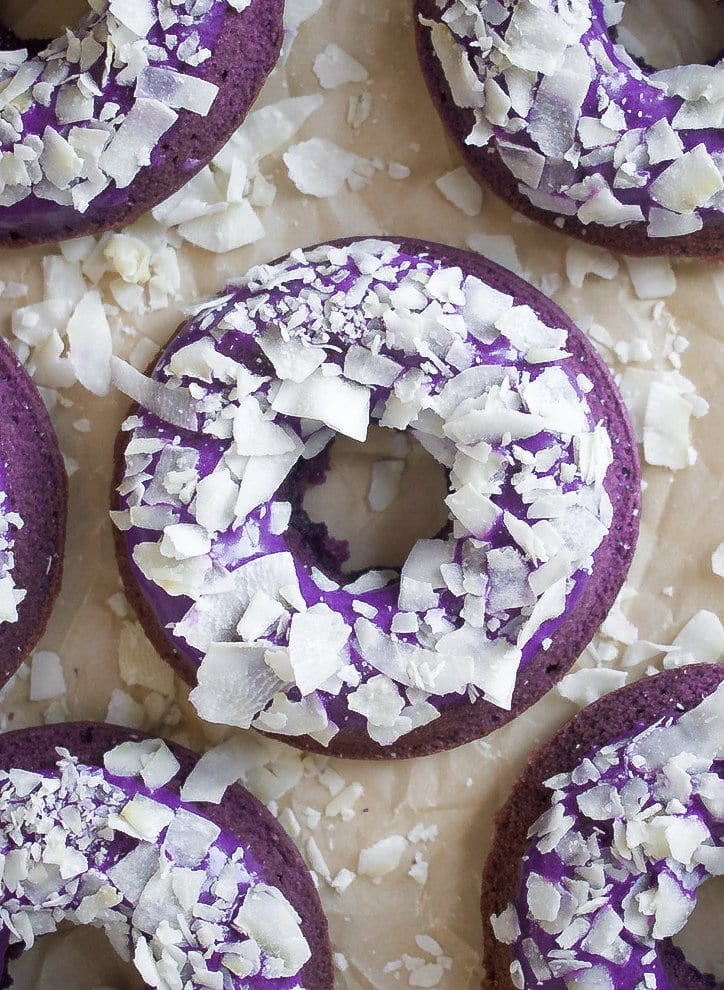
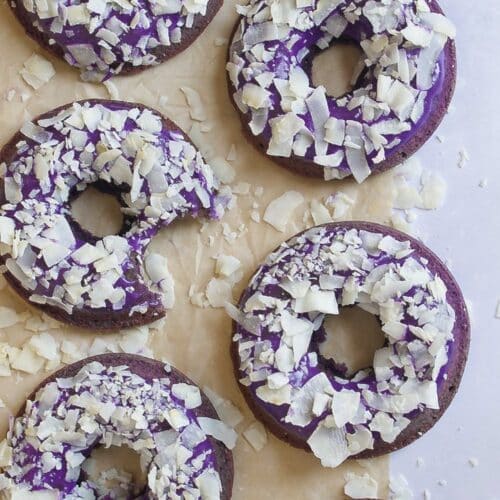
If you love mochi and/or donuts, you’ll love these ube mochi donuts! They are soft, chewy, and are made with one of my favorite combinations in Filipino desserts: ube and coconut. In addition, they’re gluten-free because they’re made with 100% mochiko sweet rice flour, not regular flour!

✉️ want to save this?
Ube Mochi Donuts
When you combine ube + mochiko to make this recipe, you get donuts with a crispy outside and a soft, chewy inside. Since this is a small-batch recipe, it yields about 6 donuts. I had a little leftover batter, so I ended up pouring the rest into a silicone cupcake mold and had a mini cupcake! And if you wanted, you can double this recipe to make a dozen donuts.
What is Ube?
If you’re not familiar with ube (pronunciation: oo-beh), it is a purple yam that is native to the Philippines. Ube is sometimes confused with another vegetable called taro, which has an earthier flavor and is used in both savory + sweet dishes. On the other hand, ube is sweeter and often described as having vanilla and nutty notes. It’s commonly used in desserts, such as ice cream, cake, or jam. It may be difficult to find fresh ube in grocery stores in the USA, but some Asian markets (especially Filipino ones) may have ube extract or ube halaya (ube jam). You can also buy ube extract and ube halaya online!
What is Mochi?
Mochiko is a popular ingredient used in Japan. It is referred to as sweet rice flour or glutinous rice flour, but is naturally gluten-free despite its name. It is widely used to make rice cakes known as mochi, but mochiko can be added to brownies, cookies, waffles, and more! Adding mochiko to a recipe will make the food chewier and slightly denser. You can find mochiko in the baking aisle at some Asian markets or order it online.

To store these ube mochi donuts, place them in an airtight container at room temperature for up to 3 days. However, they’re better eaten the day that they’re made. This is because as time passes, the donuts become softer and a tad soggier.
If you want them to last for more than one day, I recommend storing them completely unglazed. You can rebake them at 350°F/177°C for 5-10 minutes to firm them back up, let them cool, add the glaze, top with shredded coconut, and serve!
If you make these baked ube donuts, I’d love to see! You can tag me at #bitesbybianca / @bitesbybianca on Instagram. Enjoy! 🙂
Small Batch Ube Coconut Mochi Donuts
✉️ want to save this?
Ingredients
For the donuts:
- 1 c mochiko sweet rice flour, see notes (160g, $1.23)
- ½ c brown sugar, packed (100g, $0.55)
- 1 tsp baking powder ($0.07)
- ¼ tsp salt ($0.01)
- ½ can coconut milk, see notes (118 mL, $1.00)
- 1 egg ($0.17)
- 2 tbsp butter, melted and cooled (28g, $0.31)
- 2 tbsp ube halaya, optional ($0.50)
- 1 ½ tsp ube extract ($1.94)
For the ube glaze:
- ½ c powdered sugar (65g, $0.29)
- 1 ½ tbsp tbsp ube halaya, optional ($0.37)
- 1 tsp ube extract ($1.29)
- 1 – 2 tbsp coconut milk, see notes ($0.07-$0.15)
- ½ cup shredded coconut (35g, $0.46)
Instructions
For the donuts:
- Preheat the oven to 350°F/177°C.
- Dry ingredientsIn a medium bowl, whisk together the mochiko flour, baking powder, and salt.
- Wet ingredientsIn another medium bowl, whisk together the brown sugar and egg until completely smooth, Then add the butter, ube extract, and ube halaya, mixing until combined. While whisking, stream in the coconut milk until the batter is smooth.
- Combine wet and dry ingredients. Mix until combined.
- Transfer the batter to a container with a spout so it's easier to pour the batter into the mold. I like to use a 4 cup measuring cup. Alternatively, you can spoon the batter.
- Grease your donut pan using cooking spray or butter. Pour or spoon the batter into each cavity, filling it all the way to the top. Note: Depending on the size of your donut pan, you may have a small amount of leftover batter. I poured the rest into a cupcake tin and made one mini cupcake!
- Bake for 30-35 minutes. Cool donuts in the pan for about 5 minutes, then transfer them onto a wire rack and let them cool completely before adding the glaze.
For the ube glaze:
- In a small bowl or plate, add all of the shredded coconut.
- In a medium bowl, whisk together the powdered sugar, ube extract, ube halaya (optional), and 1 tbsp coconut milk. If the glaze is too thick, add ½ tbsp of coconut milk at a time.
- Dip the top of a donut into the bowl with the ube glaze, then dip the donut into the shredded coconut. Repeat with the remaining donuts.
- Serve donuts at room temperature.


What’s alternative if you don’t have donut pan please ie is it a runny battery
Hi Eva,
It is a bit runny! You can put it into a brownie pan and cut squares out. You can bake them at the same temperature, but it might taken 45-60 minutes. Keep testing with a cake tester or knife and bake until the tester/knife comes out clean!
You can also bake them in muffin or cupcake tins. Bake for 20-30 minutes. 🙂