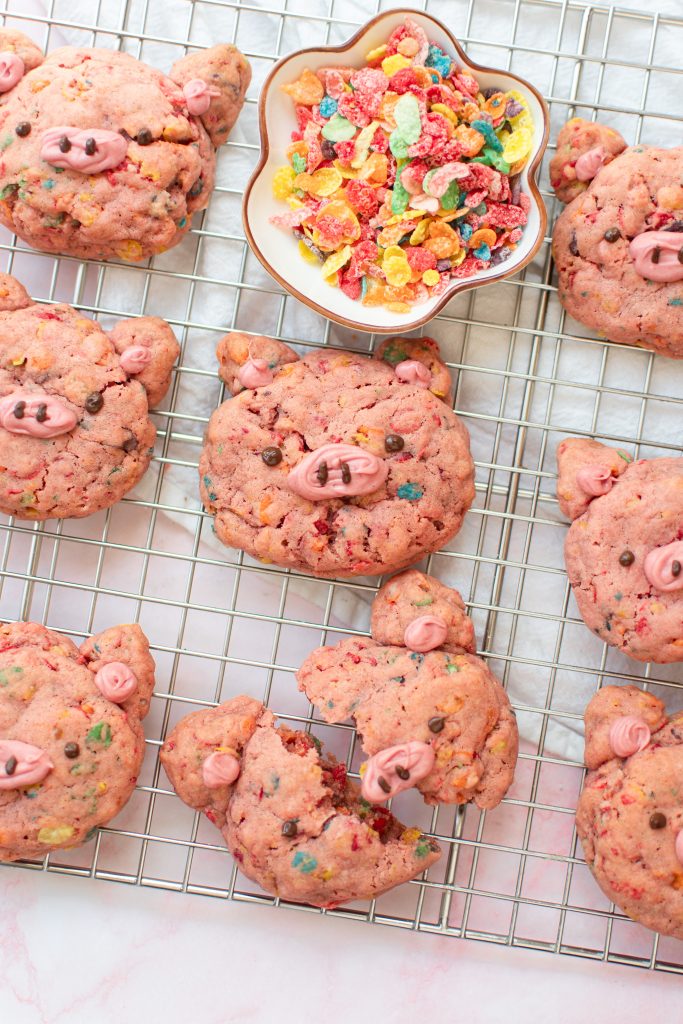
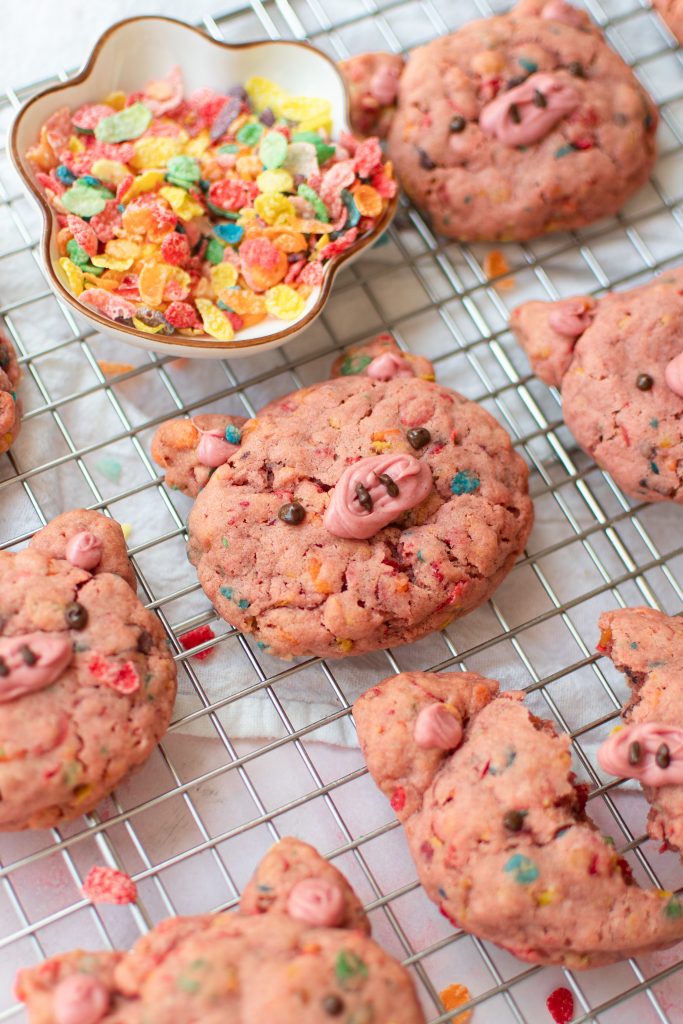
Cute piggie Fruity Pebbles cookies decorated with melted chocolate! They can be made in one bowl with a hand whisk and rubber spatula, making these pig cookies an easy project for beginner bakers and kids!
**Disclaimer: this post may contain affiliate links.
✉️ want to save this?
About these Fruity Pebbles cookies
I’ve made a LOT of bear-shaped cookies on my blog, but only have one piggie cookie recipe so far—pig snickerdoodles. So I thought I’d bring back pig cookies with this new flavor: Fruity Pebbles!
To enhance the fruity flavor of these cookies, I added in freeze dried strawberry powder. But since freeze dried strawberry powder is low key expensive, you can sub it with the same volume amount of strawberry jam or omit it completely!
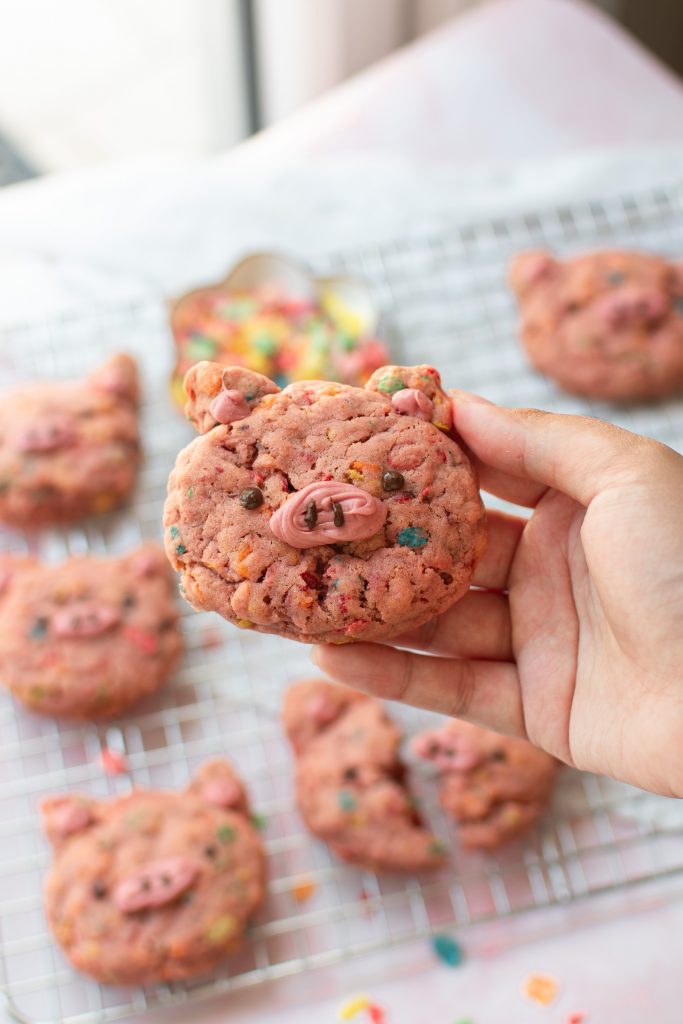
This recipe is very beginner-friendly. Making the cookie dough is simple: you can use one bowl, a hand whisk, and a rubber spatula. Shaping the pigs is pretty easy too—each piggie is just a ball of cookie dough with two little ears on top! Post-bake, they’re decorated with melted chocolates, so you don’t have to worry about making royal icing.
And what you get are adorable, soft, and a bit chewy piggie cookies. Perfect for picnics & parties, gifts for friends, or even for yourself!
FAQ
Can you make these vegan?
Yes, you can!
Instead of regular butter, you can swap in high quality vegan butter made for baking. Make sure to use a good brand—some brands are very high in water content and melt at lower temperatures, yielding very flat cookies. I recommend brands like Miyokos and Country Crock.
You can also omit the egg. First, follow the recipe up until you add the flour, baking powder/soda, and salt. Slowly mix the dry ingredients in. If the dough seems too crumbly, add a tablespoon of alternative milk at a time (2-4 tbsp total), until the dough comes together. The finished dough should be thick, but scoopable.
Lastly, you can replace the chocolate for a vegan brand, like Pascha chocolate. OR, you can try out my easy icing recipe, which is found in my teddy bear cookie recipe.
Can you make these gluten-free?
Absolutely! I recommend using 1:1 gluten-free flour.
Tips for baking and decorating
Properly measure the flour
I always like to measure my ingredients with a kitchen scale for consistent, accurate results. But if you’re measuring with cups, make sure you follow this tip: gently spoon in the flour into the cup until it’s full, then scrape the excess off using the back of a knife or offset spatula.
If you scoop the cup directly into the flour bag or container, the flour may get compacted, and you will be adding in more flour than necessary. On the other hand, if your flour is clumpy, you could be adding in chunks of flour into the cup with gaps in between them, possibly adding less flour than required. These instances can cause tougher or even really flat cookies, since the proper ratio of dry:wet ingredients isn’t met.
So, for best results, use a scale. If you don’t have one, gently spoon and level the flour into your measuring cup!
Shaping the dough
For each pig cookie, you’ll want to use a small cookie scoop, or gather about 1 ½ tbsp of dough. Shape it into a rounded football and place it onto your lined baking tray. Repeat for about 15 more cookies, making sure you have some left over for the ears.
For the ears, take about 1/2 tsp of dough, and split it into two equally sized pieces. Roll into balls and place on the sides of pigs’ heads. Pinch the ends so the ears are pointed.
Decorating with melted chocolate
You can use a piping bag, cookie scribe, or toothpick to add on the details.
First, use the pink white chocolate for the snouts and ears. Then, use dark or milk chocolate to add the eyes.
When dying white chocolate, you’ll want to use oil-based food coloring or the chocolate will seize up and become lumpy. However, if you don’t have oil-based food coloring, you can try mixing in a tsp of neutral oil (canola, vegetable) at a time! The chocolate should come back together. Maaagic.
Storing the cookies
Store these fruity pebbles cookies in an airtight container at room temperature for up to a week!
I really hope you enjoy this recipe. If you make these cute pig cookies, I’d love to see them. You can tag me at #bitesbybianca / @bitesbybianca on Instagram. Enjoy!

Pig Fruity Pebbles Cookies
✉️ want to save this?
Ingredients
Dry ingredients:
- 1 ½ cup all-purpose flour (180g)
- ½ tsp baking soda
- ½ tsp baking powder
- ½ tsp salt
Wet ingredients:
- ½ cup unsalted butter, melted and cooled (1 stick butter/8 tbsp)
- ¼ cup granulated sugar (50g)
- ¼ cup light or dark brown sugar, packed (50g)
- 1 tsp vanilla extract
- 1 egg
- 3 tbsp freeze dried strawberry powder or strawberry jam
- liquid, gel, or powdered food coloring (pink)
Mix-ins:
- 2 cup Fruity Pebbles (72g)
Decoration for face:
- 1 tbsp melted milk or dark chocolate
- 3 tbsp melted white chocolate
- oil-based food coloring, see steps (pink)
Instructions
For the cookie dough:
- In a medium bowl, whisk together all of the dry ingredients: all-purpose flour, baking powder baking soda, and salt.
- In a stand mixer using the paddle attachment (can alternatively use hand mixer or whisk), mix the butter and sugars on medium speed until combined. Scrape bottom of bowl.
- Add vanilla, egg, and freeze dried strawberry powder and mix again. If you'd like a deeper pink color, add in pink food coloring.
- Dump in all of the dry ingredients and Fruity Pebbles. Stir until combined.
- Preheat oven to 325°F/163°C and line two baking trays with parchment paper or silicone mats.
- Use a small cookie dough scoop to gather dough (about 1 ½ tablespoon each). Shape into a rounded football and place onto lined baking tray. This will be the pig' head.For the ears, take about ½ tsp of dough, shape into ball, and equally split it into two. Place on the sides of pig's head and pinch the ends so the ears are pointed. Repeat for remaining dough and place pig cookies about 3-4 inches apart.
- Bake for 9-11 minutes. For soft cookies, bake them until the edges are set and firm. For chewier ones, bake slightly longer, until the edges are a light golden brown.
- Let cool on pan for about 5-10 minutes, then transfer cookies to wire rack. Let cool completely.
For the faces:
- You can a piping bag, toothpick, or cookie scribe to add on the details. I used a piping bag for the arrow and eyes/mouth, then a scribe for the blush.
- Add oil-based pink food coloring to the melted white chocolate. If you don't have oil-based food coloring, then the chocolate will seize/become lumpy. To counter this, stir in a tsp of neutral oil (canola, vegetable) at a time, until it becomes smooth again. Use the pink white chocolate for the snouts and ears.
- Use melted milk chocolate to create the eyes and nose.
- Enjoy!
Notes
- Store cookies in an airtight container at room temperature for up to a week.
- To make it vegan, swap in a high quality vegan butter and vegan chocolate (suggestions listed in this blog post). Omit the egg. Follow the recipe accordingly up until you add in the dries. If the dough seems crumbly, add in a tbsp of alternative milk (2-4 tbsp total) at a time until the dough comes together. It should be thick, but scoopable. In addition, you can use a vegan chocolate brand like Pascha Chocolate. OR, you can try out my easy icing recipe, which is found in my teddy bear cookie recipe.
- To make it gluten-free, sub in 1:1 gluten-free flour!