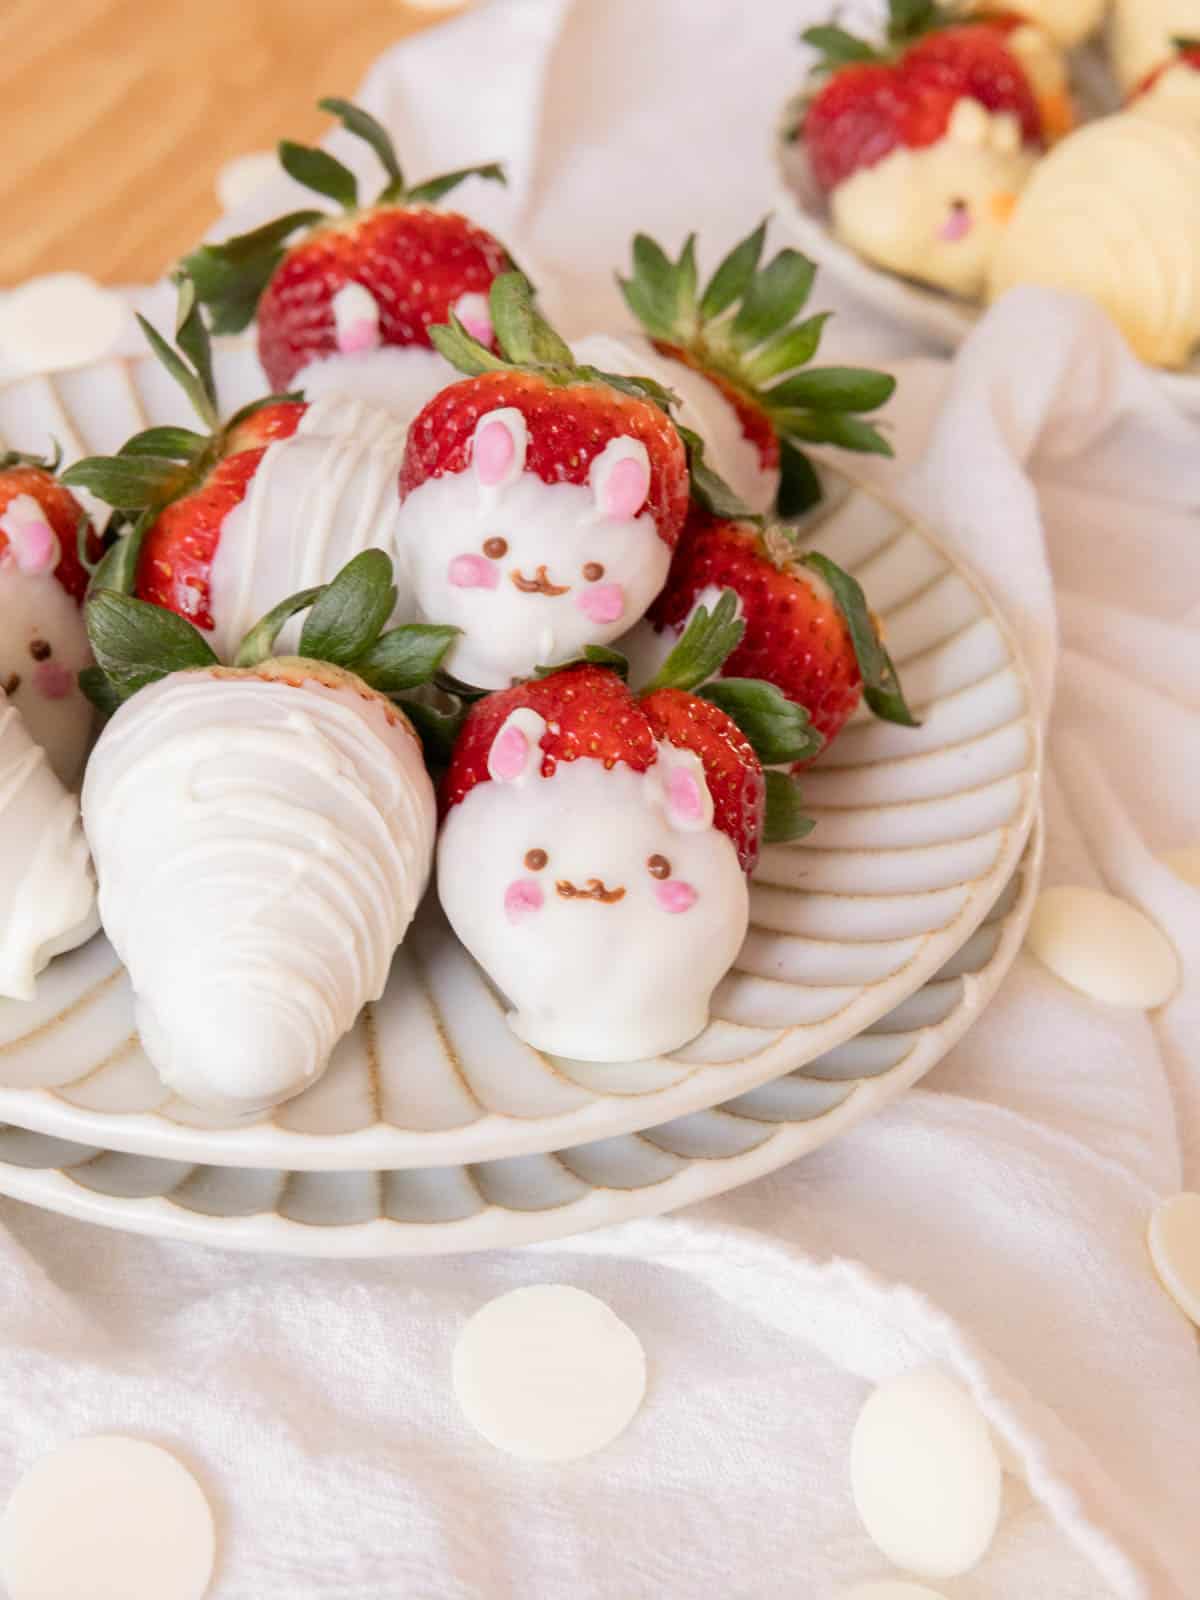
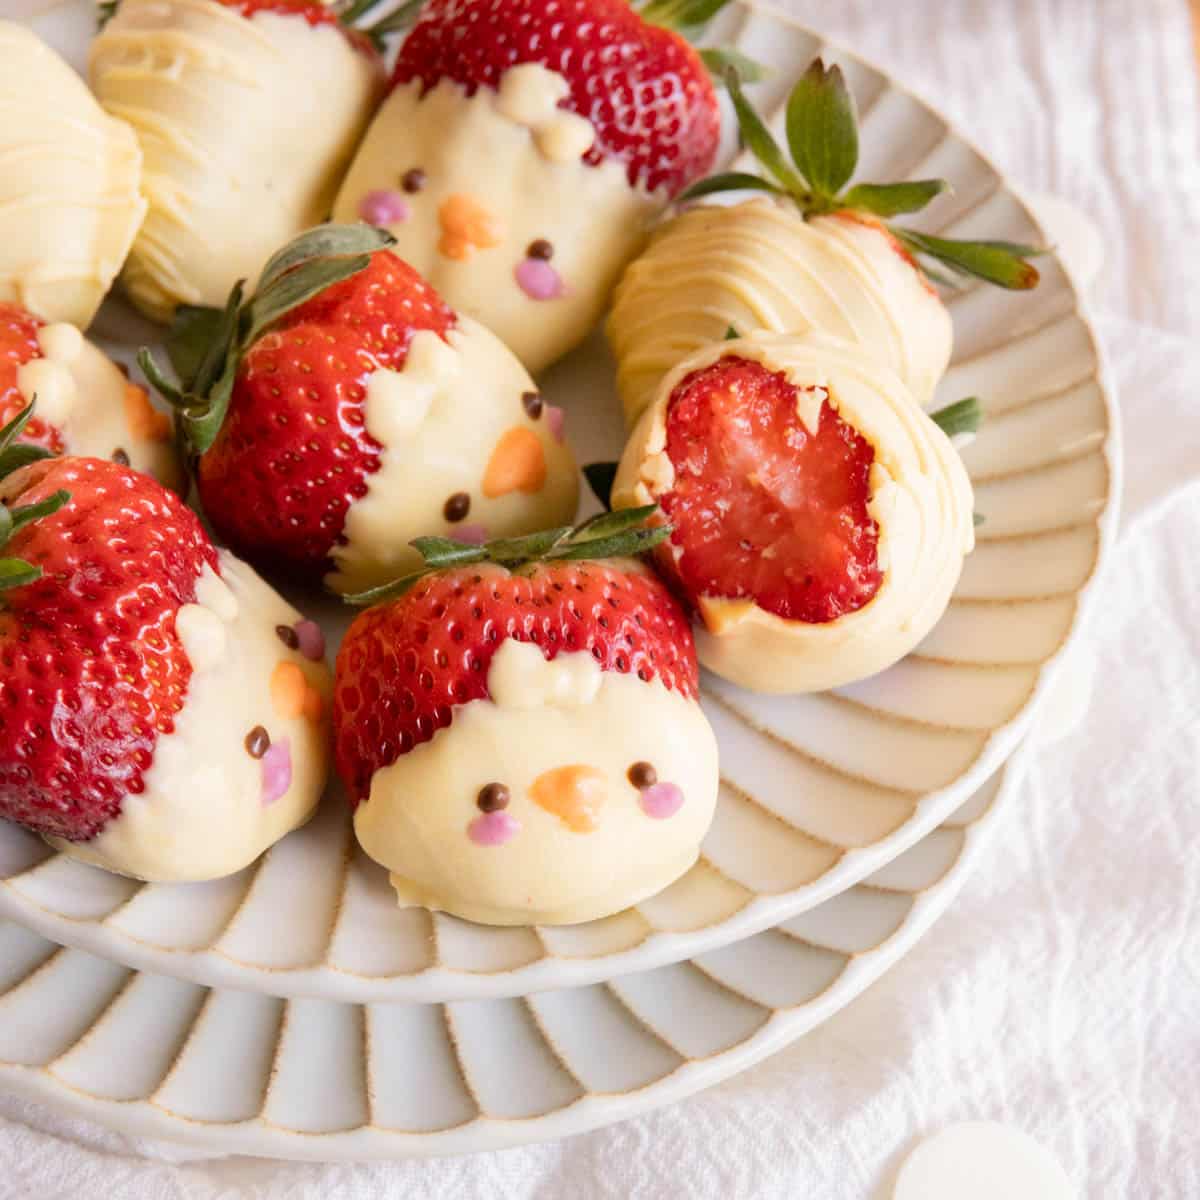
The cutest white chocolate-covered strawberries in under an hour, perfect for welcoming Spring and warmer weather.
Disclaimer: This post contains affiliate links! Clicking the links are no cost to you at all, but they help me earn commission as part of my income. All of my affiliate links are for products that I truly love using, and wouldn’t share otherwise. Any clicks are really appreciated! <3

✉️ want to save this?
Why you’ll love these white chocolate-covered strawberries <3
- Quick and simple to make: This recipe, along with any decorations, should take about 30 minutes to an hour. If you’re in a real time crunch, you can always decorate most of the strawberries with regular designs, then decorate a few of them into bunnies.
- Versatile: There are so many ingredients you can play around with! You can change textures, designs, and flavors, depending what you’re in the mood for. For example, you can drizzle on other chocolates or add sprinkles, nuts, shredded coconut, crushed candies, etc.
- Great for hosting: Chocolate-covered strawberries are always amazing to have at a party! And since it’s fast & easy to whip up, you can make dozens of them at once.
Equipment
- Toothpicks: I like to skewer the tops of the strawberries. This creates a handle so I can easily dip them in melted chocolate.
- Knife: I used a knife to drizzle on more melted white chocolate for that stripe effect!
- Microwave-safe bowls: These will be used to heat the chocolate wafers in the microwave. Use as many bowls for as many colors you have.
- Small silicone spatulas: For stirring the melted chocolate. You can always use spoons or knives!
- Wax or parchment paper: For lining the baking tray. This is where you will let the strawberries dry.
- Baking tray
Ingredients
- Ghiradelli melting wafers: In terms of ease, taste, and quality, I believe this is the best chocolate for chocolate covered strawberries, especially for beginners. For this recipe, I used both white and dark chocolate.
- Food coloring: You can use pink or red food coloring to dye the white chocolate for the inner ears and blush. Oil-based food coloring is best so the chocolate doesn’t seize. But if you don’t have it, you can add a bit of neutral oil (canola, vegetable) to smooth out seized chocolate.
- Toppings: Feel free to add on finely chopped nuts, shredded coconut, sprinkles, etc.
How to make bunny white chocolate-covered strawberries
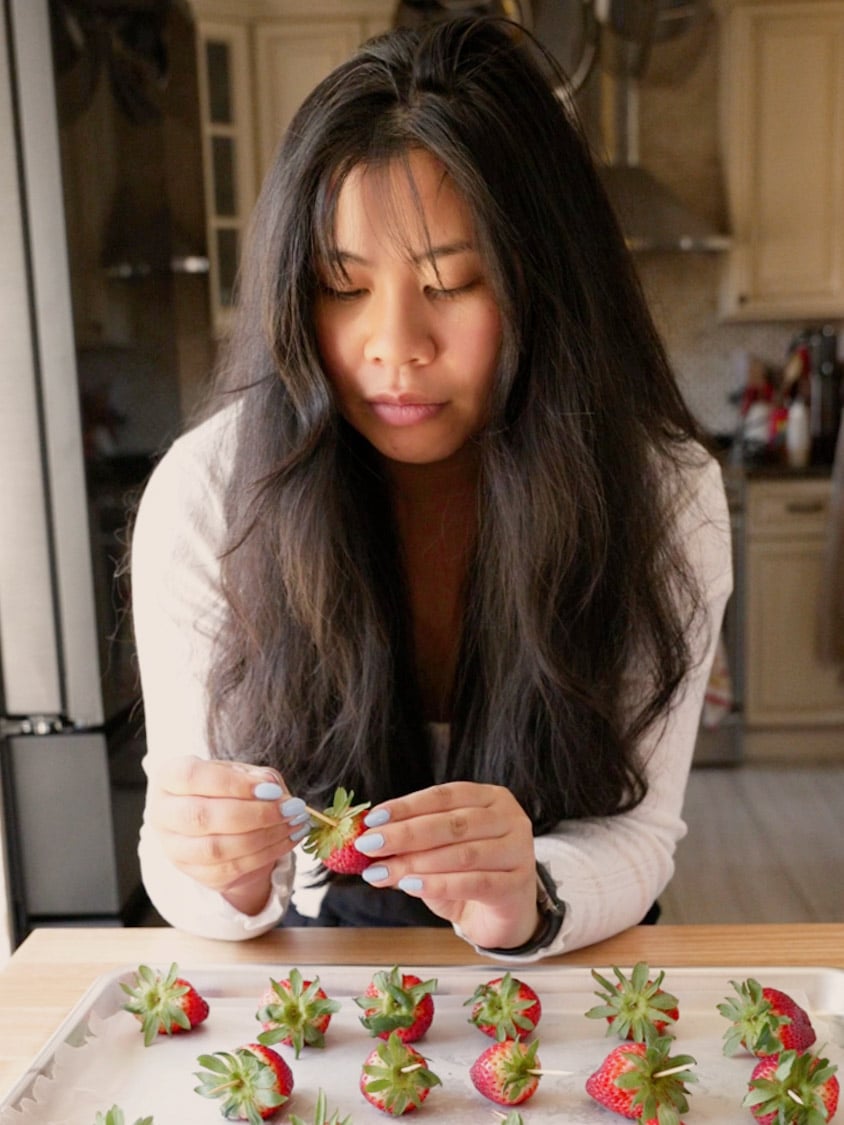
- Skewer strawberries. Insert a toothpick into the tops of each strawberry. This creates handles so the strawberries are easier to dip.
- Melt white chocolate wafers in microwave. In a microwave-safe bowl, add white chocolate flavored wafers. Heat in microwave at 30-second intervals, stirring in between, until fully melted.
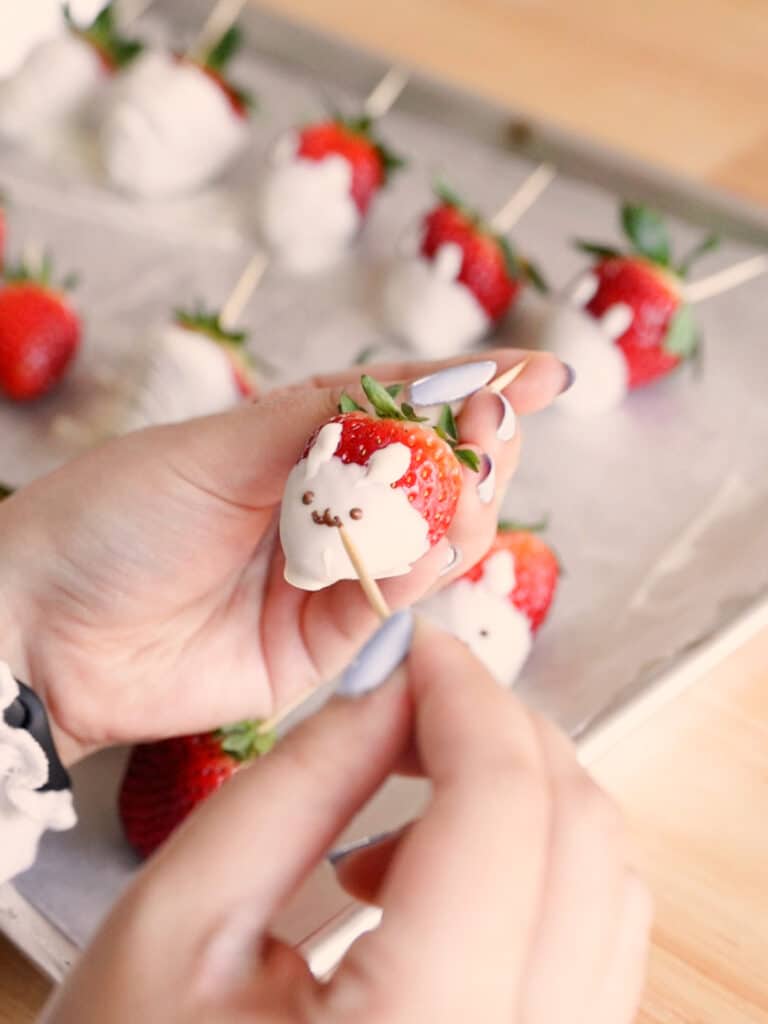
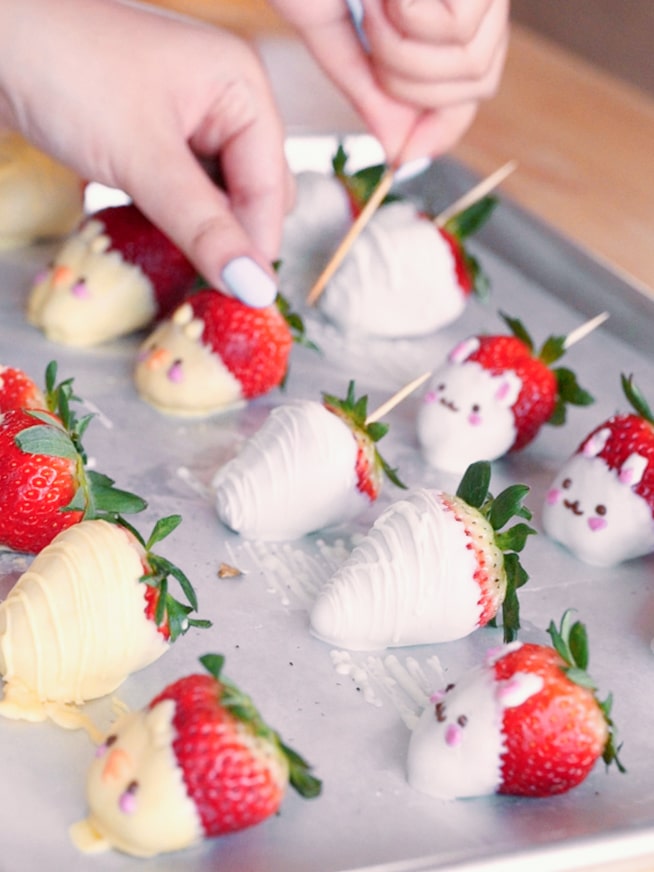
- Dip strawberries. Hold the toothpick handle and dip the strawberries into the melted chocolate. Either fully dip for regular white chocolated-covered strawberries, or halfway to later create the bunny design. Gently scrape excess chocolate on rim of bowl. Reheat chocolate in microwave at 15-second intervals as needed.

- Add toppings and decorations.
- For regular white chocolate-covered strawberries: While chocolate is still wet, add any sprinkles, finely chopped nuts, etc. Otherwise, let white chocolate fully dry. Then, drizzle on extra chocolate using your knife or offset spatula.
- For bunny white chocolate-covered strawberries: Use a toothpick to draw on bunny ears. Melt some milk/dark chocolate and use this to draw on the eyes + mouths. Lastly, dye any remaining white chocolate with pink/red food coloring and use this for the inner ears and blush.
- Enjoy!
Tips
- Completely dry strawberries before dipping: Wet strawberries will make it pretty hard for any chocolate to stick. Plus, adding water to the melted chocolate may cause it to seize!
- Use high quality chocolate or melting wafers: I like to use Ghiradelli melting wafers. They’re tasty, melt really easily, dry quickly, and are pretty much no fuss. If using chocolate chips, you’ll need to thin them out with coconut oil. Using melting wafers just make this recipe much easier.
Storage
How long do chocolate covered strawberries last? Unfortunately, not too long. They’re best eaten day of. 🙁
If strawberries are left out for hours at room temperature, they will start to sweat and become soggy. Keep this in mind when making them for a party or hosting. I do not recommend leaving them at room temperature for more than 6 hours.
For longer storage, arrange the cute bunny white chocolate strawberries in a single layer in a container. Top strawberries with paper towel, which will help absorb any moisture. Close airtight container and keep in the fridge for up to 3 days. When removing from the fridge, let the container come to room temperature (about 15-20 minutes) before opening. This step will help prevent the chocolate from sweating.
Do NOT freeze the strawberries because when thawed, they will become a mushy mess!
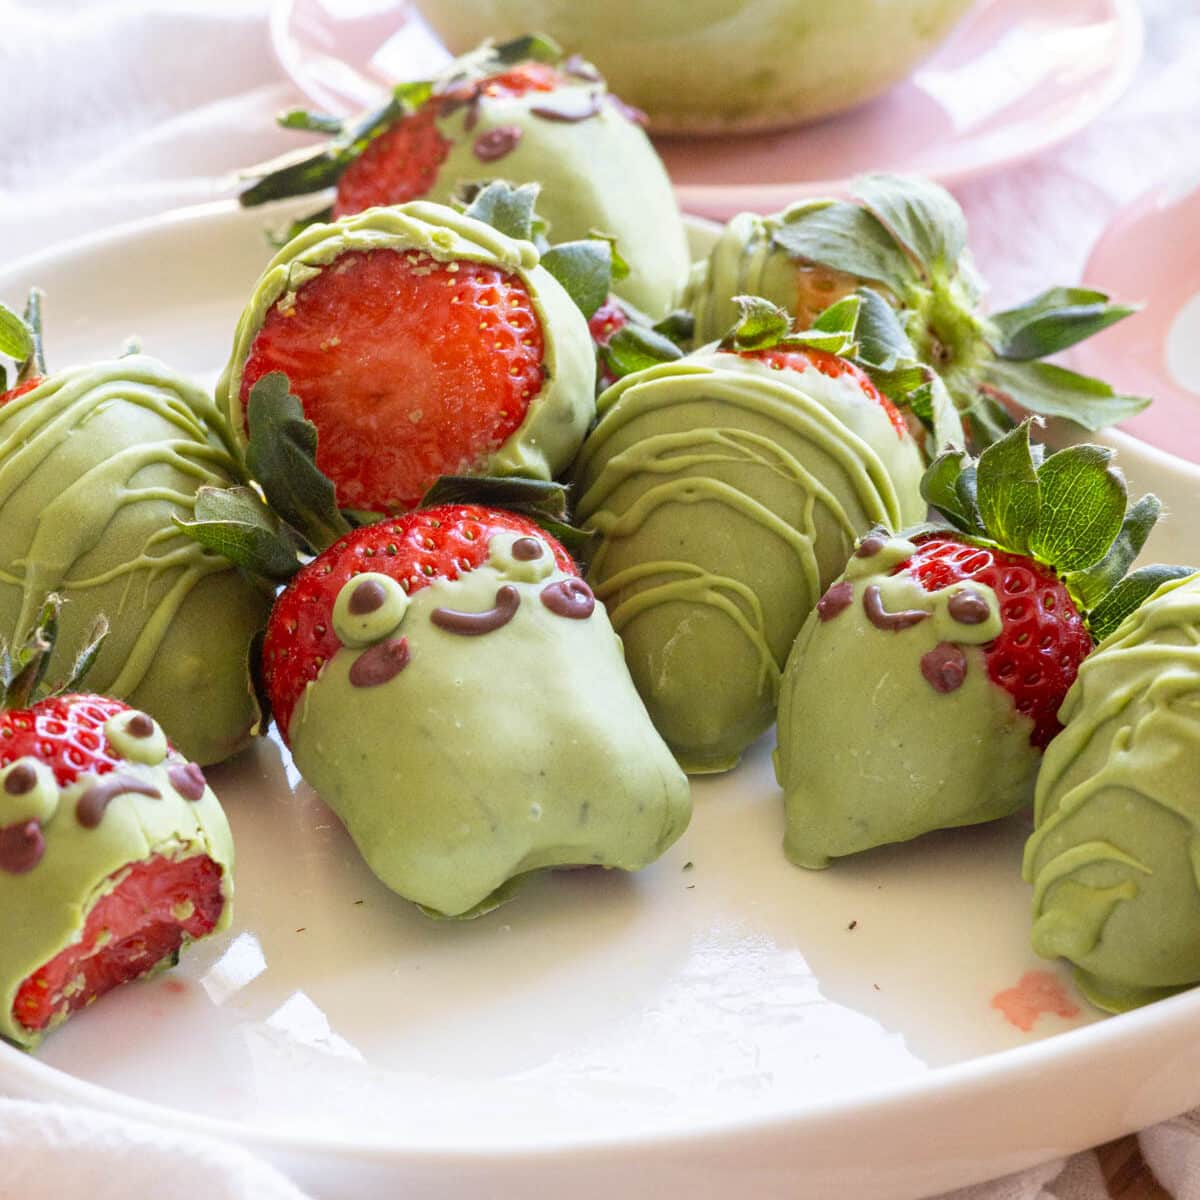
More chocolate-covered strawberry designs

I really hope you enjoy this recipe. If you make these Easter chocolate strawberries, I’d love to see them. You can tag me at #bitesbybianca / @bitesbybianca on Instagram. Enjoy! 🙂
Video Tutorial
📖 Recipe

Bunny White Chocolate Covered Strawberries
✉️ want to save this?
Equipment
- 1 offset spatula or knife, for drizzling chocolate
- 2 microwave-safe bowls,
- 2 small silicone spatulas, or spoons or knives to stir chocolate
- wax or parchment paper
Ingredients
For the white chocolate strawberries:
- 12 (12) strawberries, rinsed and completely dried
- 10 oz (283.5 g) Ghiradelli white chocolate melting wafers
- toppings, finely chopped nuts, shredded coconut, sprinkles, etc.
For bunny decorations:
- 2-3 pieces (2-3 pieces) Ghiradelli milk or dark chocolate melting wafers
- pink or red food coloring, oil-based is best, but see steps if you have regular food coloring
Instructions
- Line baking tray with wax or parchment paper.
- Insert toothpicks in the top of each strawberry and line up the strawberries on your tray. The toothpicks will be your handles for dipping.
- In a microwave-safe bowl, add 10 oz Ghiradelli white chocolate melting wafers. Heat in 30-second intervals, stirring in between, until fully melted.
- For regular white chocolate-covered strawberries: Fully dip strawberry in melted chocolate. Gently scrape excess chocolate off the bottom on the rim the bowl, then set on lined tray. While chocolate is still wet, add any sprinkles, finely chopped nuts, etc. Otherwise, let white chocolate fully dry. Then, drizzle on extra chocolate using an offset spatula or knife. Let the chocolate harden at room temperature, which should take about 5 minutes.Tip: reheat chocolate in 15-second intervals as needed.

- For bunny white chocolate-covered strawberries: Dip halfway into melted white chocolate. Gently scrape excess chocolate off the bottom on the rim of the bowl, then set on lined tray. Use a toothpick to draw on bunny ears. In another microwave-safe bowl, melt 2-3 pieces Ghiradelli milk or dark chocolate melting wafers and use this to draw on the eyes + mouths. Lastly, dye any remaining white chocolate with pink/red food coloring and use this for the inner ears and blush. Let the chocolate harden at room temperature, which should take about 5 minutes.Tip: reheat chocolate in 15-second intervals as needed.Note: If using oil-based food coloring, the chocolate will not seize. If using regular food coloring, the chocolate may seize and thicken. You can reverse this by stirring in ½-1 tsp of neutral oil (canola, vegetable) until it smooths out.
- Remove toothpick skewers and enjoy!


Notes
- See post for proper storage information.